Tobisho (飛庄, tobishō) is a maker of pruning shears, bud snips and trimming shears in Yamagata City, in northern Japan. On the morning of 20 October 2026 I visited its workshop and showroom on Hinoki-chō in Yamagata, listened to an explanation, and was shown the workshop while it was running. This article draws on that visit and on the materials the company itself publishes. It tries to explain why Tobisho pruning shears have the shape they have, and why they are made the way they are made.
The order is as follows. I state the conclusion first, then describe the visit and the history of the company. After that I follow the making of one shear in the order we walked through the workshop, and then take up the blade geometry (ura-suki and the hamaguri edge), the labour-intensive brazed Type A, and the Hiryu, a shear whose blades never cross. The second half covers how to choose a model, how to send shears back to the maker for resharpening and repair, and what to check before you buy. I wrote it so that people who use shears every day can apply it to their own working routine.
The short answer — Tobisho keeps labour-intensive methods and unusual shapes, and gives a reason for each
Tobisho pruning shears have three defining features. The first is forging, in which the steel is struck many times to tighten its structure. The second is ura-suki (裏スキ), a hollow ground into the back of the cutting blade, and an edge finished in the shape of a clam. The third is a system in which the maker itself takes shears back for resharpening and repair. All three put the effort into the places that touch the user’s hand and the cut face of the branch.
Models are chosen by use. The brazed Type A, with the blade and handle made as separate parts, is built so that the hard steel goes only in the blade. The Hiryu, whose blades do not cross, was born from the idea of reducing resistance as the shear cuts through. In both cases, knowing why the shear is built that way before you choose keeps you from choosing wrongly.
A morning on 20 October 2026 — shown the showroom and the workshop
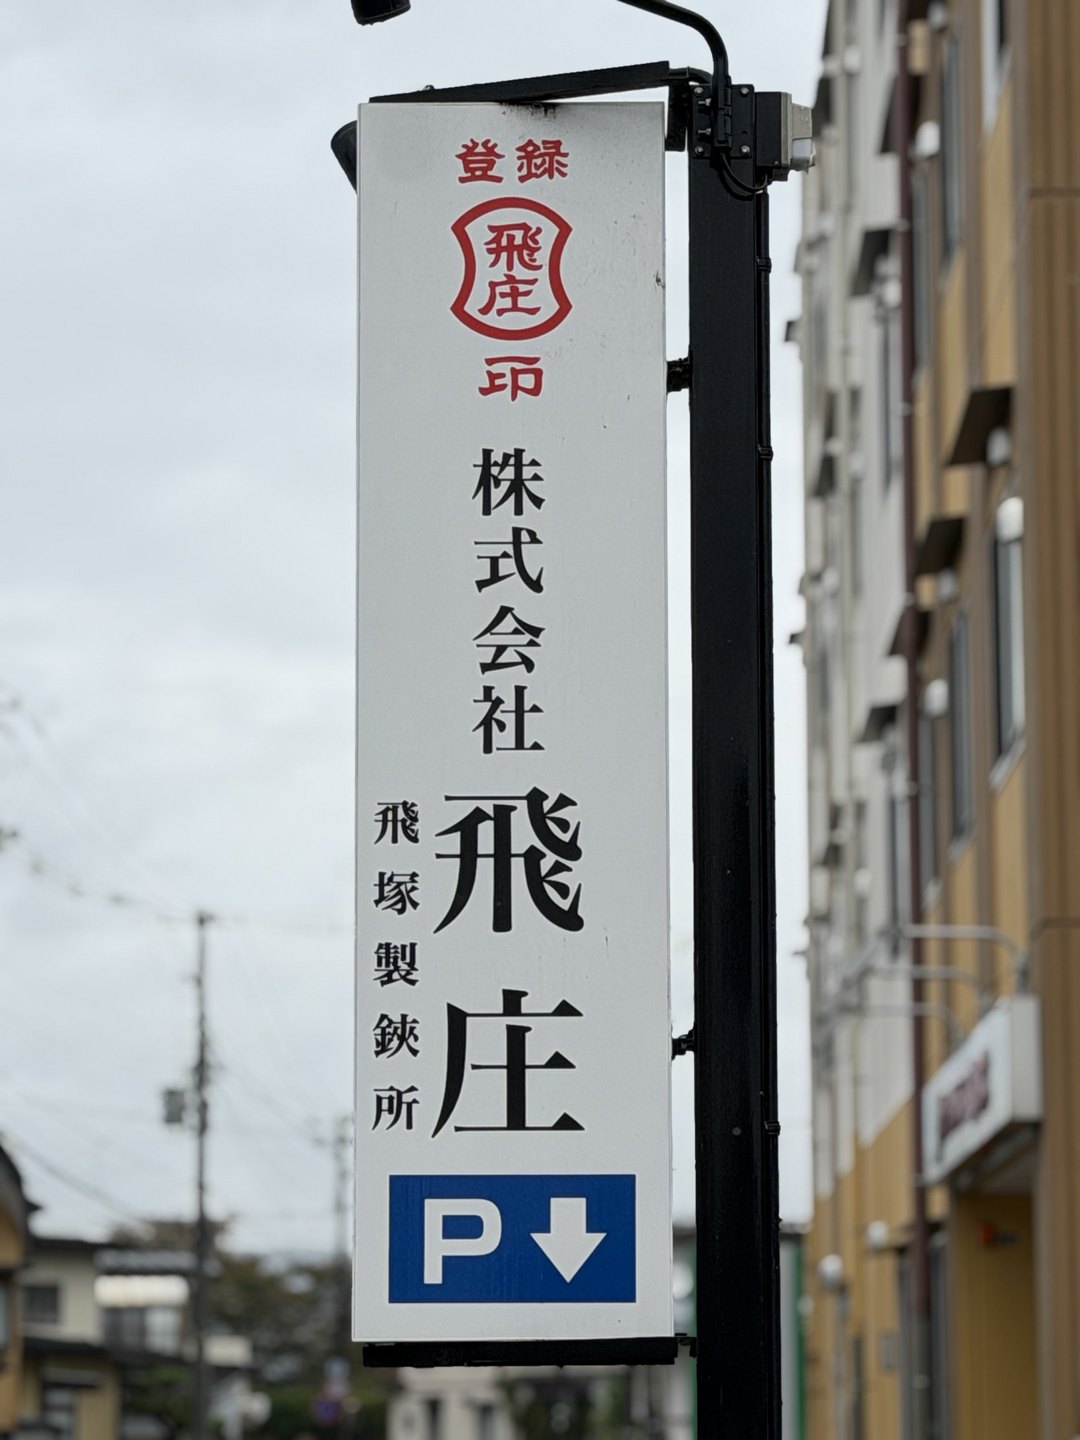
A sign reading “Tobisho Co., Ltd. / Tobizuka Scissors Works” stands beside the street on Hinoki-chō in Yamagata. On the wall of the building is a plate that turns the trade name Tobisho into a design. We arrived a little after 9:30 and were shown into the showroom first.
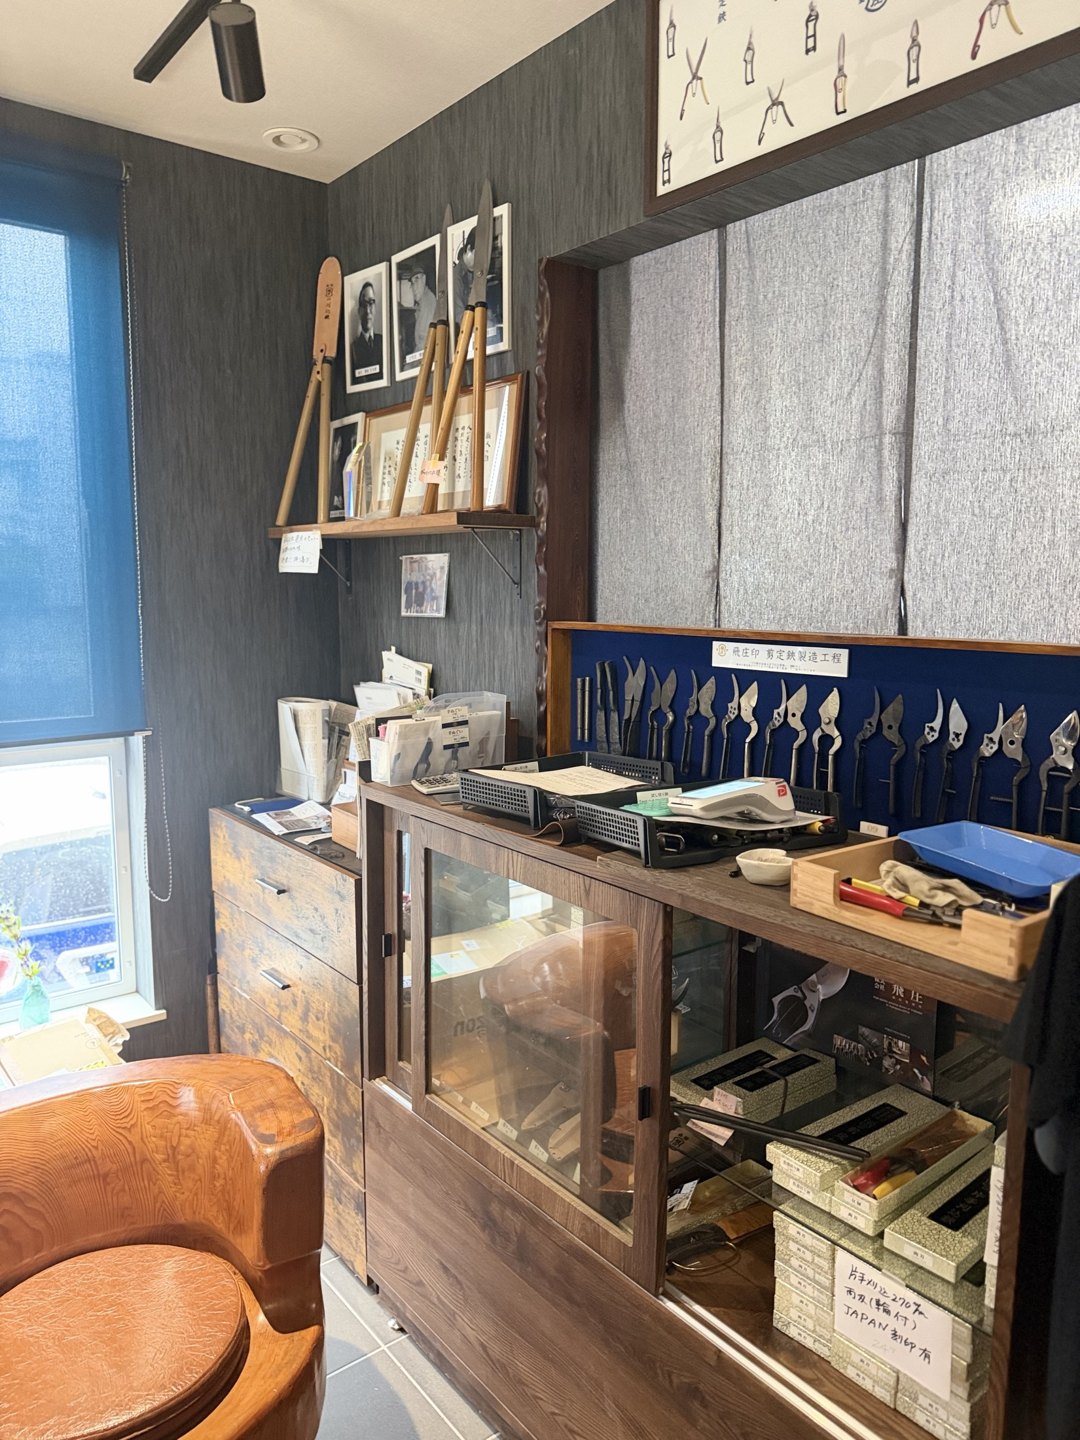
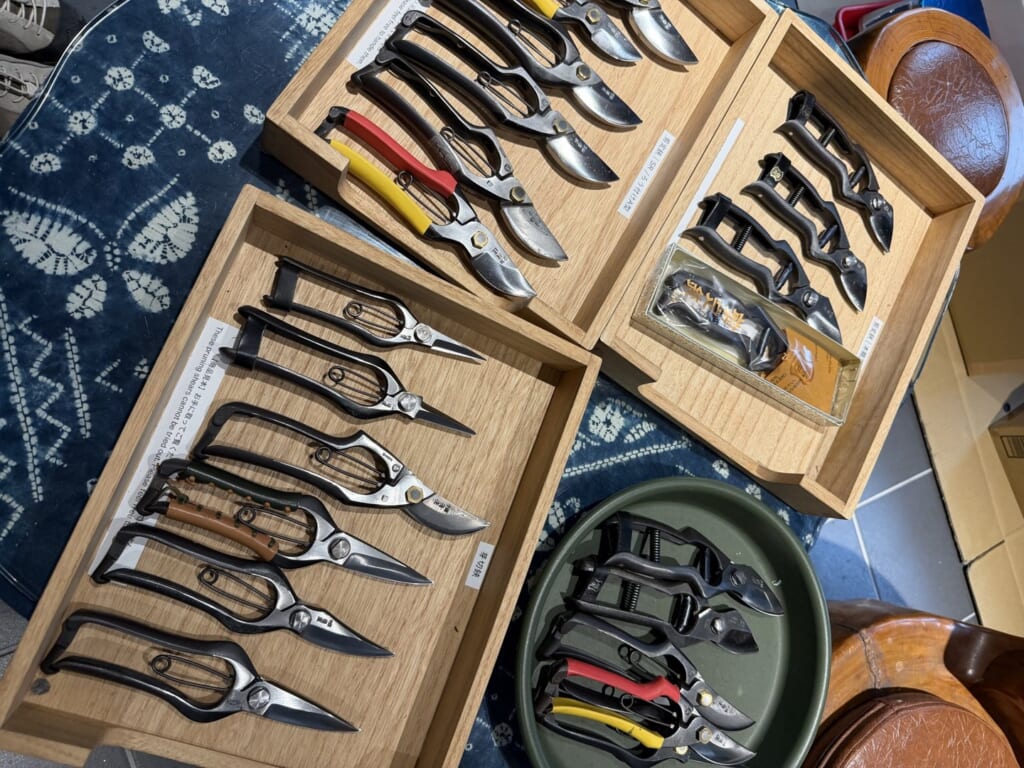
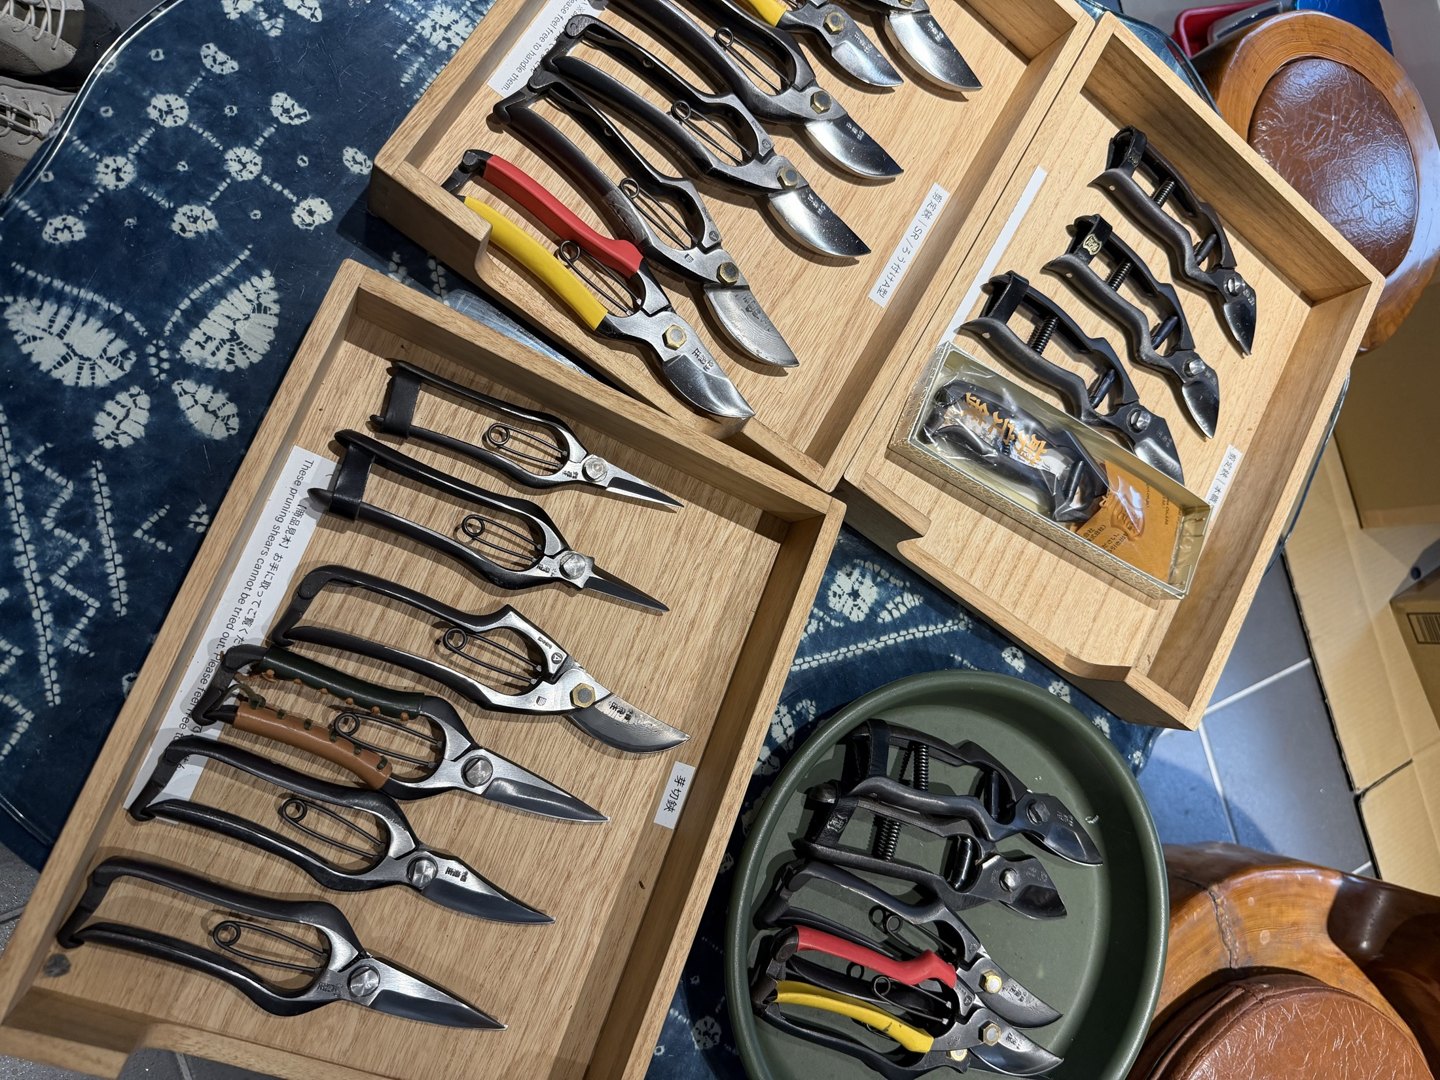
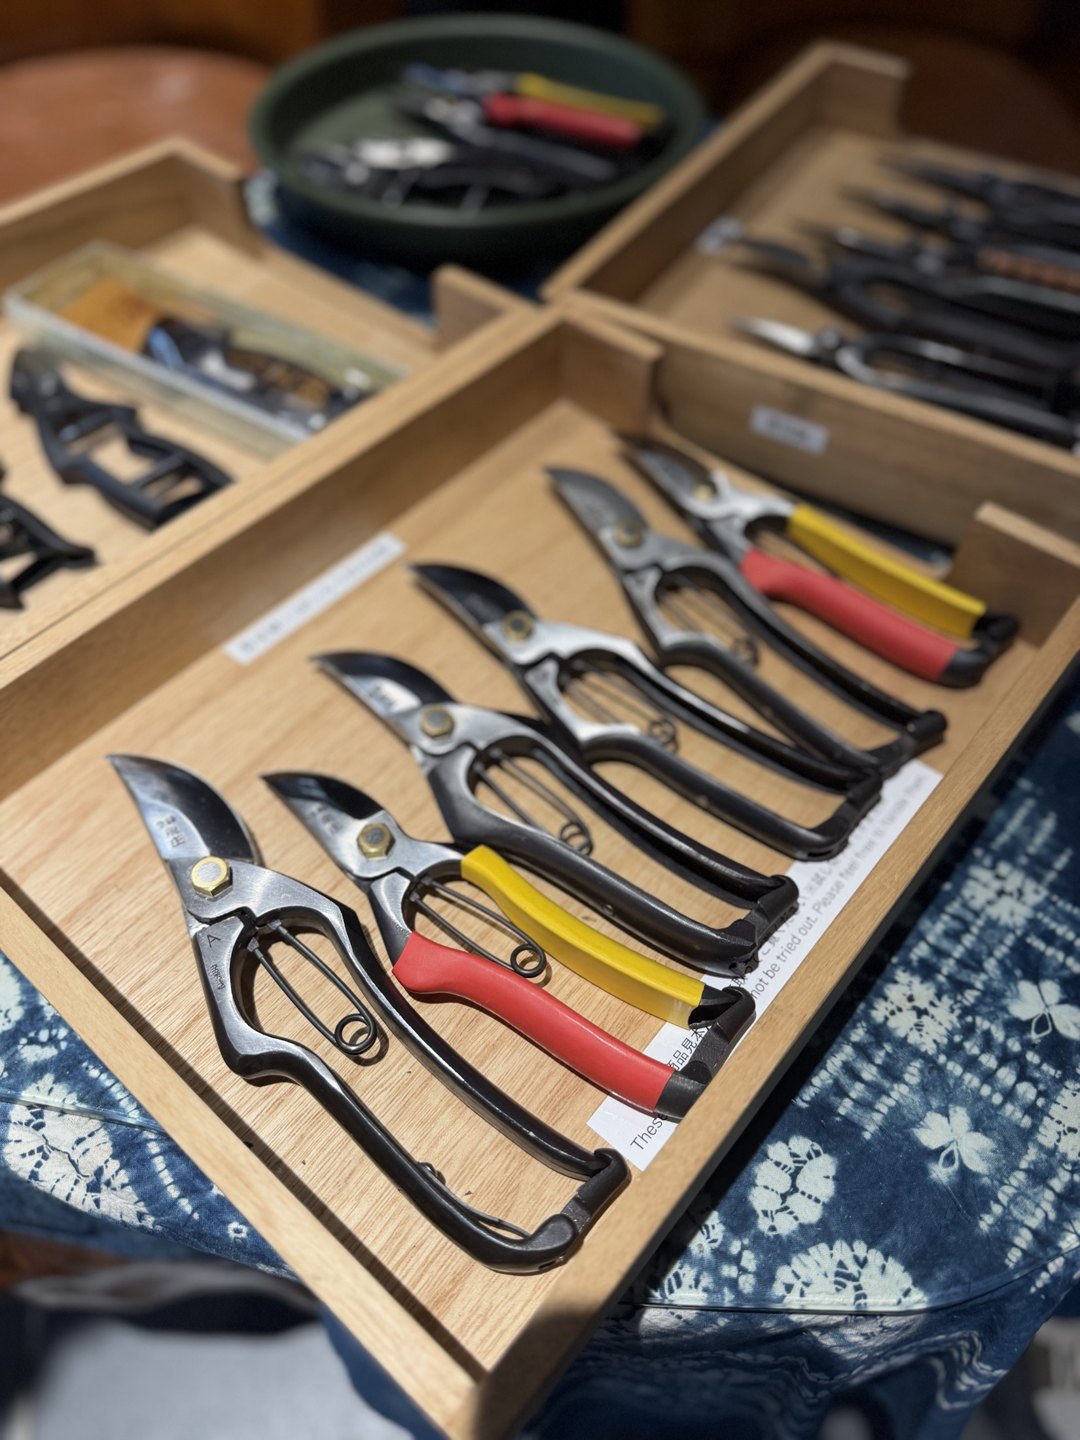
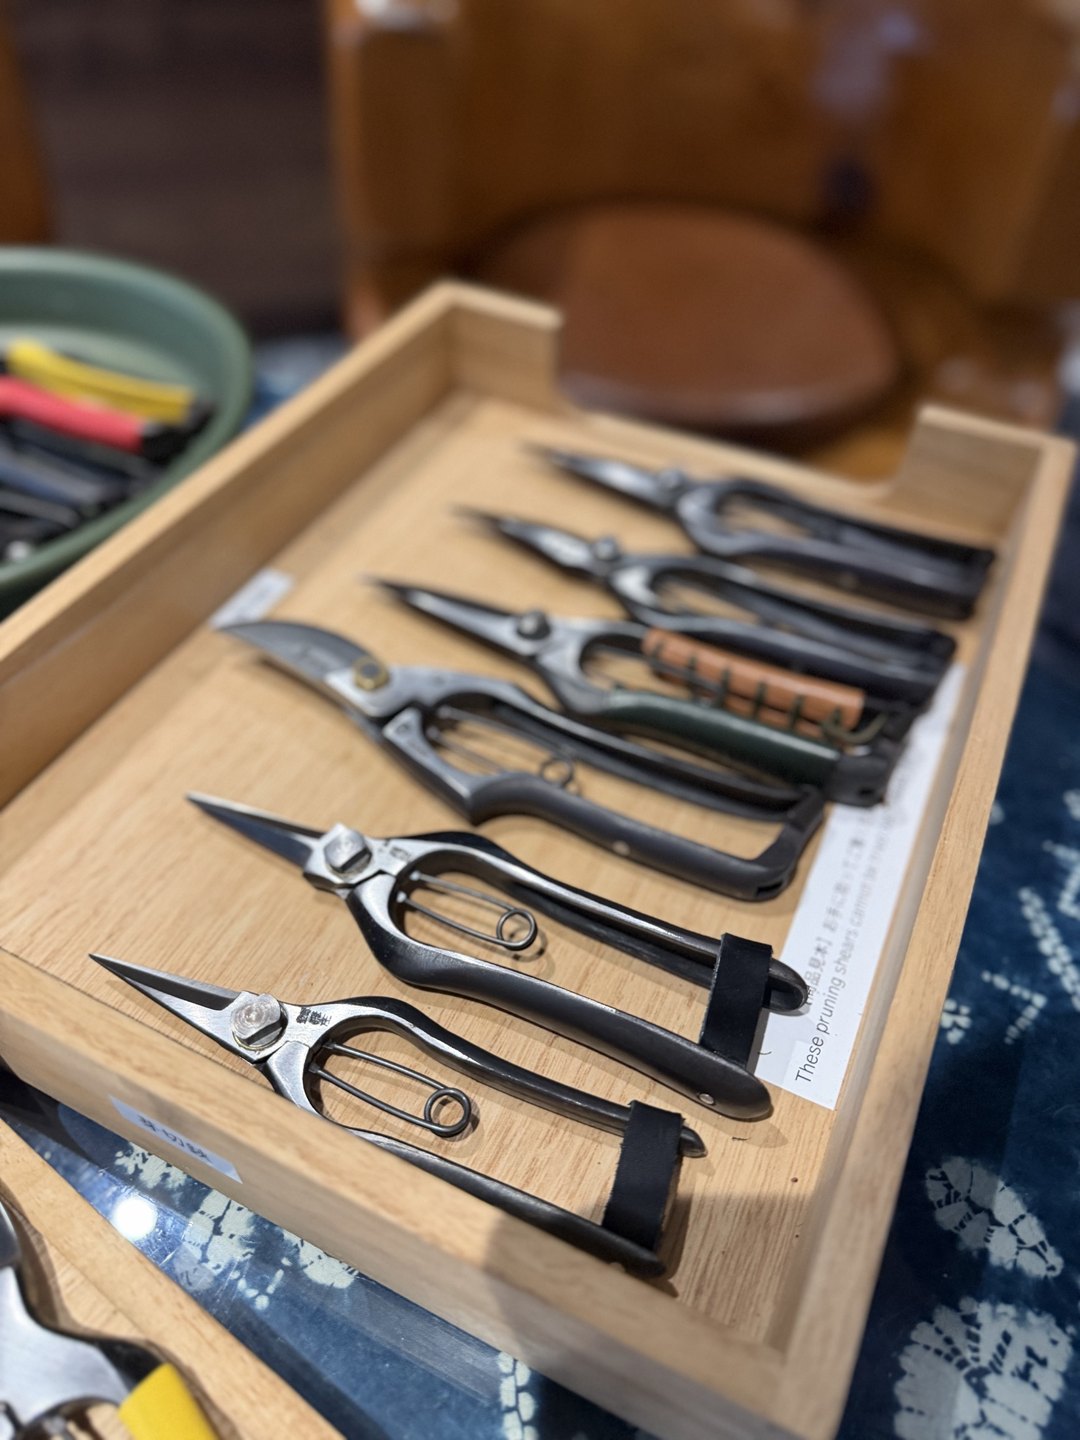
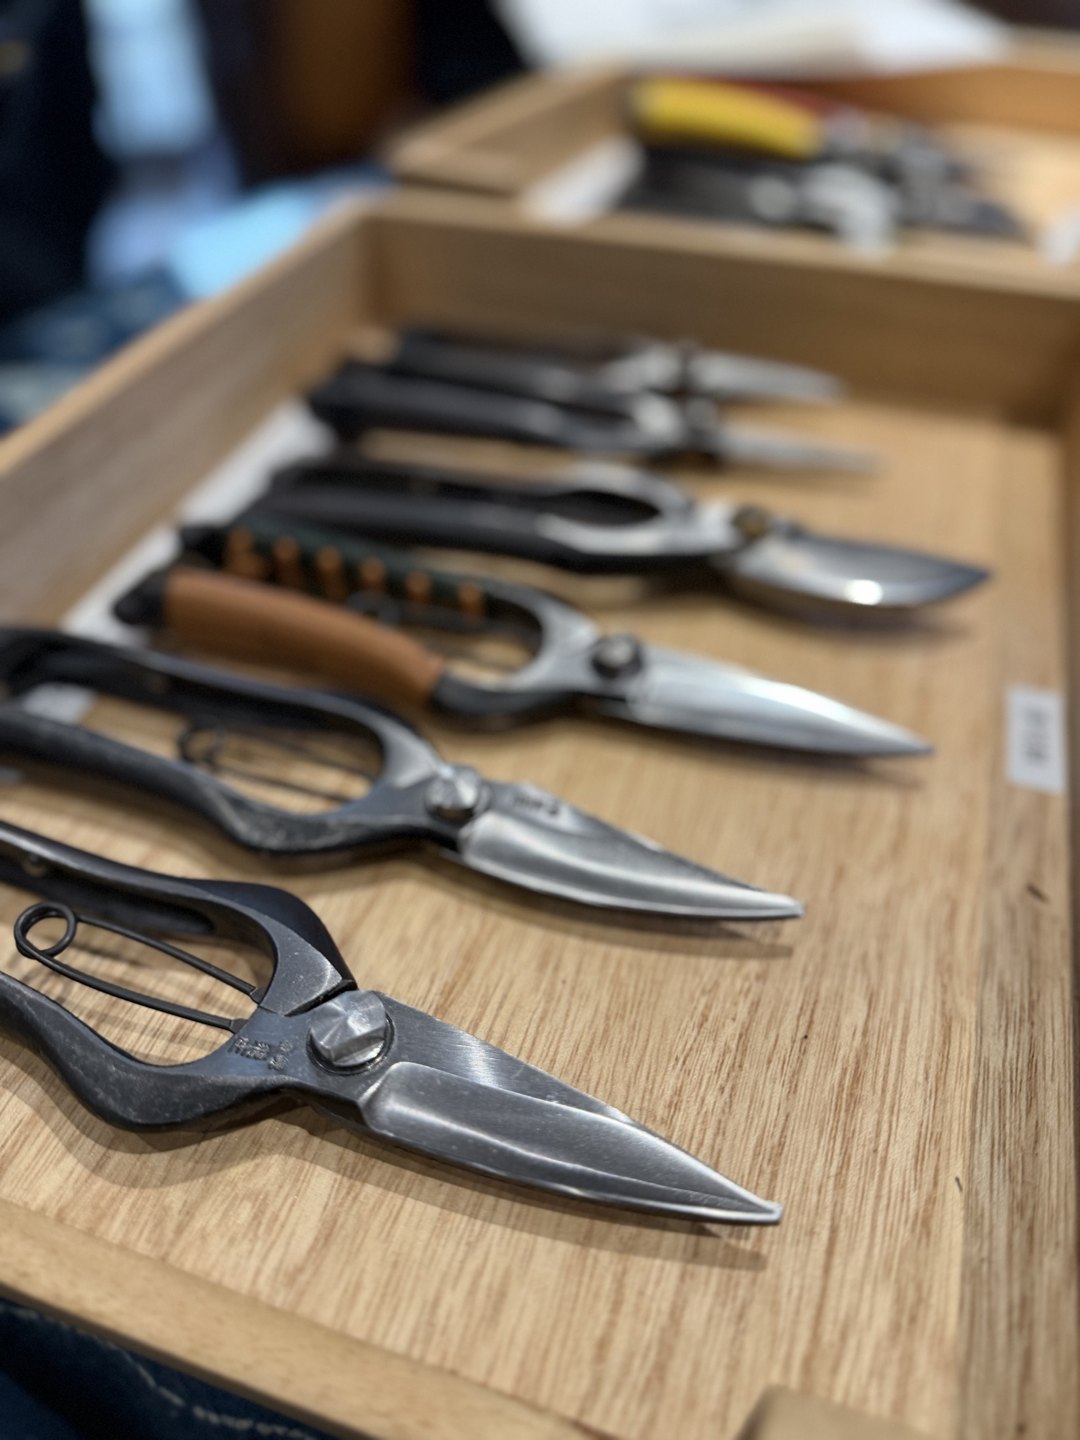
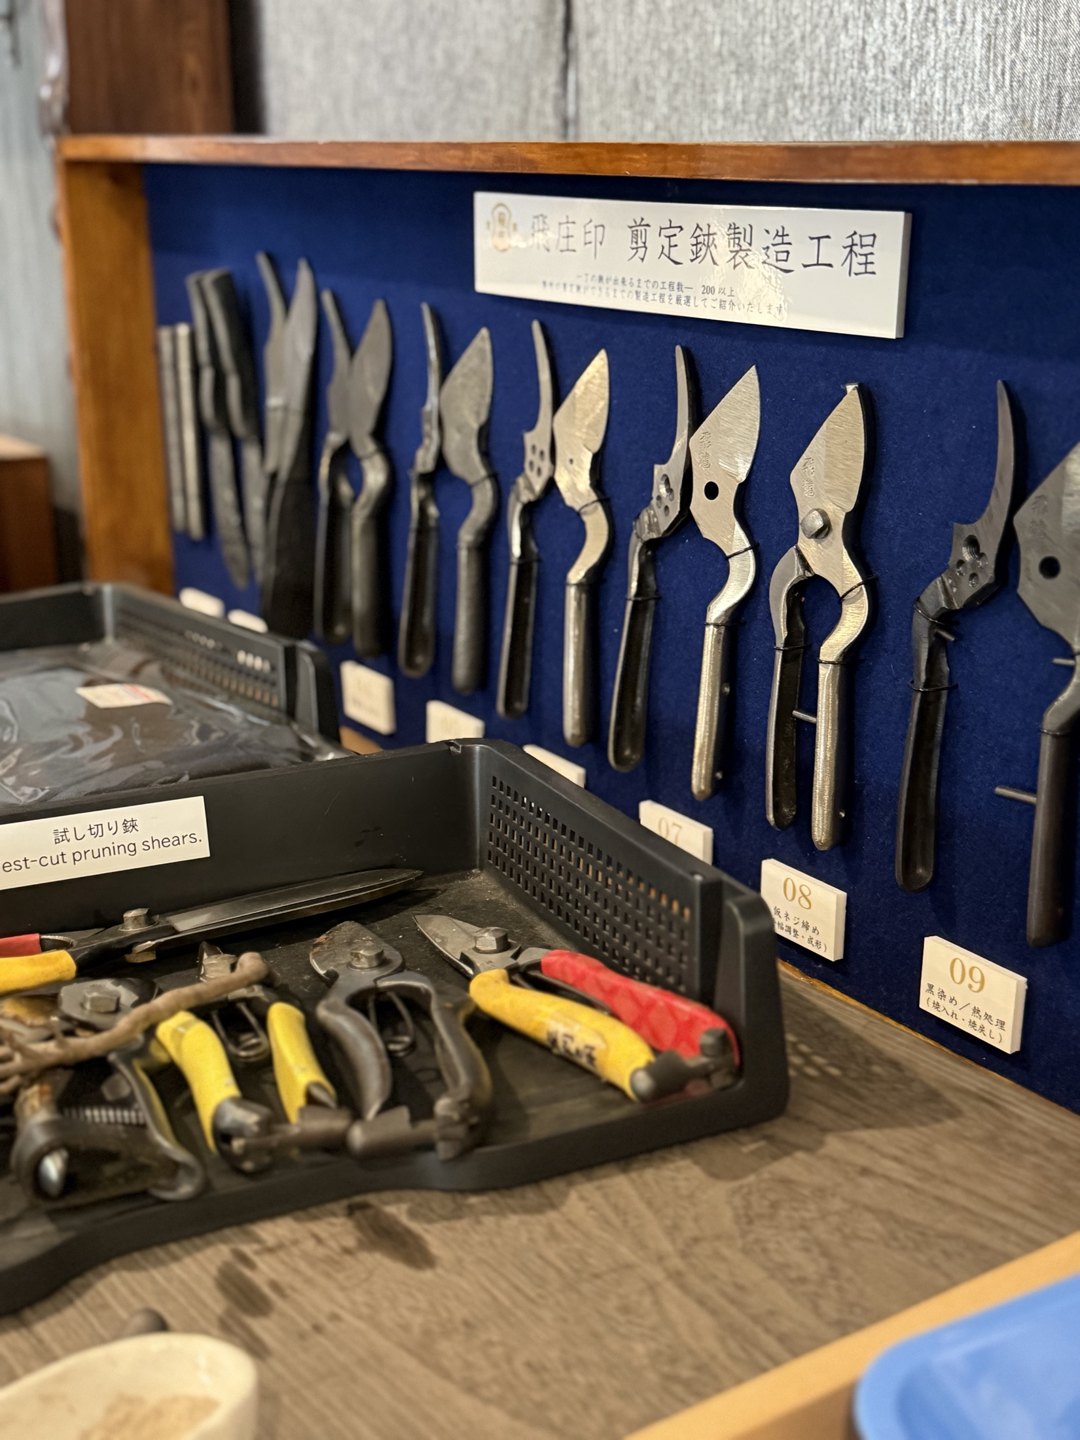
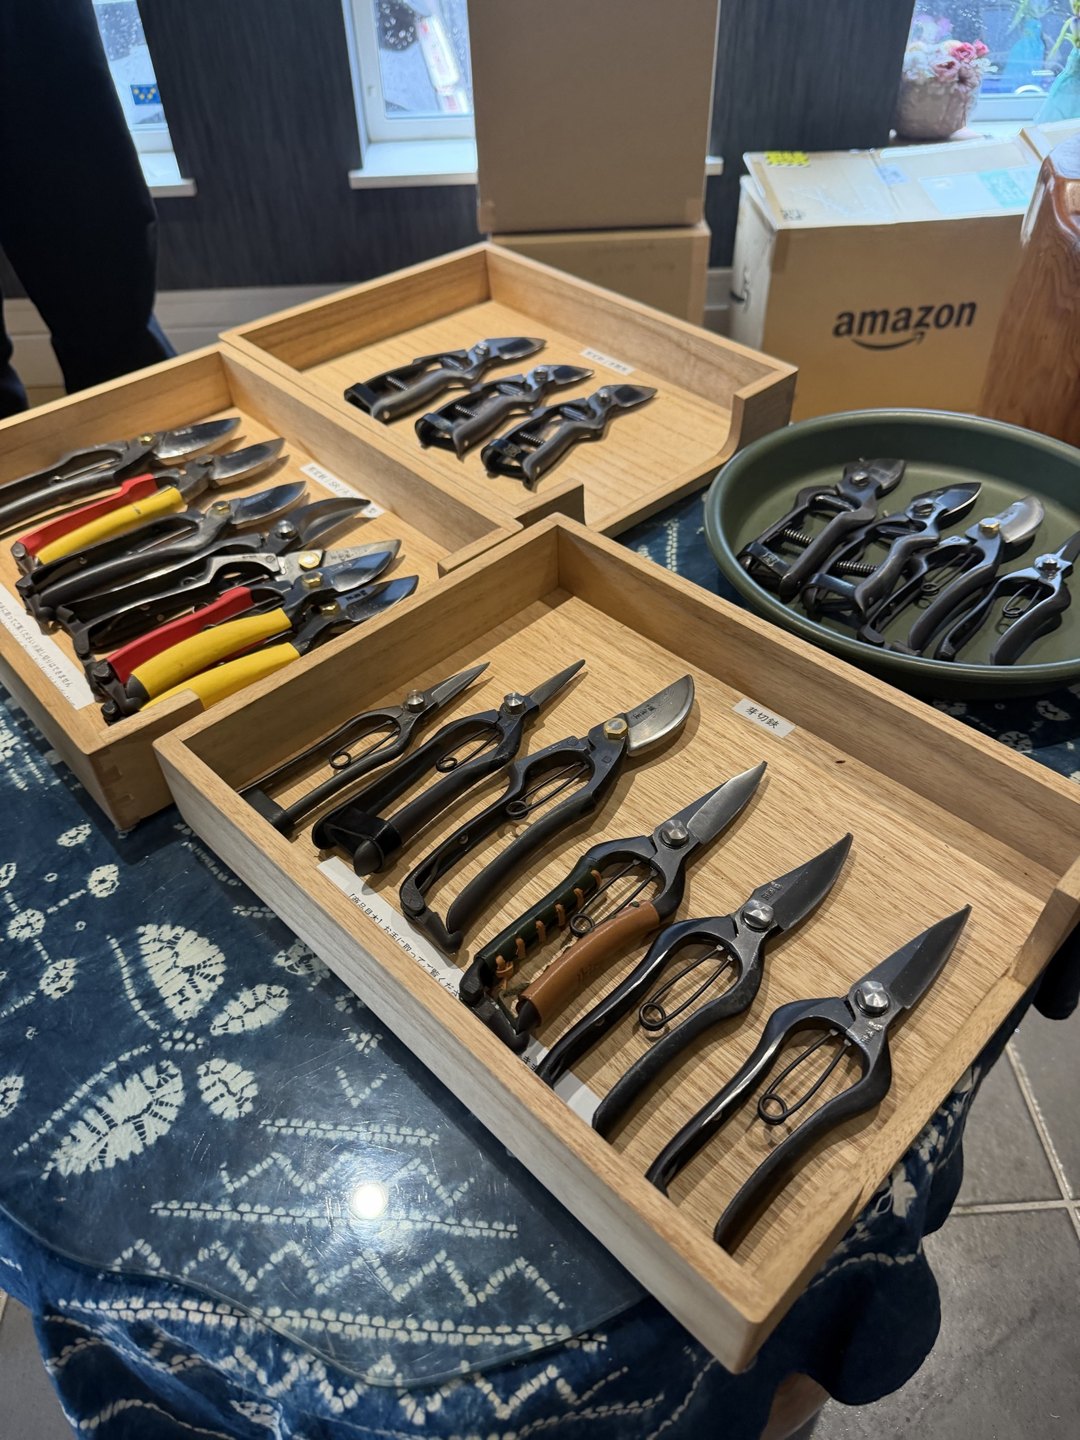
In the showroom, shears lay in shallow wooden trays. The trays were divided by model, so that shears with red-and-yellow grips, shears with black-painted handles, and shears with a ladder-like frame in the handle could be compared on one table. Along the wall hung a board showing the making of one shear in “eleven stages”, from round bar to finished product. The caption on the board says that one shear takes more than 200 steps.
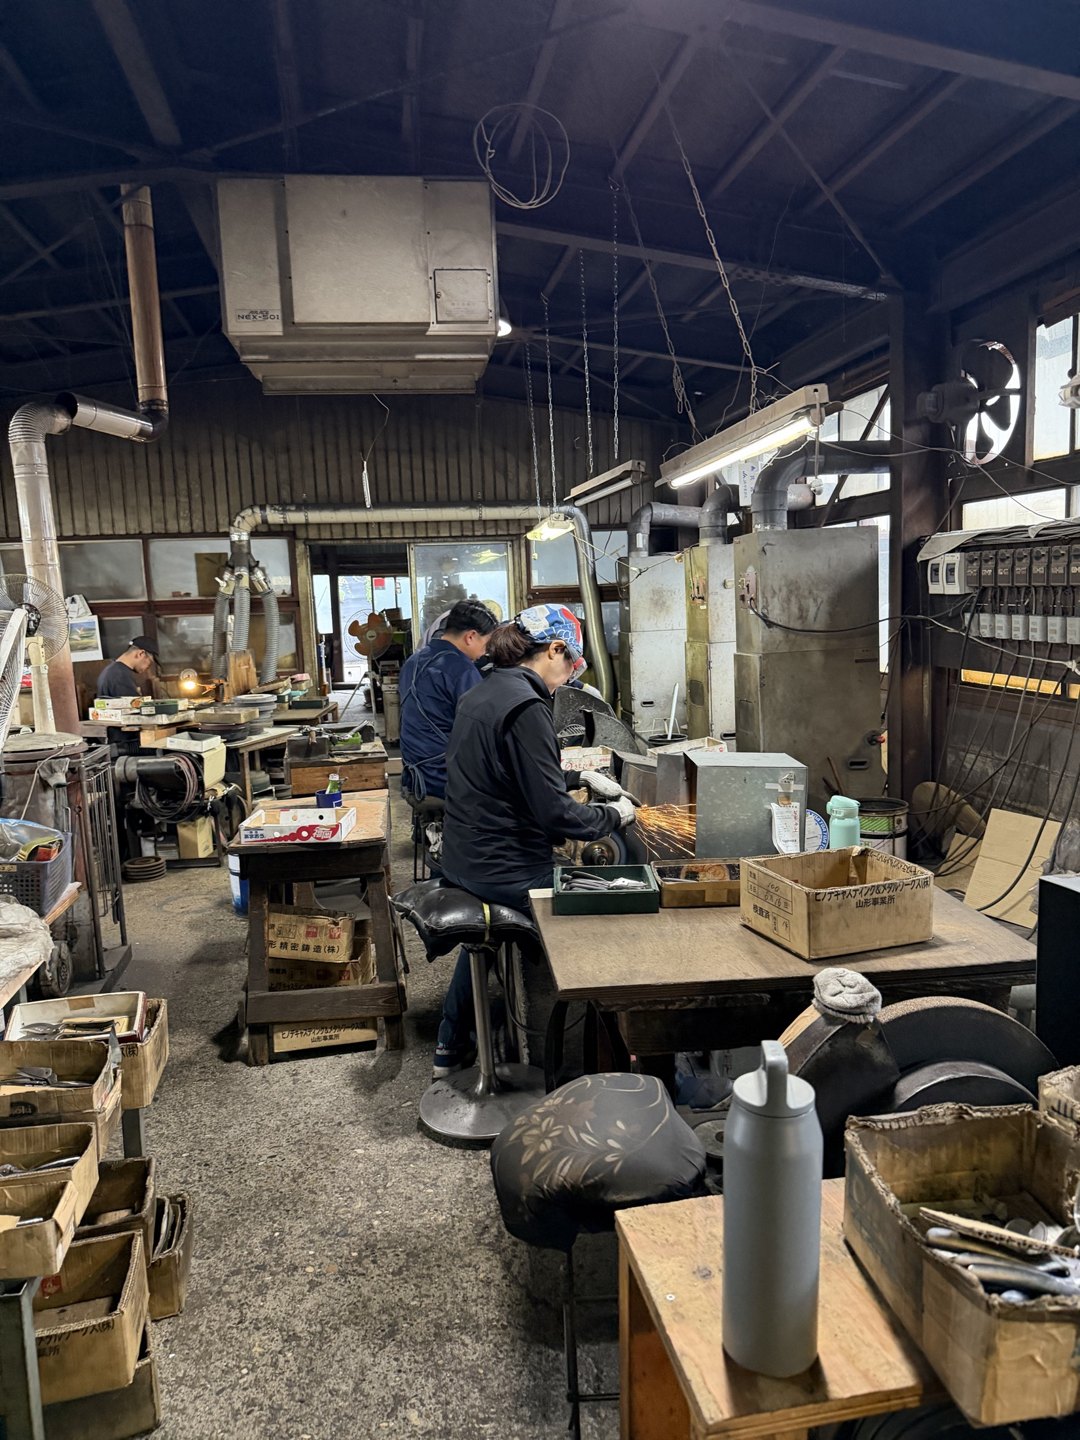
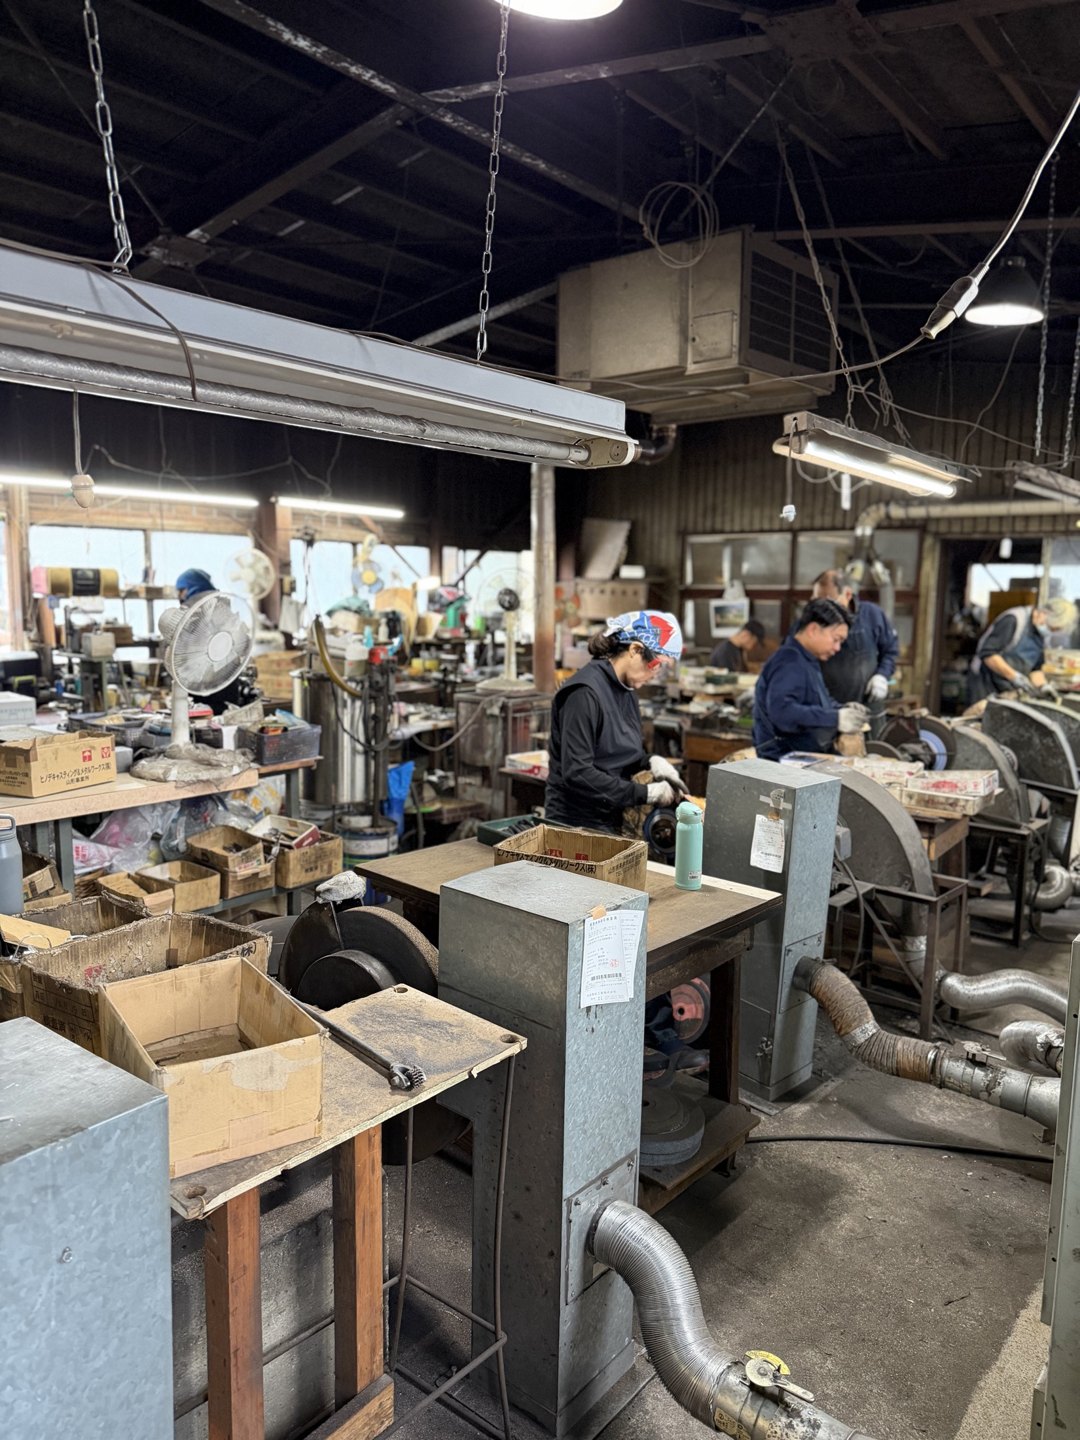
After the explanation we moved to the workshop. In front of the machines, craftspeople each handled one stage. At the far end stood a press and a furnace, and on the bench near the front, half-assembled shears lay on a board. I follow the stages in the order I photographed them.
The building may surprise you if you imagine an urban factory. A dark wall carries the trade-name plate, and a short flight of steps leads up to the showroom entrance. The 2022 winter issue of the gardening magazine Niwa reports that the building had been renovated and a showroom added, listing it as a major change together with the change of generation and the move to incorporation. The craftspeople’s workplace and a place where users can pick up the tools are on the same site. That arrangement connects to the choice I describe later, sending shears back to the maker for resharpening. It is where users and makers are close together that you can ask, “Could you fix this tool for me?”
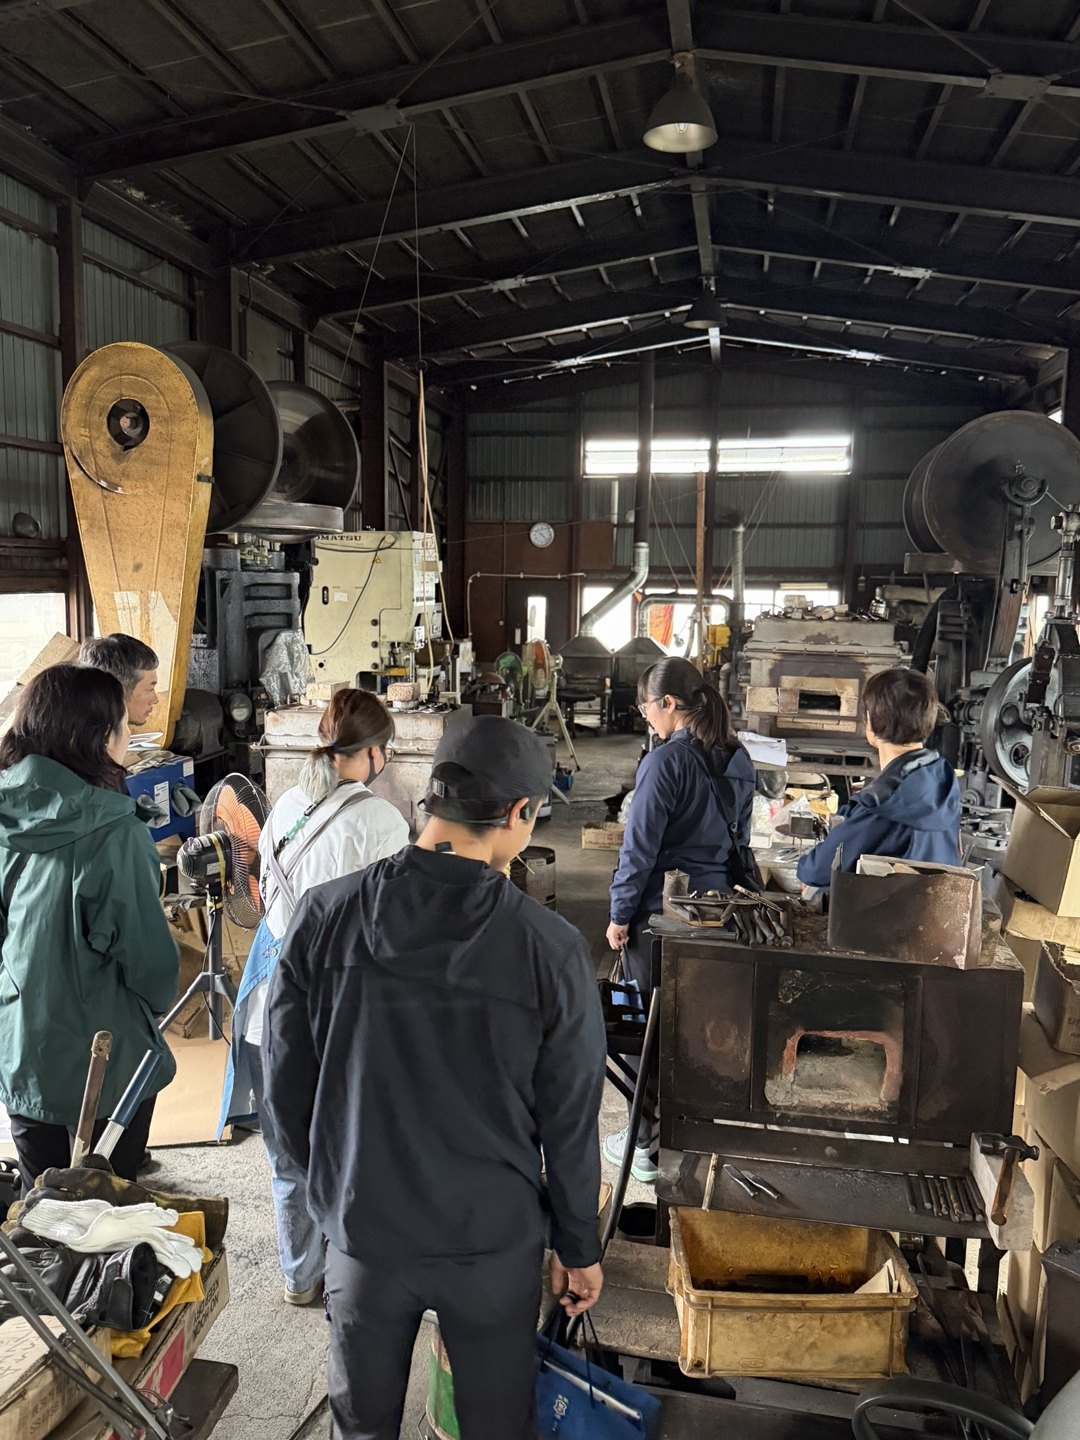
Inside, the workshop is long and narrow, with machines and benches lined up along its length. The ceiling is high, and the floor looks like packed earth. Wooden boxes of parts stood on and beside the benches, and the craftspeople sat in front of the machine for their own stage. One shear travels down this long room from machine to machine and from box to box. The chapter on the process follows that flow.
Who Tobisho is — a town of edge-tool smiths, and a trade name taken from the founder
Tobisho’s company profile gives the beginning of Yamagata edge-tool making as follows. When Shiba Kaneyori (an ancestor of Mogami Yoshiaki), acting on the order of Ashikaga Takauji, entered the province of Dewa in the Nanboku-chō period, the blacksmiths in his retinue formed a smiths’ quarter under the lord’s protection. This is the origin as Tobisho itself publishes it, and it reads as a history that began when a lord brought craftspeople in as a whole town.
The profile then explains the line of the present head. He is the tenth generation of a respected family of blade smiths dating from the first year of Bunka (1804). In the fifth year of Shōwa (1930), Tobizuka Shōjirō (庄次郎) founded the Tobizuka Scissors Works and began to make mainly pruning shears and garden shears. After moving the workshop three times, the company settled in its present workshop on Hinoki-chō. It counts four generations as shear makers. The name “Tobisho” is a trade name taken from the founder, “Tobizuka Shōjirō”, and it is a registered trademark.
Around 1930, when the company was founded, Yamagata was a silk-farming region rather than a fruit-growing one. The fourth-generation head, Tobizuka Daiki (大貴), told the craft-profile media DEKIRU! that the workshop made large numbers of shears for pruning mulberry trees. An article in the 2022 winter issue of Niwa says that Yamagata became a major fruit-producing region only about half a century ago, and that until then these shears were used for pruning mulberry; a trace of that survives in the 225 mm Type A. The Yamagata pruning shear now thought of as a “fruit-tree shear” began as a tool for mulberry trees.
The same magazine explains one more thing, the stream to which Tobisho’s shear making belongs. Tracing the roots of Japanese pruning shears leads to two lines. One is the apple shear that reached Aomori in 1875 (Meiji 8) together with apple growing. The other is the pruning shear of the Abukuma River area, which a sword smith in the service of the lord of Shirakawa began making, modelled on Western shears, after the sword-abolition edict. Yamagata pruning shears were born in the early twentieth century and divided into two lines, Type B and Type A.
The originator of the Type A is said to be a maker called Murahisa (村久). According to the article, Tobisho’s founder Shōjirō was an apprentice of Murahisa’s first-generation maker. For that reason, the fourth-generation head says, the original method of brazing a steel blade on with brass has been handed down to Tobisho as well.
| Year | Event | Source |
|---|---|---|
| Nanboku-chō period | Smiths form a smiths’ quarter with the arrival of Shiba Kaneyori (the origin of Yamagata edge tools) | Tobisho company profile |
| 1804 (Bunka 1) | The head’s family descends from blade smiths who started in this year; the present head is the tenth generation | Tobisho company profile |
| 1875 (Meiji 8) | The apple shear reaches Aomori together with apple growing | Niwa no. 238 |
| Early 20th century | Yamagata pruning shears are born, in two lines: Type A (Murahisa) and Type B | Niwa no. 238 |
| 1930 (Shōwa 5) | Tobizuka Shōjirō founds the Tobizuka Scissors Works and begins making pruning and garden shears | Tobisho company profile |
| 1980 (Shōwa 55) | The newly developed SR-1 pruning shear wins a Small and Medium Enterprise Agency Director-General’s award | Tobisho company profile (craftsman page) |
| By 2022 | The third generation hands over to the fourth, Tobizuka Daiki; the business changes from sole proprietorship to a company | Niwa no. 249 |
What has been recognised — awards, and use abroad
The craftsman page of Tobisho’s company profile lists, year by year, the awards and offices in the career of the third-generation head, Tobizuka Yasuhito (靖仁). It reads as the record of one workshop building up recognition through its products, so I have set it out in a table exactly as the company describes it.
| Year | Career and awards (as given on the company’s craftsman page) |
|---|---|
| 1977 (Shōwa 52) | Graduates from the Department of Mechanical Engineering, College of Engineering, Nihon University. Joins the family business, the Tobizuka Scissors Works |
| 1980 (Shōwa 55) | The newly developed SR-1 pruning shear wins a Small and Medium Enterprise Agency Director-General’s award |
| 1998 (Heisei 10) | Becomes managing director of the Yamagata Edge Tool Industry Cooperative |
| 2000 (Heisei 12) | Becomes chairman of the cooperative’s shears section |
| 2004 (Heisei 16) | Launches the “Kajitakumi” brand as a premium line |
| 2005 (Heisei 17) | The Kajitakumi brand is certified as a Yamagata Selection |
| 2006 (Heisei 18) | The “one-hand trimming shear (single-edge) Type A 200 mm (blue-paper steel version)” wins the 2006 Yamagata Excellent Design Award |
| 2007 (Heisei 19) | Receives the Yamagata City commendation for contributors to traditional craft industry technique |
| 2011 (Heisei 23) | The Hiryu and the Asuka are certified as Yamagata Selections |
| 2020 (Reiwa 2) | Becomes president of the Yamagata Edge Tool Industry Cooperative |
Of the “newly developed SR-1 pruning shear” in the table, the fourth-generation head, Tobizuka Daiki, told DEKIRU!: “My predecessor made it to see whether the good points of the Type A and the Type B could be combined, and it is our own original.” This model is still listed in the pruning-shear section of the company’s product brochure. That a prize-winning model from 46 years ago is still in the catalogue is a sign of how long the design has lasted.
I will also describe use abroad, as far as public information allows. The company brochure says its shears are well received not only by customers in Japan but also from overseas. The fourth-generation head told DEKIRU! that it seems to have users in countries where gardening is popular, led by the United Kingdom, most of Europe, the United States, Australia, Canada and countries across Asia. The 2022 winter issue of Niwa reports that messages now arrive through social media from customers around the world.
What interests me here is the story of sales channels. The fourth-generation head says, “Our main business is manufacturing and wholesale.” In other words, end users did not have many chances to deal with Tobisho directly in the first place. That there are now ways to “buy direct”, through the online shop and the shop in Yamagata, matters when you think about the free resharpening voucher and the repair desk (more on that below). On translation, he says frankly that because the whole family speaks only Japanese, online translation has been a great help. The reality is that messages from users abroad are answered with the help of translation tools.
From steel bar to finished shear — the process, in the order we walked it
The process page on Tobisho’s website says that one shear takes “more than 200” steps. I cannot follow all of them, but the big milestones are four: forging, heat treatment, edge grinding and screw fitting. The table below follows the order on the company’s process page and sets beside it what I saw on the visit. The stage names and the column “Key points of the company’s description” are Tobisho’s words. The right-hand column is my own observation from the photographs, not Tobisho’s explanation.
| No. | Stage | Key points of the company’s description | What I saw on the visit |
|---|---|---|---|
| 1 | Material | Starts from two steel bars | Sample round bars (blade-grade carbon steel), and a bar placed in my hand |
| 2 | Rough forging | Hot steel is shaped by machine; one side is made thin in a “shamoji” (rice-paddle) shape, the part that will become the handle | Piles of black forgings |
| 3 | Die forging and annealing | Steel at about 900 °C (1,650 °F) is pressed; eight dies in total, “striking dies” and “punching dies”, are used for one shear (for the metal-latch type); annealing follows | A press and dies, a basket of tangled handle frames, boxes of punched shear shapes |
| 4 | Brazing (Type A only) | A blade of harder metal than the handle is joined with borax and brass | A brass line visible at the joint of blade and handle |
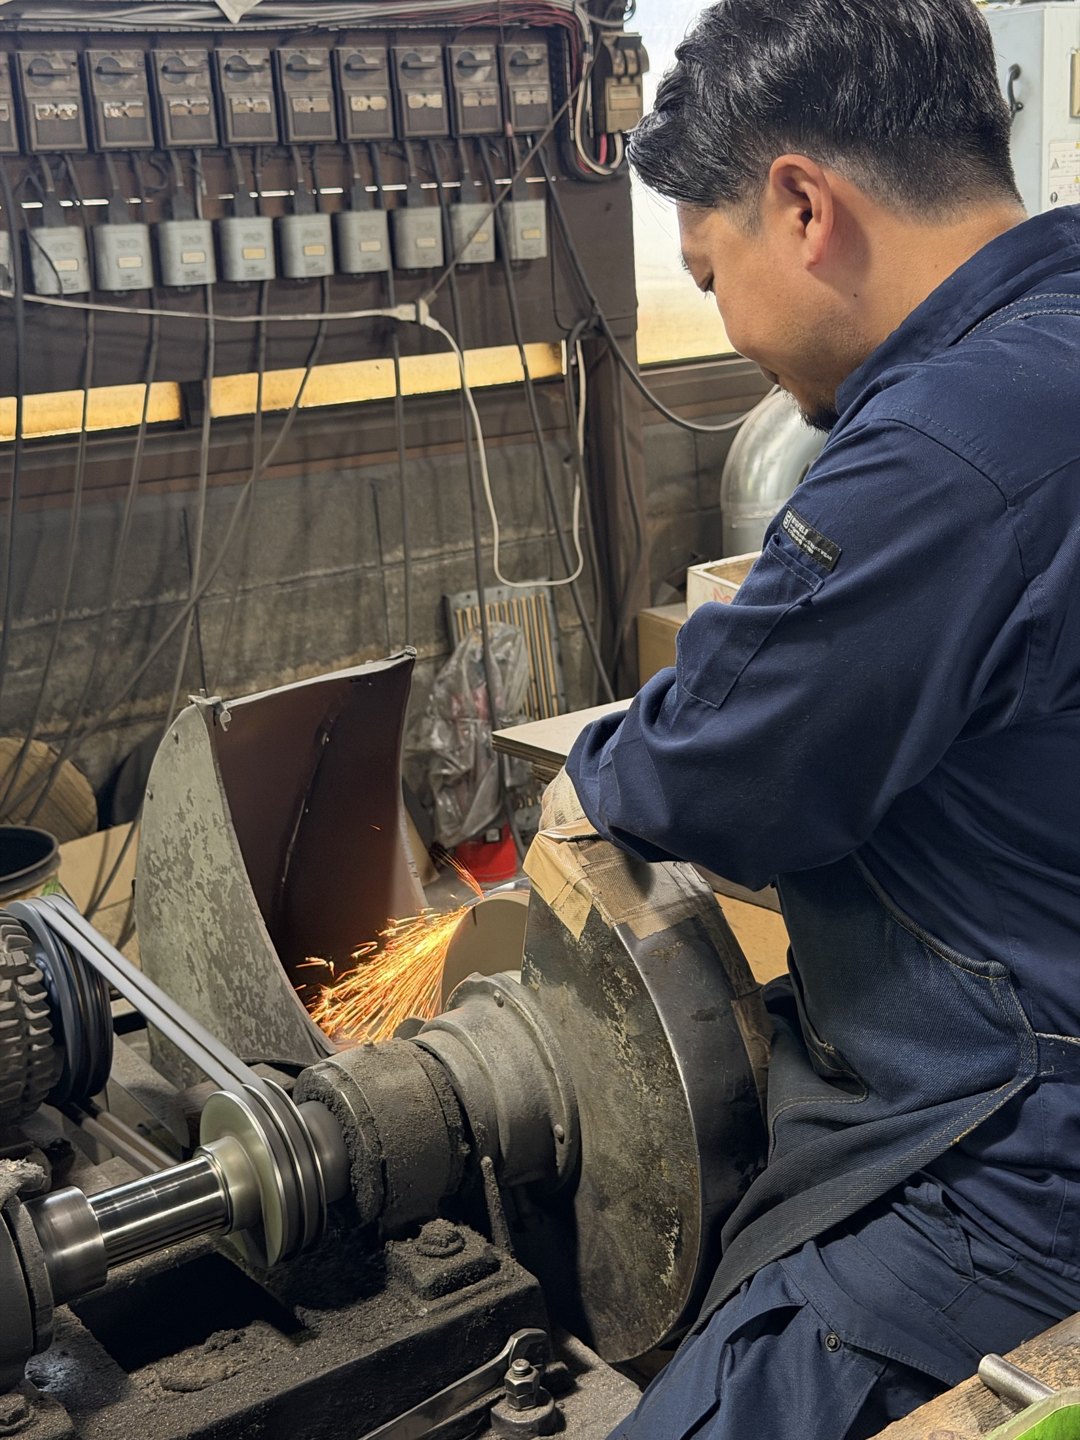
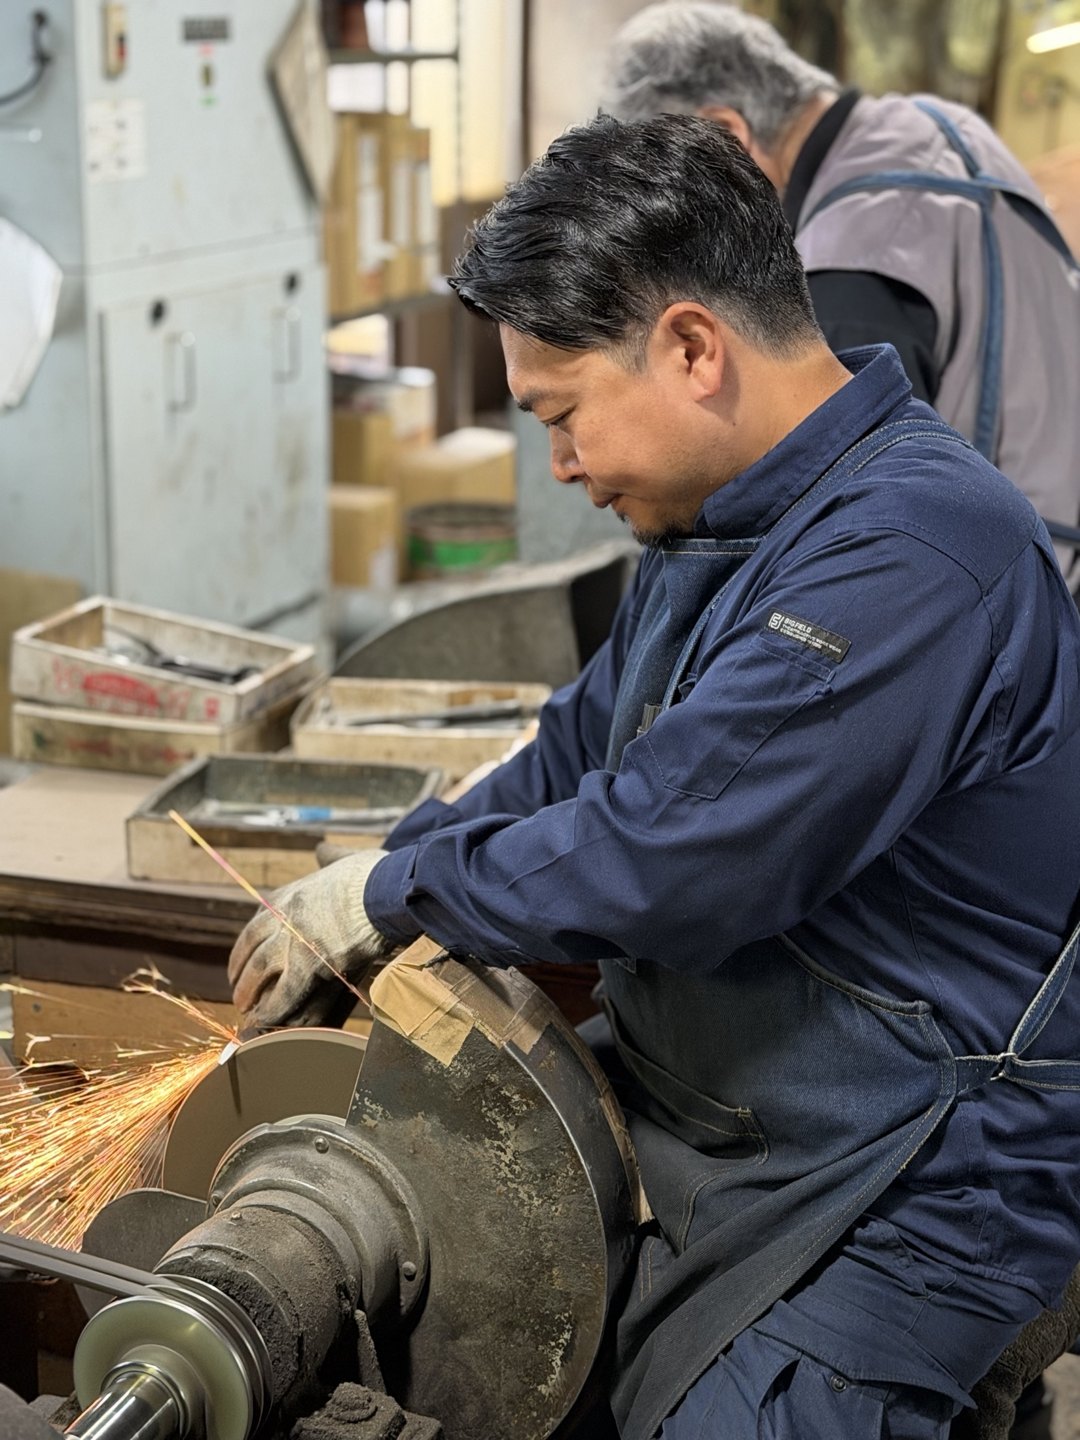
| 5 | Grinding and matching | Cutting blade and receiving blade are made a pair, marked with an “aimon” mark, and adjusted pair by pair | A craftsperson working at a grinder, boxes of stacked parts with blades |
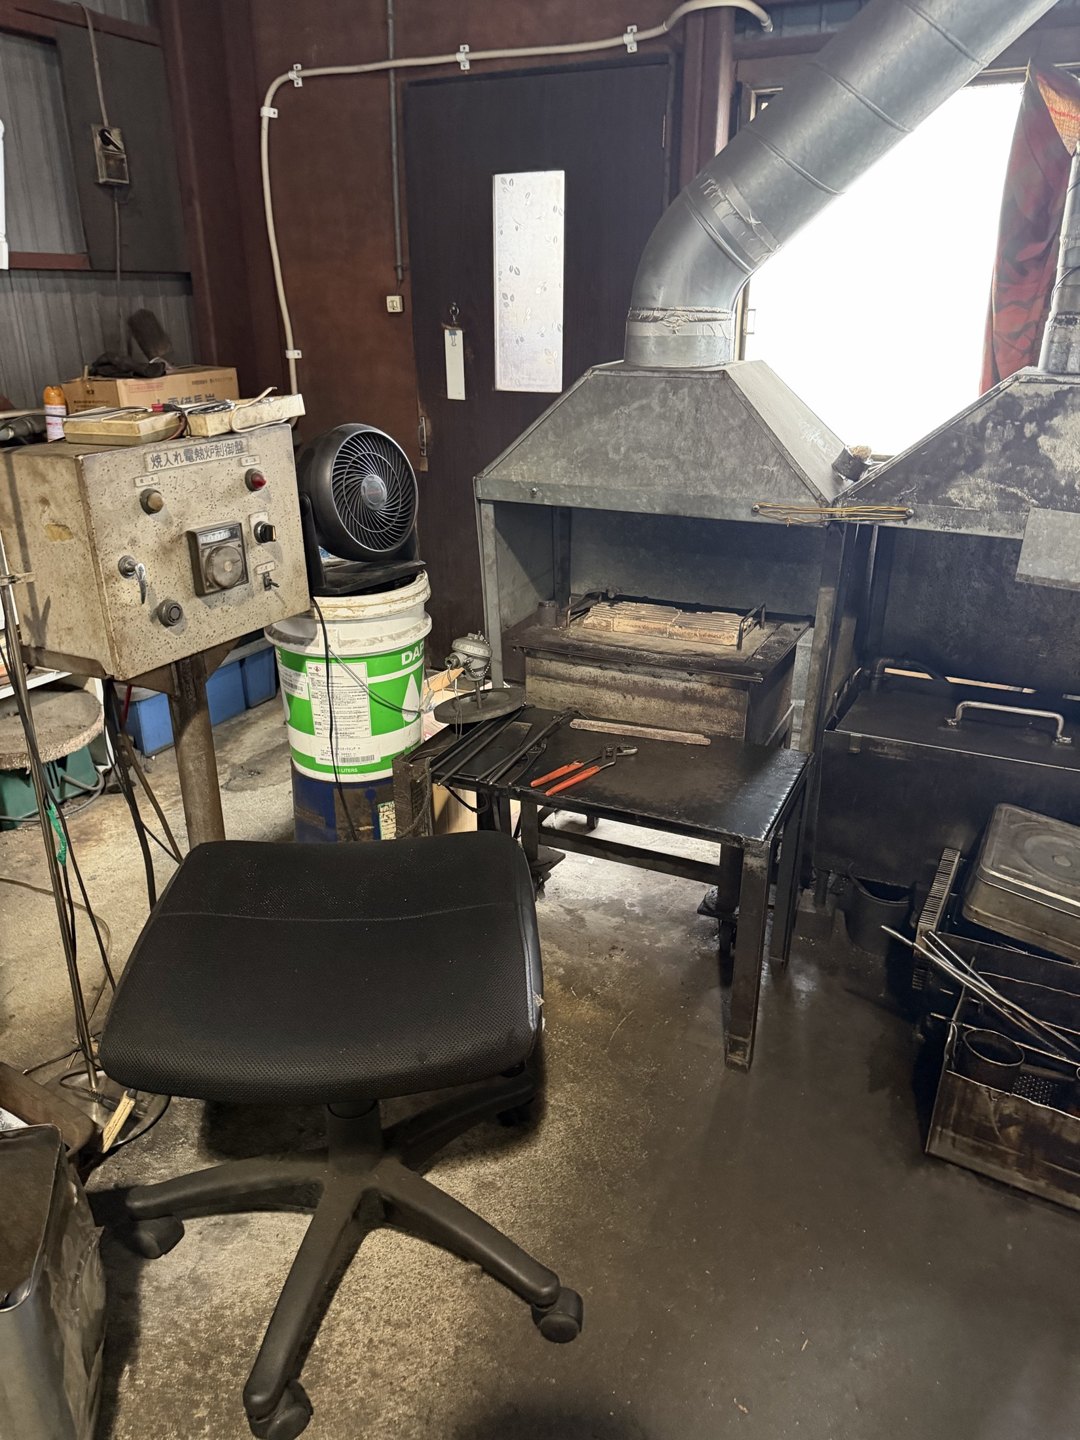
| 6 | Heat treatment | Heated to about 800 °C (1,470 °F) with oxygen shut out, quenched, then tempered to add toughness | A furnace and an exhaust duct |
| 7 | Ura-suki and edge grinding | The back of the cutting blade is hollowed into a three-dimensional curve; the edge is finished in a clam shape | (The work itself was not photographed) |
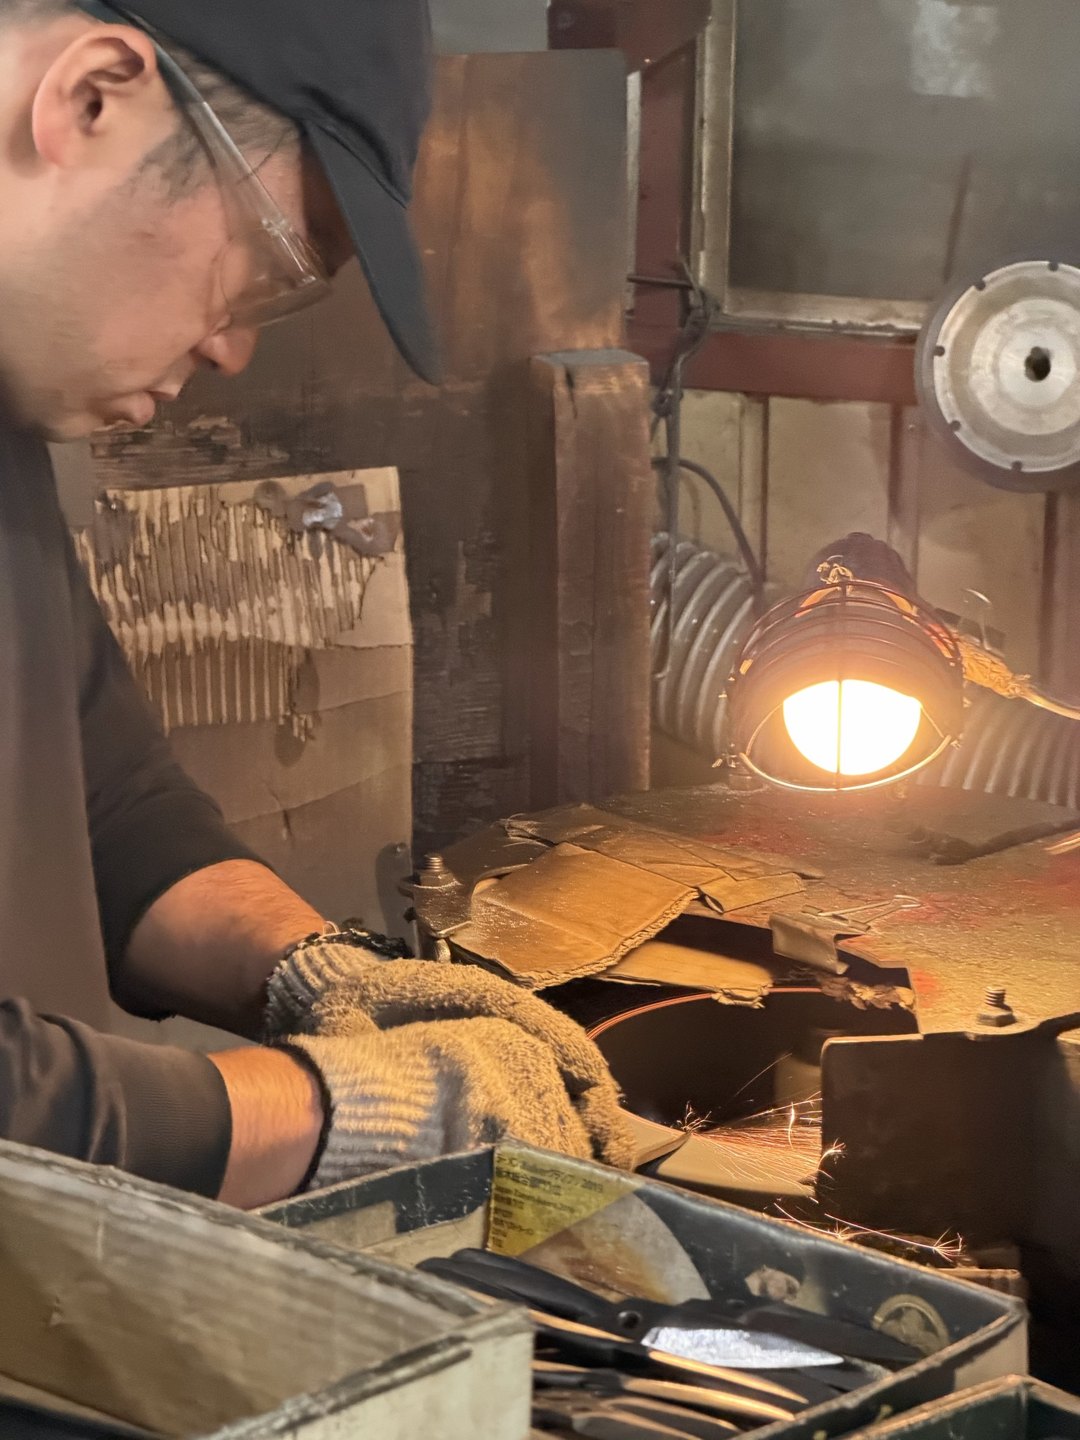
| 8 | Finishing and screw fitting | Polishing, adjusting the recess, fitting the screw | Half-assembled shears on a board, a box of parts |
Material — it begins with a round bar of steel
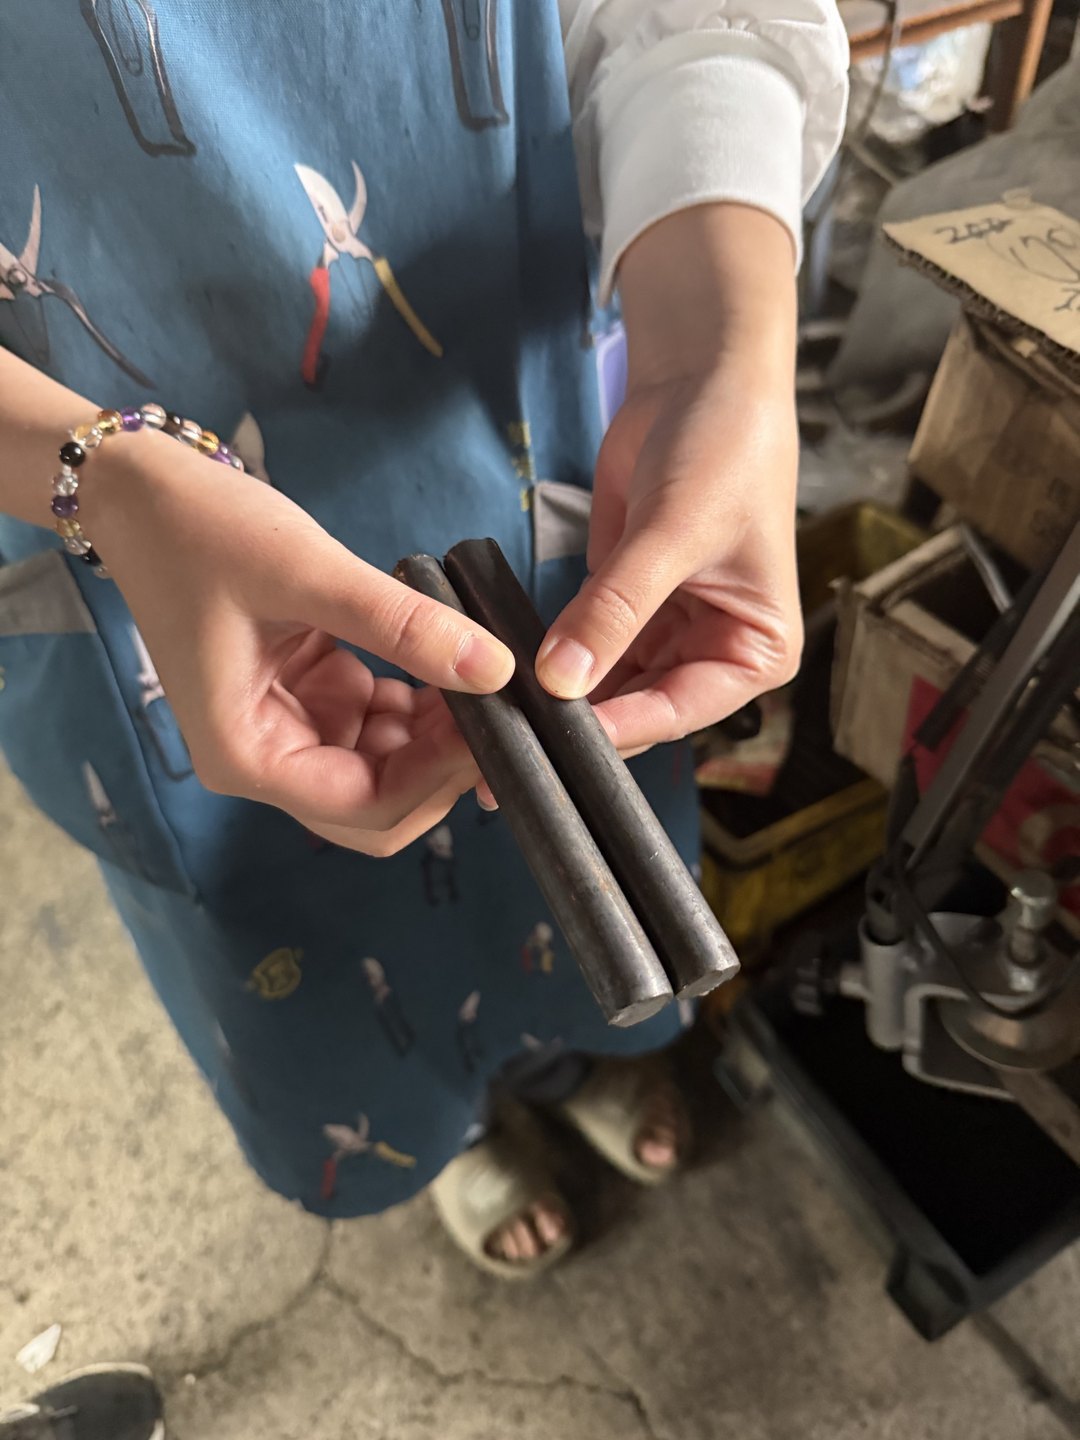
The first stage is a round bar of carbon steel for blades. On the process board in the showroom, two short bars labelled “Round bar material (carbon steel for blades)” sat at the far left, at No. 01. The company’s process page also says “It begins with these two steel bars”, and does not give the steel’s name.
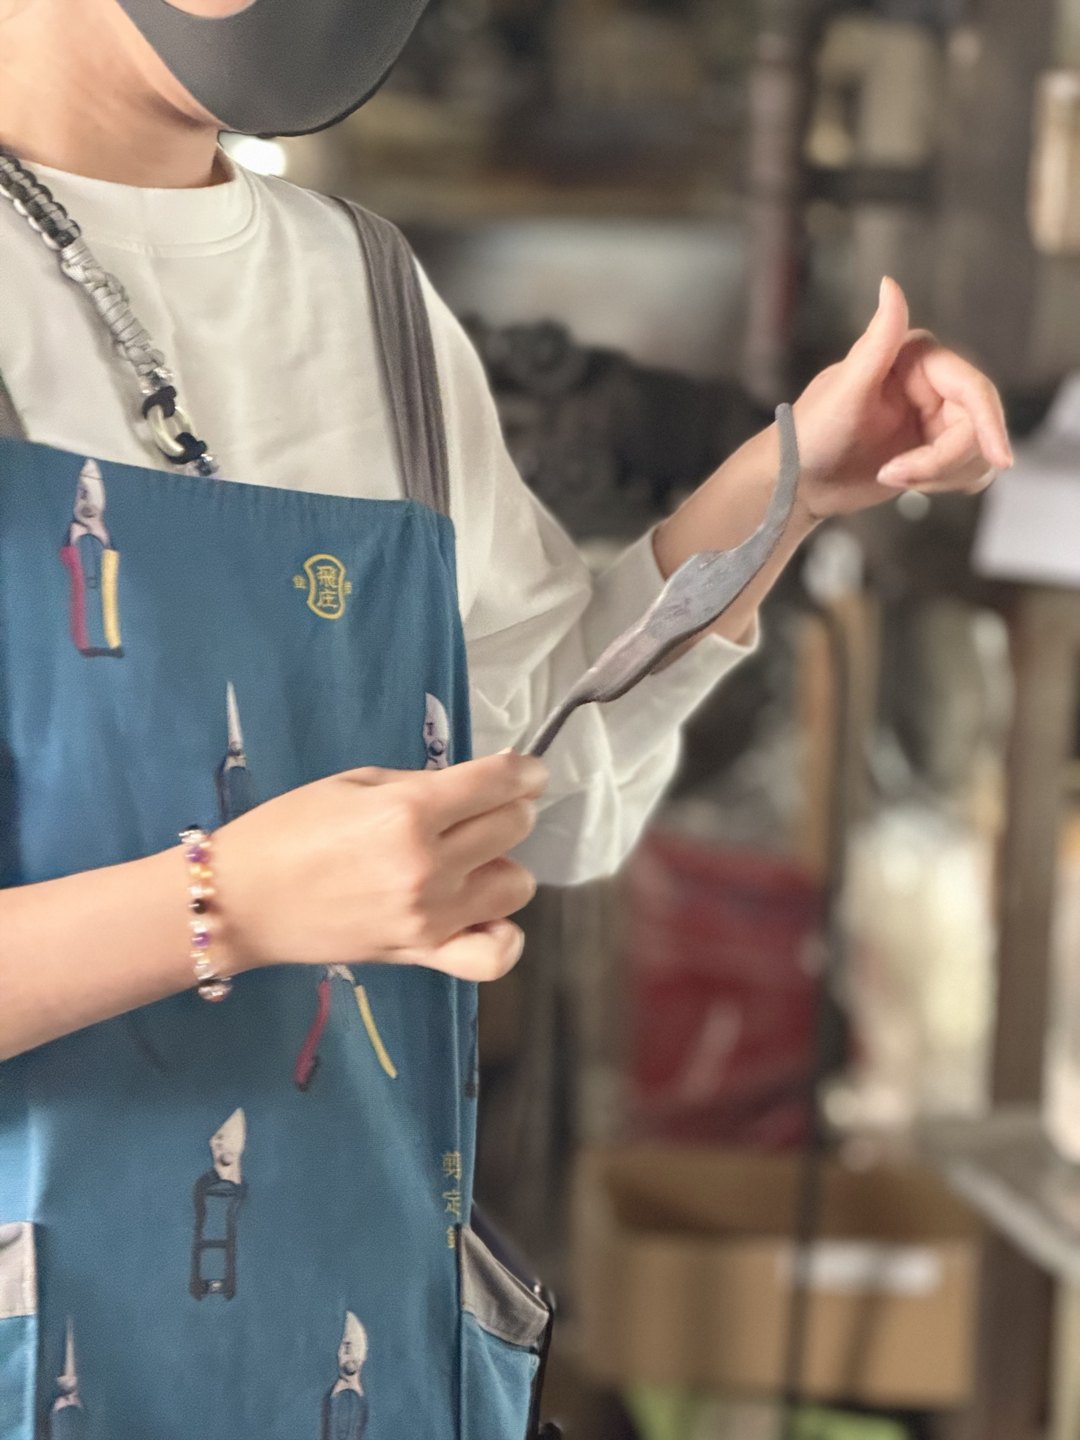
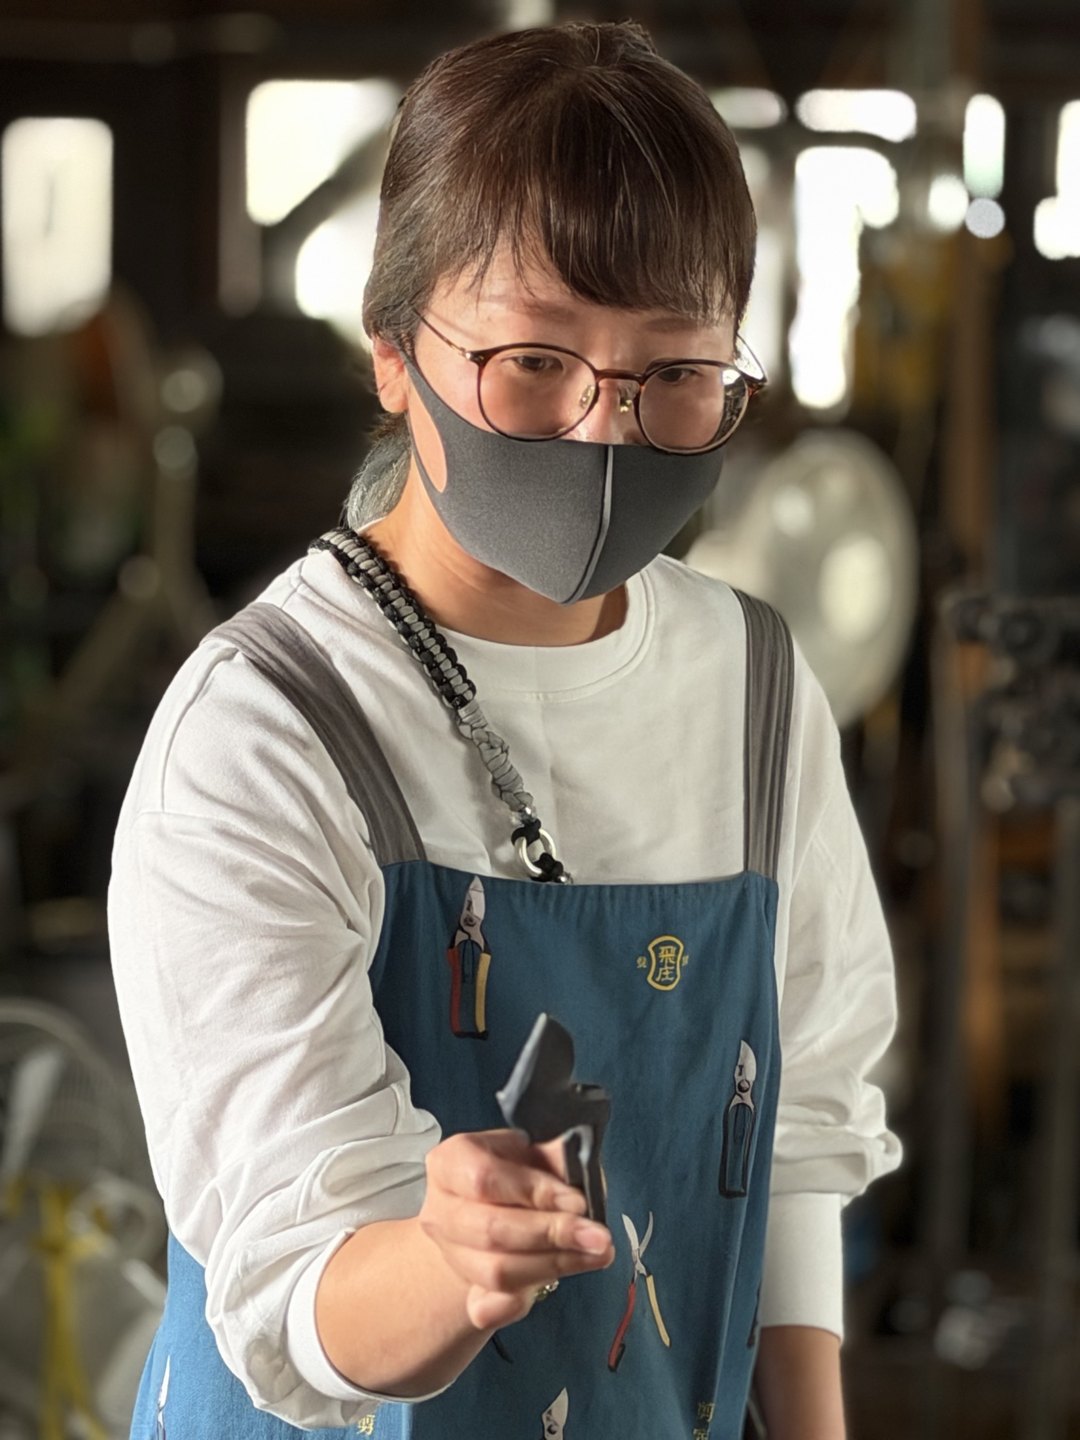
On the visit I was shown a bar and allowed to hold it. As the photograph shows, it is a bar short enough to fit in one hand. In the company’s words, these two bars become one shear. At this stage there is no sign anywhere yet of the shape of a shear.
Rough forging — striking the handle side flat
The first forging is the stage in which a round bar is heated and struck by machine into a rough lump in the shape of a shear. In the company’s description, one side is made into a thin “shamoji” shape. That side later becomes the handle. The handle of a shear begins as steel struck flat into a rice-paddle shape.
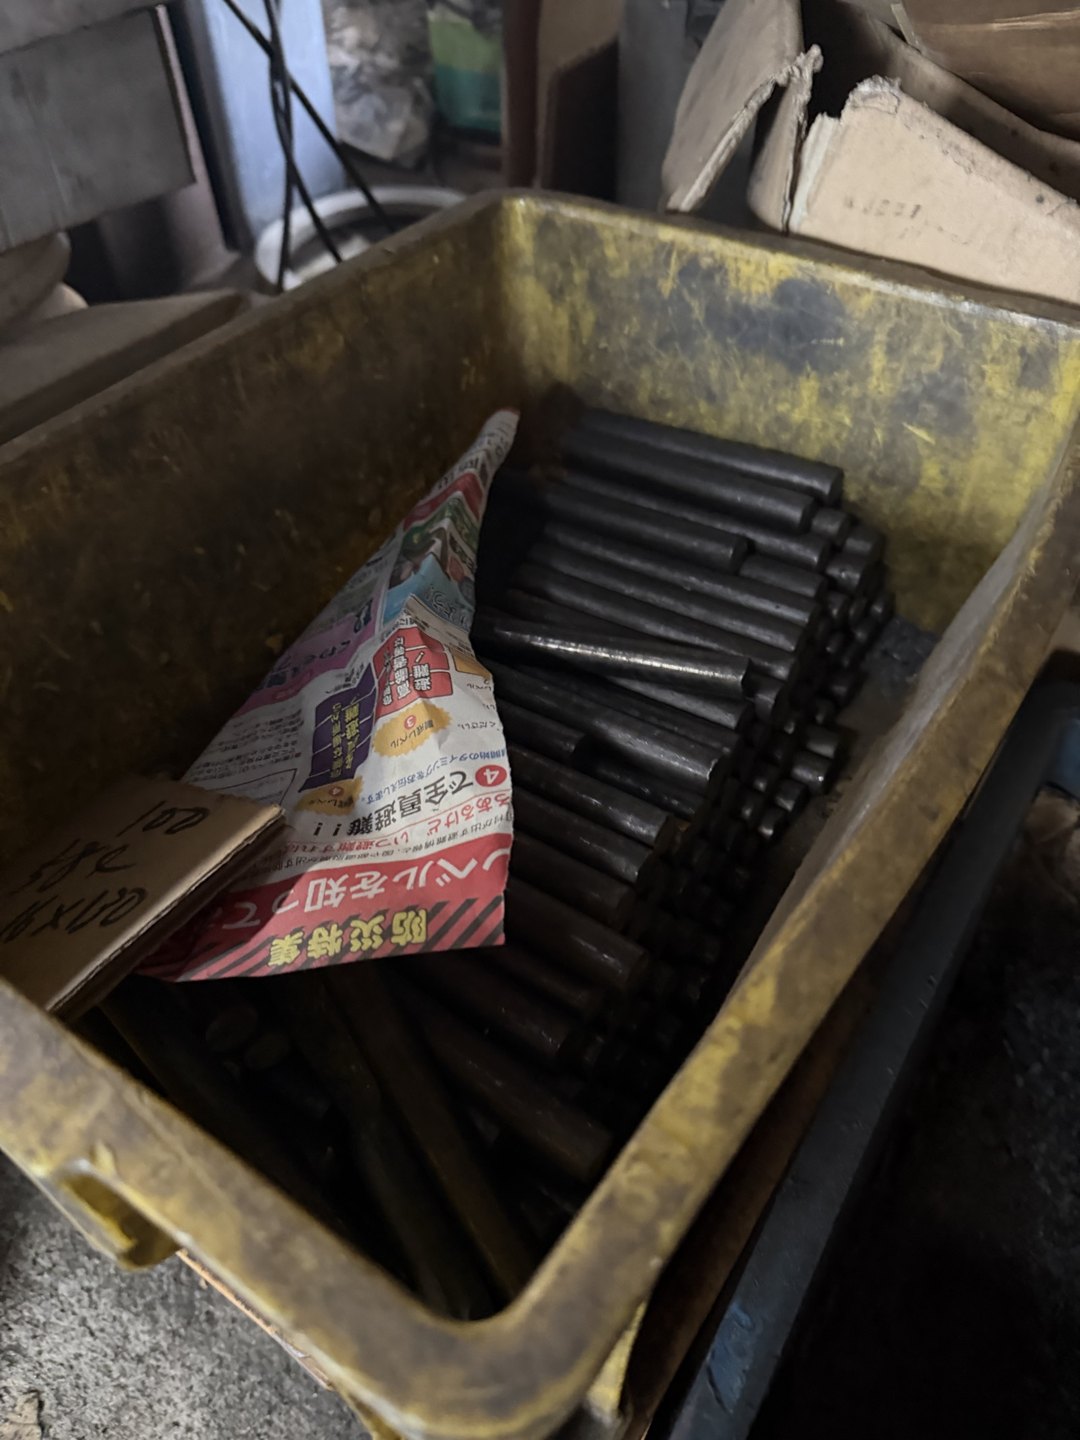
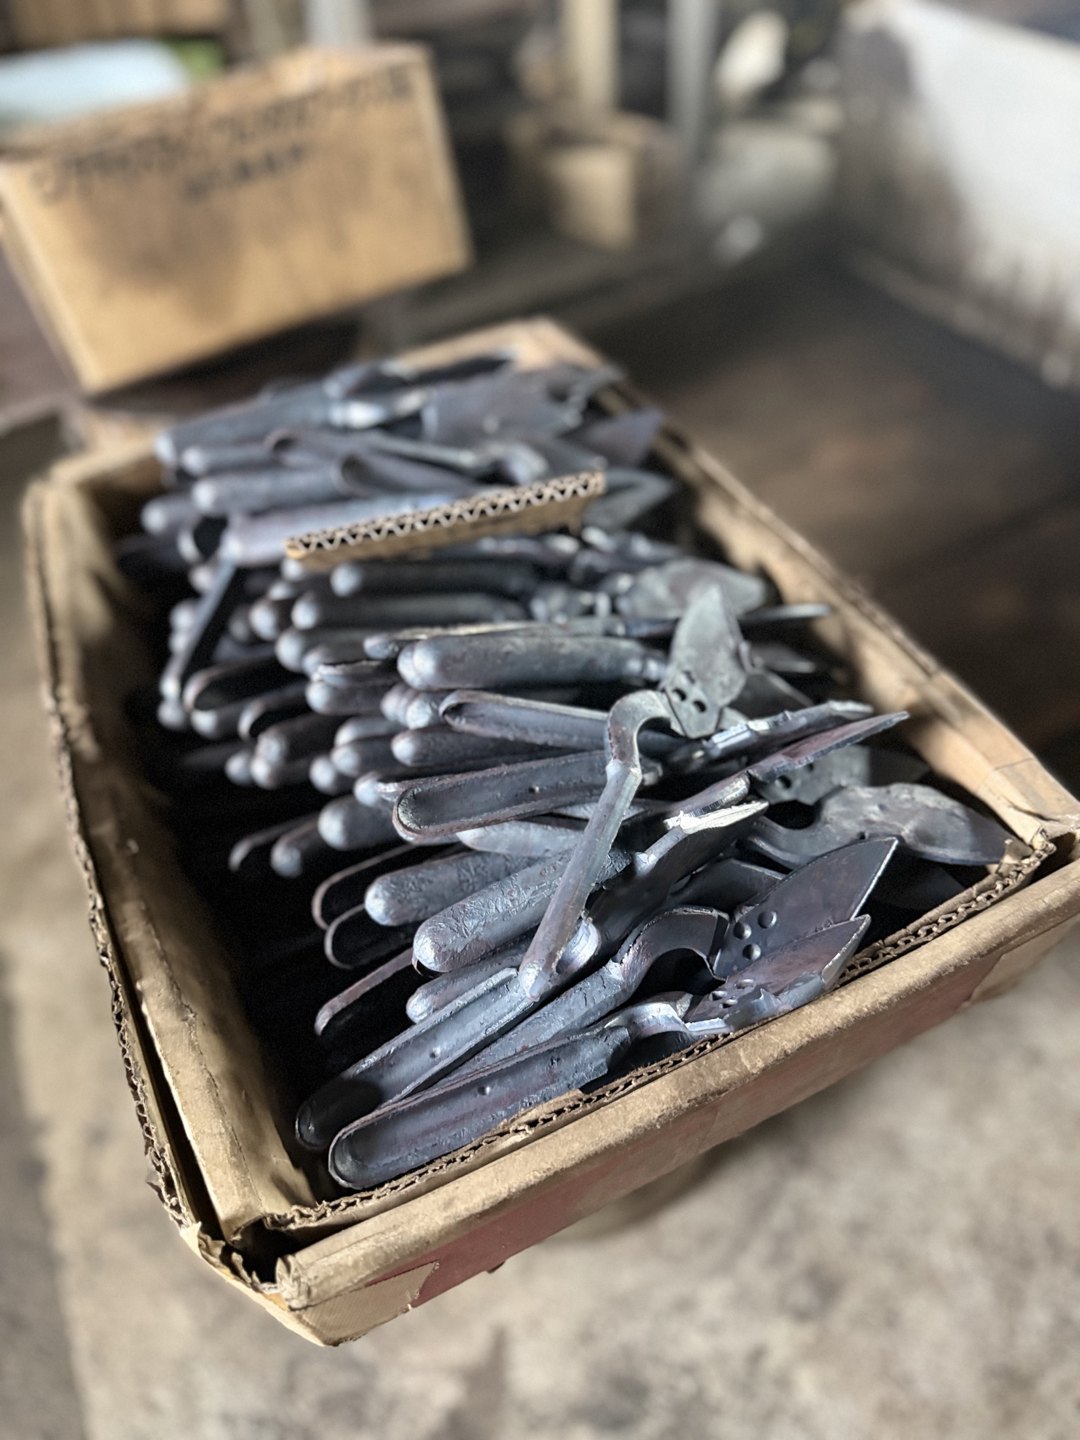
In the workshop I saw black forgings overflowing from boxes onto the floor. In each, one end is flattened and the other is still a bar. The same shape lay stacked many times over, so it seems they are struck in batches and sent on to the next stage.
Die forging — pressing steel at about 900 °C to make the shapes match
Next, steel at about 900 °C (1,650 °F) is put into dies and pressed. The features page of Tobisho’s website explains: “By striking repeatedly at a low heating temperature that does not destroy the steel’s structure, impurities are removed and the structure of the steel is made dense.” The dies used for one shear number eight in total, “striking dies” and “punching dies” together (for the metal-latch type). One part is therefore pressed many times, changing dies each time.
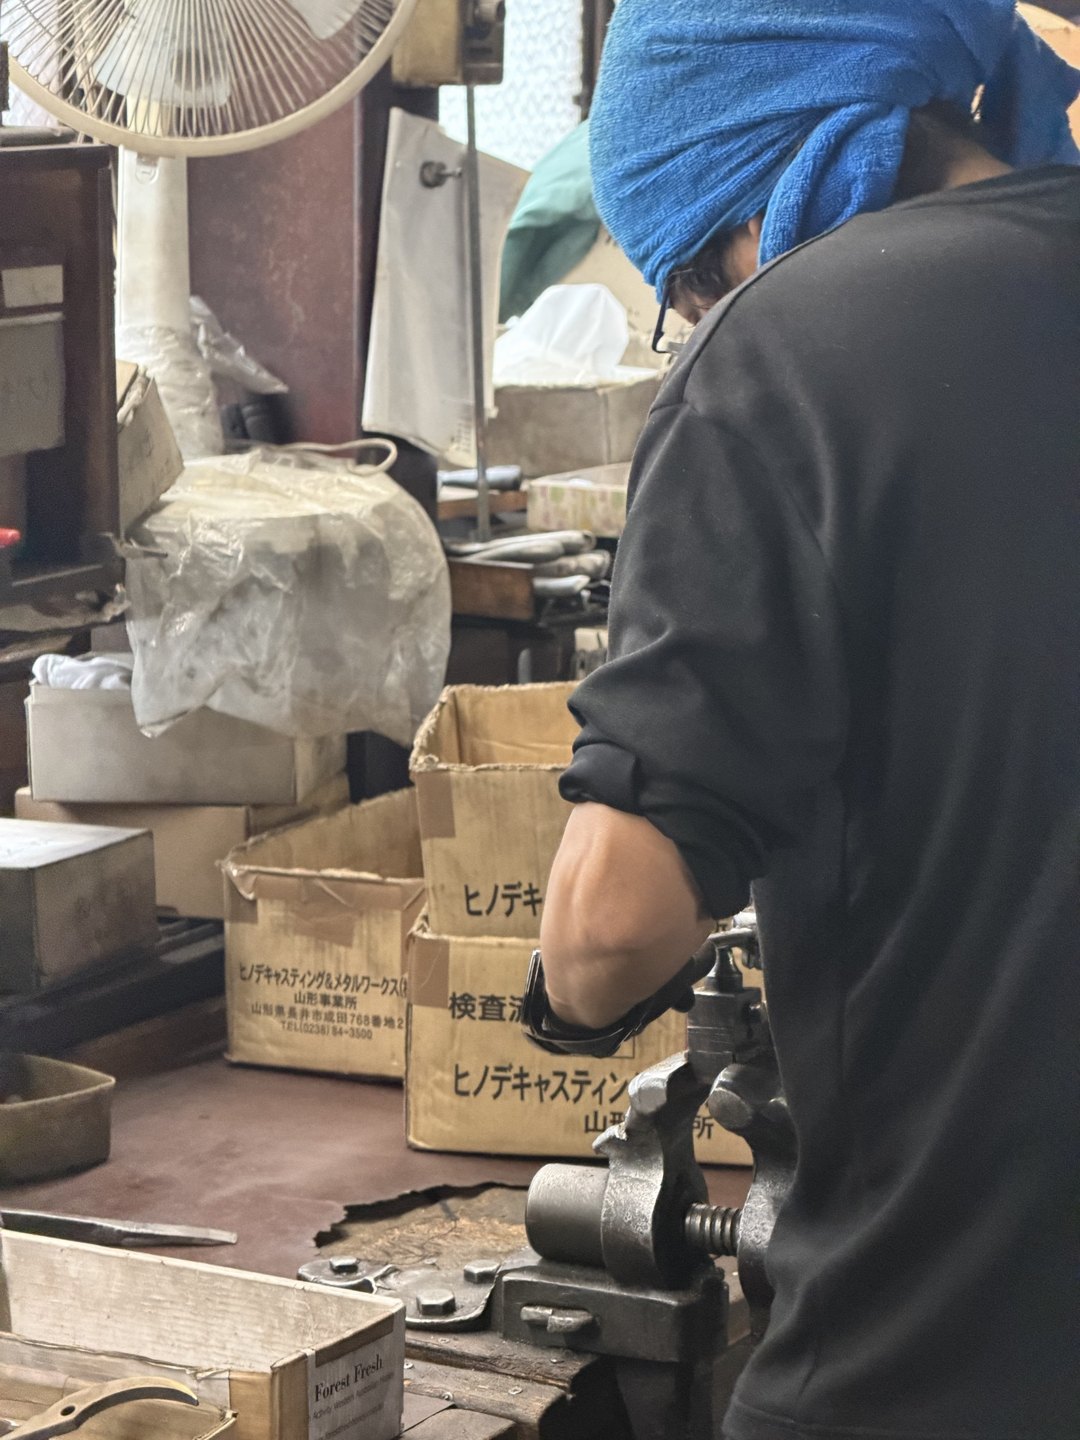
The press had a structure in which the dies were built into a heavy iron frame. Rods and tools were set around the dies.
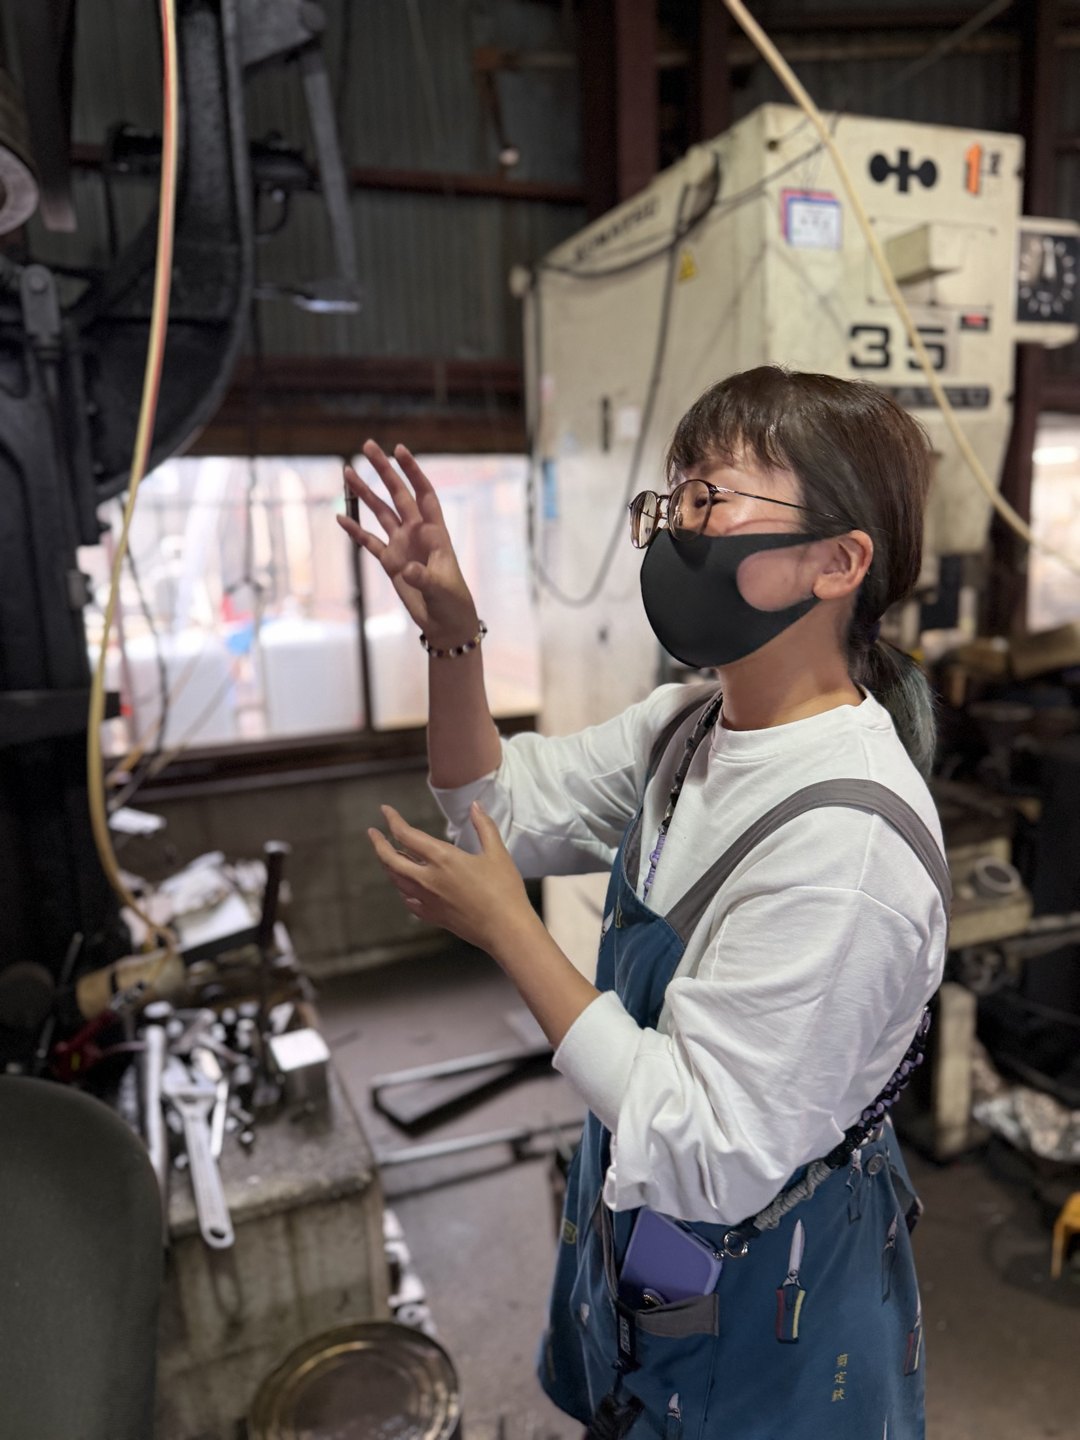
The dies are blocks of metal with the outline of one half of a shear cut into them. After pressing in a striking die, the surplus is punched out by a punching die to leave the shape of the handle frame; that is the division of labour between the company’s “striking dies” and “punching dies”. Making the outline of one half of a shear the same shape, over and over, from a round bar is the role of die forging.
Parts that had been pressed and punched were held in boxes and baskets. There was a basket of handle frames tangled together, plus a box of parts stacked with blade and handle still joined, and you can see at a glance that the shapes are uniform. That the work is not finished by machine alone, as with mass-produced goods, becomes clear in the stages that follow.
Brazing — the hand work that only the Type A keeps
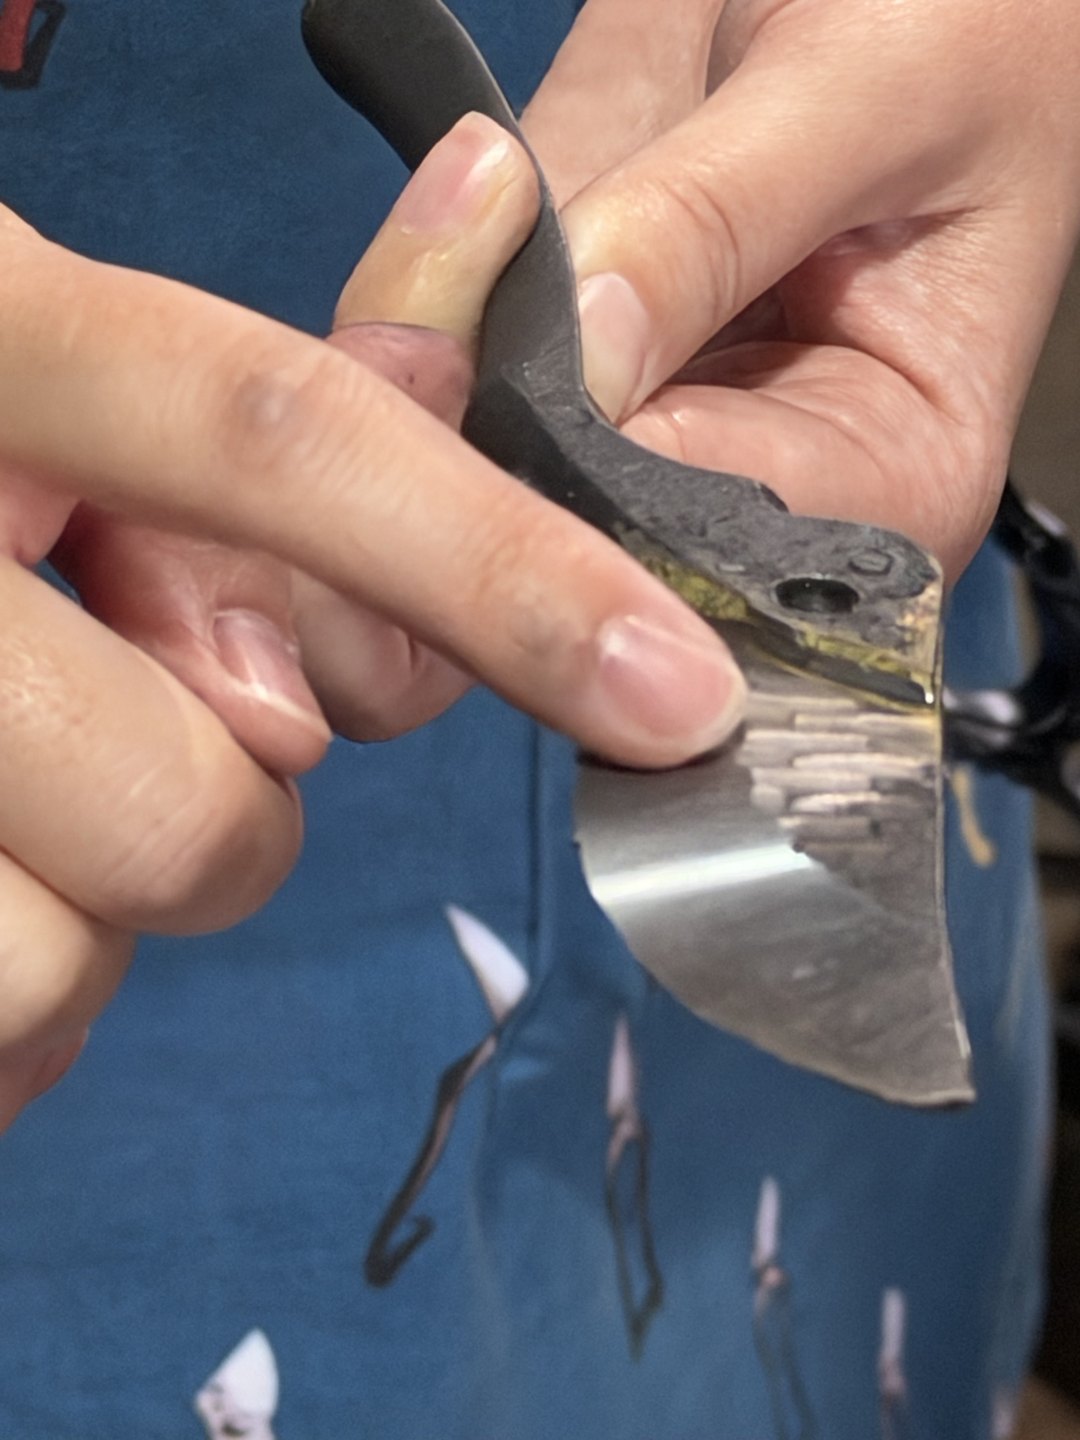
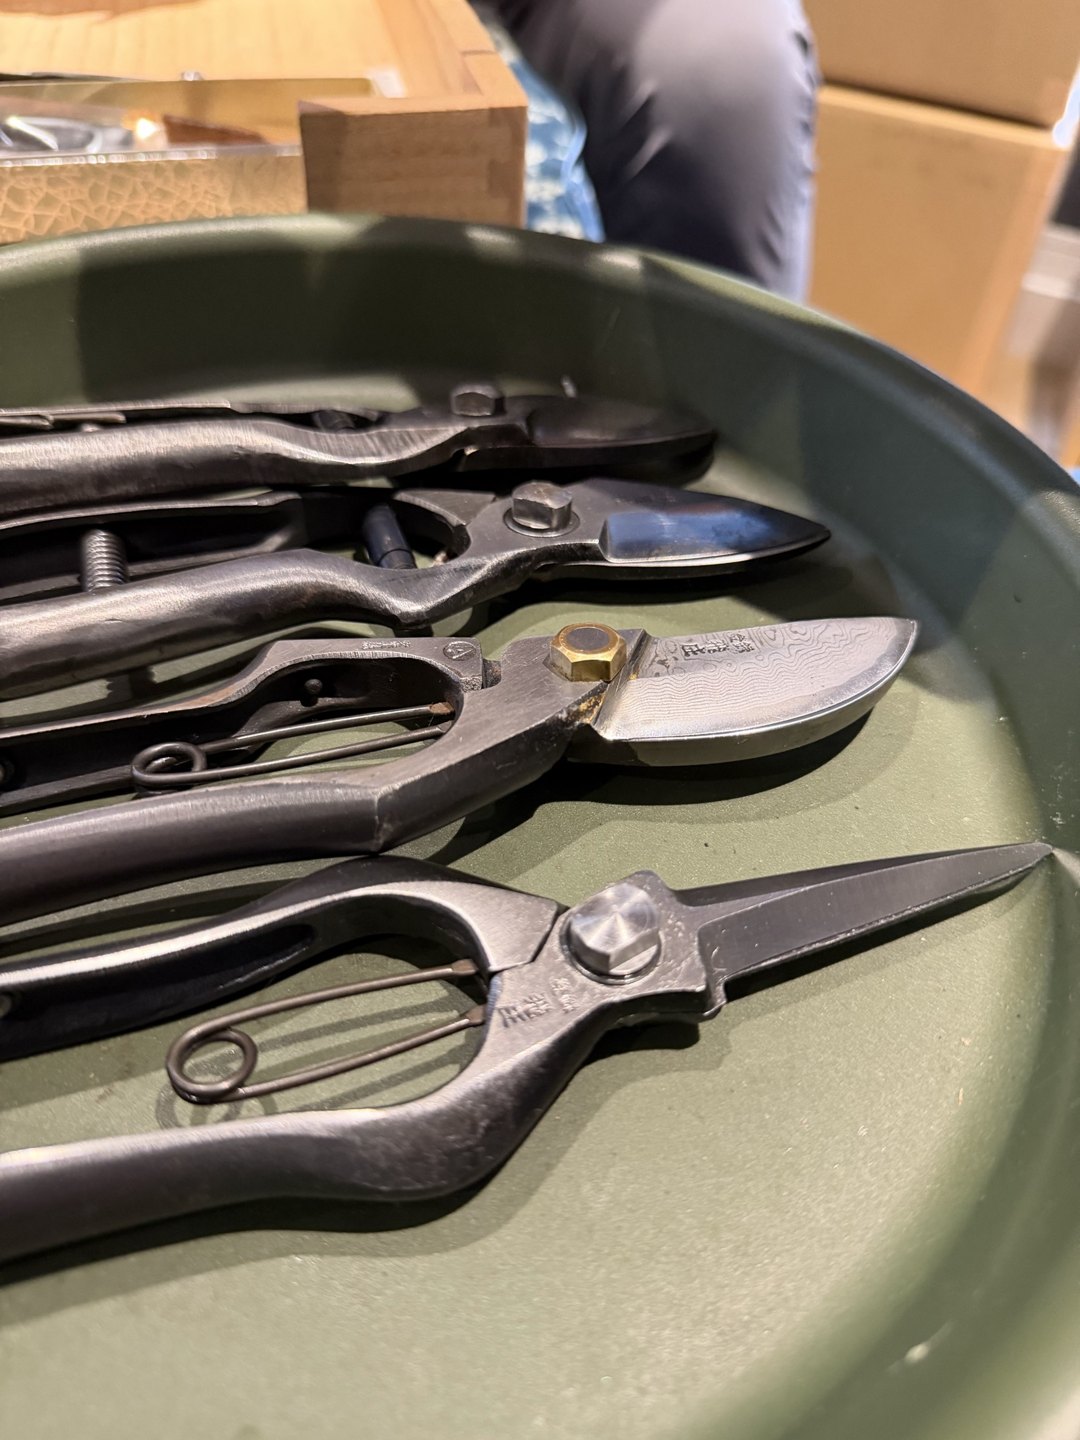
For the Type A, the handle and the blade are made separately and joined afterwards with brass. In the company’s description of the process, this is the work of fitting a blade of a different material (a harder metal than the handle) to the handle: borax powder is sprinkled on, brass is laid on, and the joint is heated again. The page “Characteristics of the pruning-shear types” on Tobisho’s website says that, as far as it knows, only one or two workshops in the whole country, Tobisho among them, still carry on this method.
On the visit I was shown a brazed blade and allowed to hold it. The face of the blade bears hammer marks, and a yellow brass line runs along the joint with the handle. That the colour and texture differ on either side of the yellow line, blade side and handle side, can be read from the photograph too.
Grinding and matching — making the blades a pair
After brazing and forging, the cutting blade and the receiving blade are ground into shape. At this stage the company’s process page explains that “the cutting blade and the receiving blade are made a pair, marked with a mark called ‘aimon’, and balanced pair by pair”. A pair marked in this way can no longer be exchanged. I write about what this means in the next section, “Shears that are complete only as a pair”.
Heat treatment — quenching with oxygen shut out, then tempering to add toughness
Heat treatment is the stage that turns steel into a blade. The company brochure explains that the steel is heated to about 800 °C (1,470 °F) by a traditional method that shuts out oxygen, then quenched, and afterwards tempered at the best temperature for the material. The structure of the steel, hardened by quenching, loosens a little, and the steel gains “toughness” as well as hardness. The balance of hardness and toughness in a blade is set in these two steps.
In one corner of the workshop stood a furnace with an exhaust duct. A chair had been placed in front of the furnace, so you can tell it is where a craftsperson sits and watches the fire. A metal tray sat above the furnace, and it looks built for laying the parts on it and heating them.
Ura-suki and edge grinding — making the cut at the end
The ura-suki and edge-grinding work itself is not in my photographs. Since there is little here that I can show in pictures, I set out the company’s own explanation. It says: “Ura-suki is the work of hollowing the back of the cutting blade into a three-dimensional curve”, and “Edge grinding finishes the edge in a shape like a hamaguri, a bivalve clam.” In the next section, “What the blade shape changes”, I read these two in detail.
Screw fitting and assembly — the hand work that comes last
After edge grinding and finishing, the screw fitting comes last. The company brochure calls the screw fitting “the heart of the cut”. It is the stage that makes the cut of a shear by bringing the cutting blade and the receiving blade together, and it explains that skilled craftspeople adjust each shear one at a time, checking by feel, so that it opens and closes smoothly.
On the board on the bench, half-assembled shears with springs and screws lay in a long row. Shears with springs and screws attached and shears that were still blades only lay on the same board, at different stages. There was also a black box of parts, in which springs, screws and round metal bars were mixed.
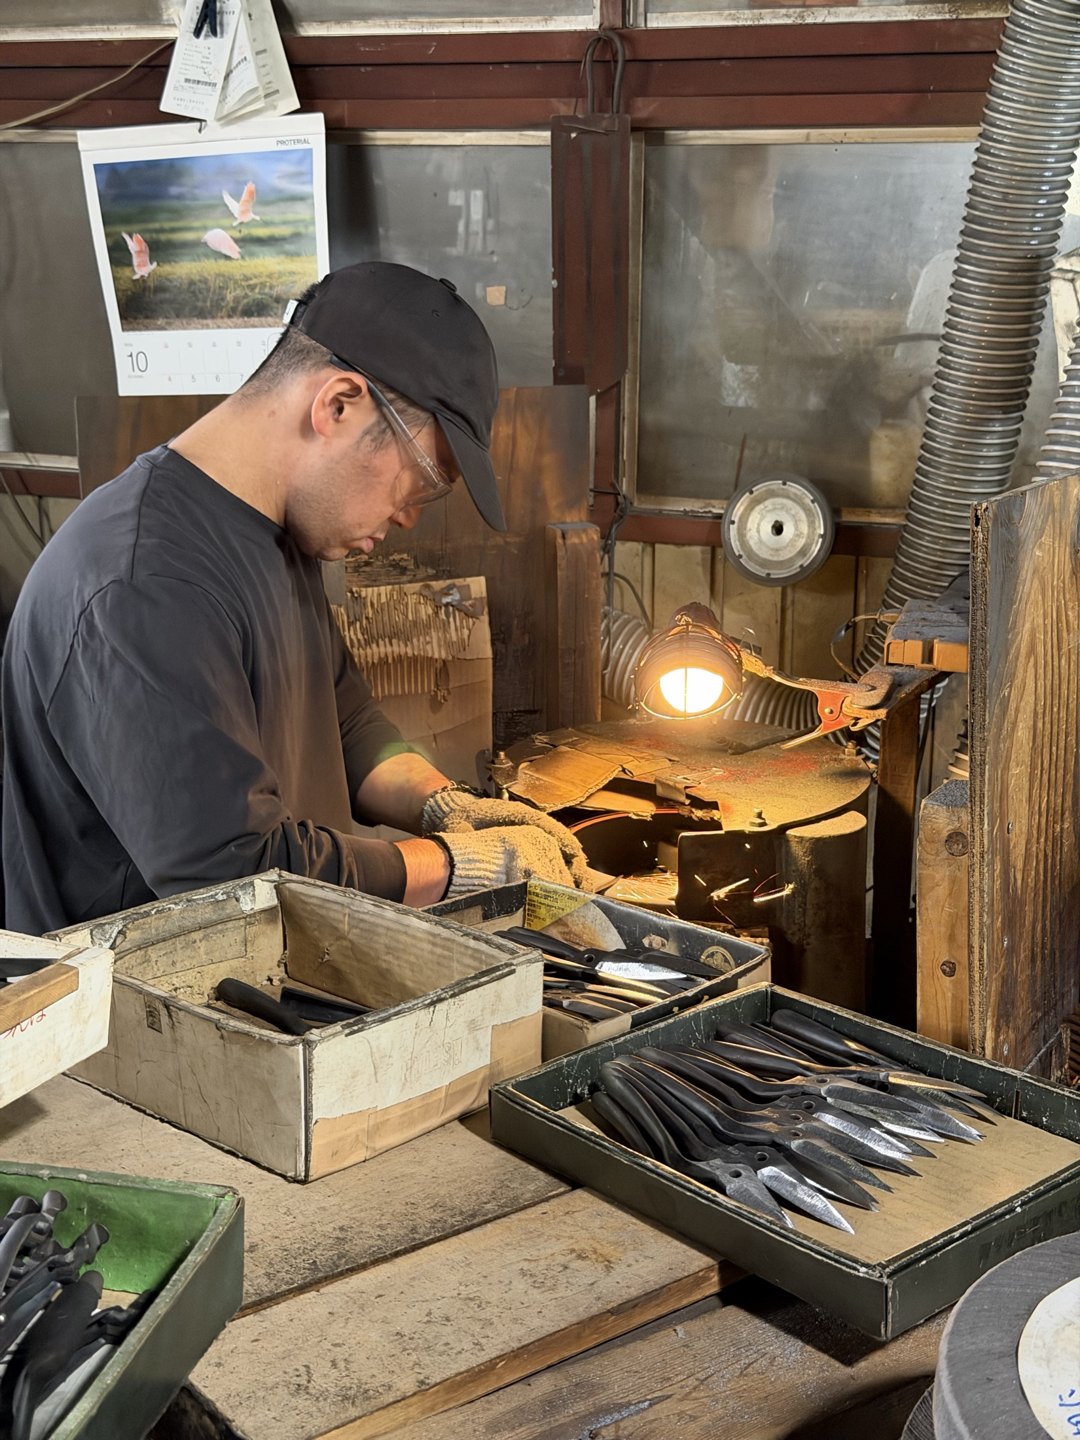
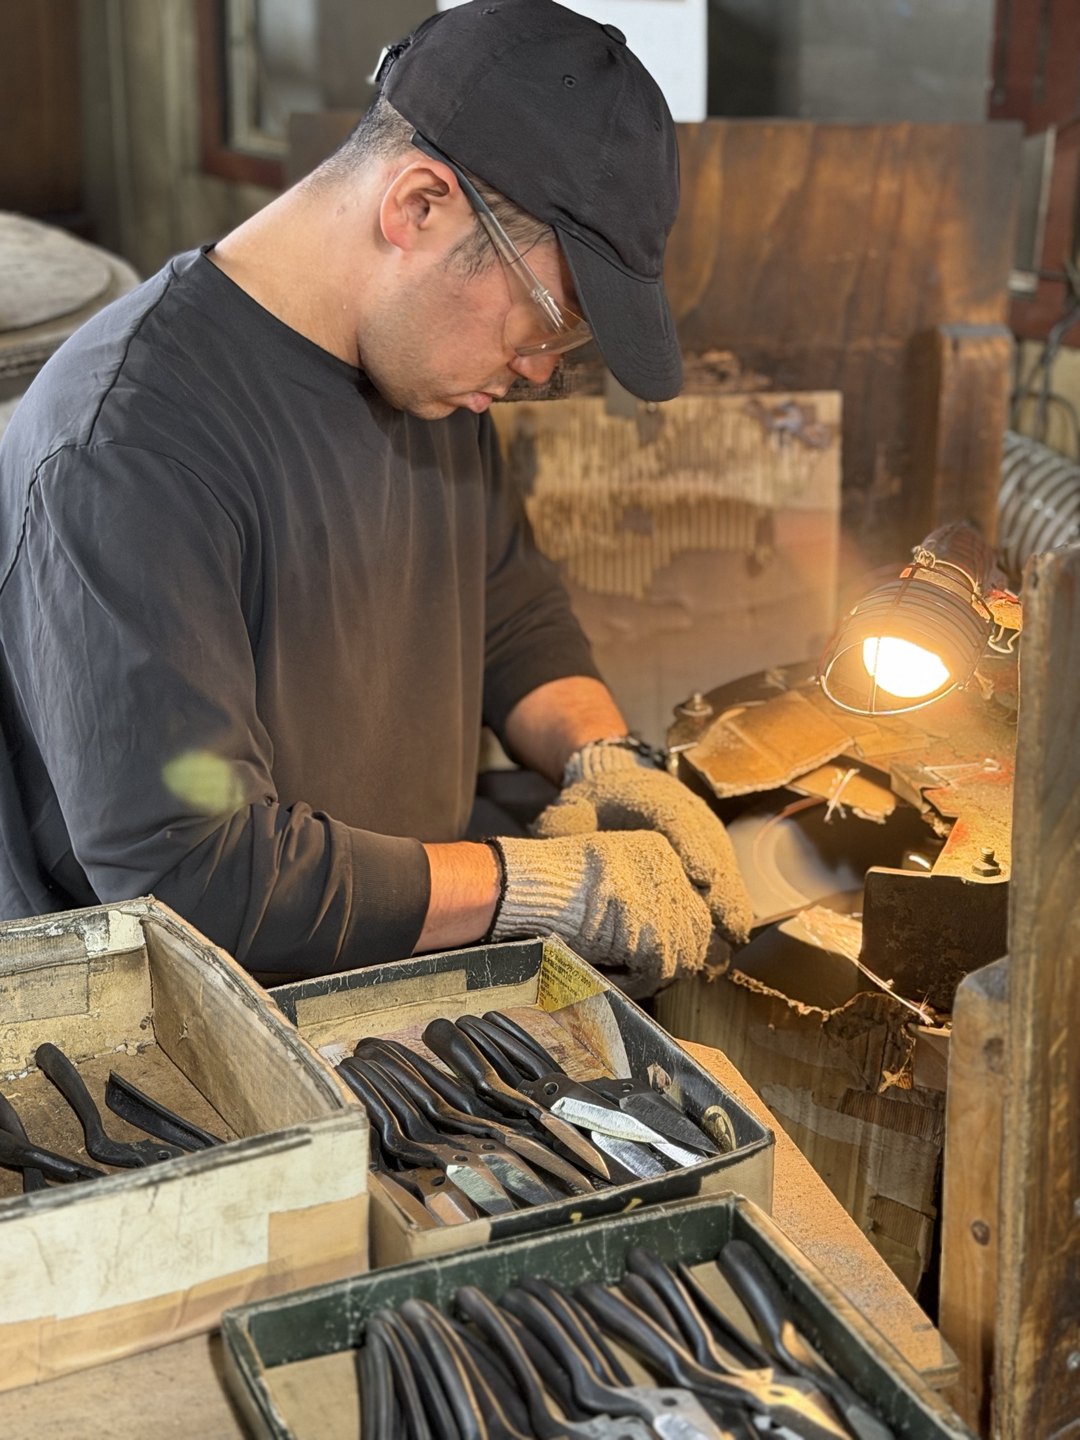
Shears that are complete only as a pair — the aimon mark, and hand work
What I was made to think about most while following the process is that a shear is a tool that is complete only when two blades are paired. The fourth-generation head, Tobizuka Daiki, told DEKIRU!: “It is complete only when two blades are made a pair, so the blades have to work on each other like a married couple.” A kitchen knife is finished with a single blade, but a shear is not. The match between the cutting blade and the receiving blade decides everything about the cut.
The mechanism that preserves this “match” is the “aimon” that appears on the company’s process page. At the grinding stage the cutting blade and the receiving blade are made a pair, marked, and balanced pair by pair. From then on, the two blades that have become a pair are handled on the premise that they are never mixed with another shear’s. The company’s guide to resharpening and repair also says that parts do not always need to be replaced, and that “we will inspect the actual shear and repair it as the craftsman judges best”.
From here comes one caution that bears directly on how you use shears on the job: when you take a shear apart for care, do not swap the blades with those of another shear. Tobisho’s user guide states that even for the same model and the same length, hand-made dimensions vary. It is safest to assume that swapping a pair may change how the cutting blade and the receiving blade meet. If you take shears apart one at a time to clean them, reassemble them one at a time.
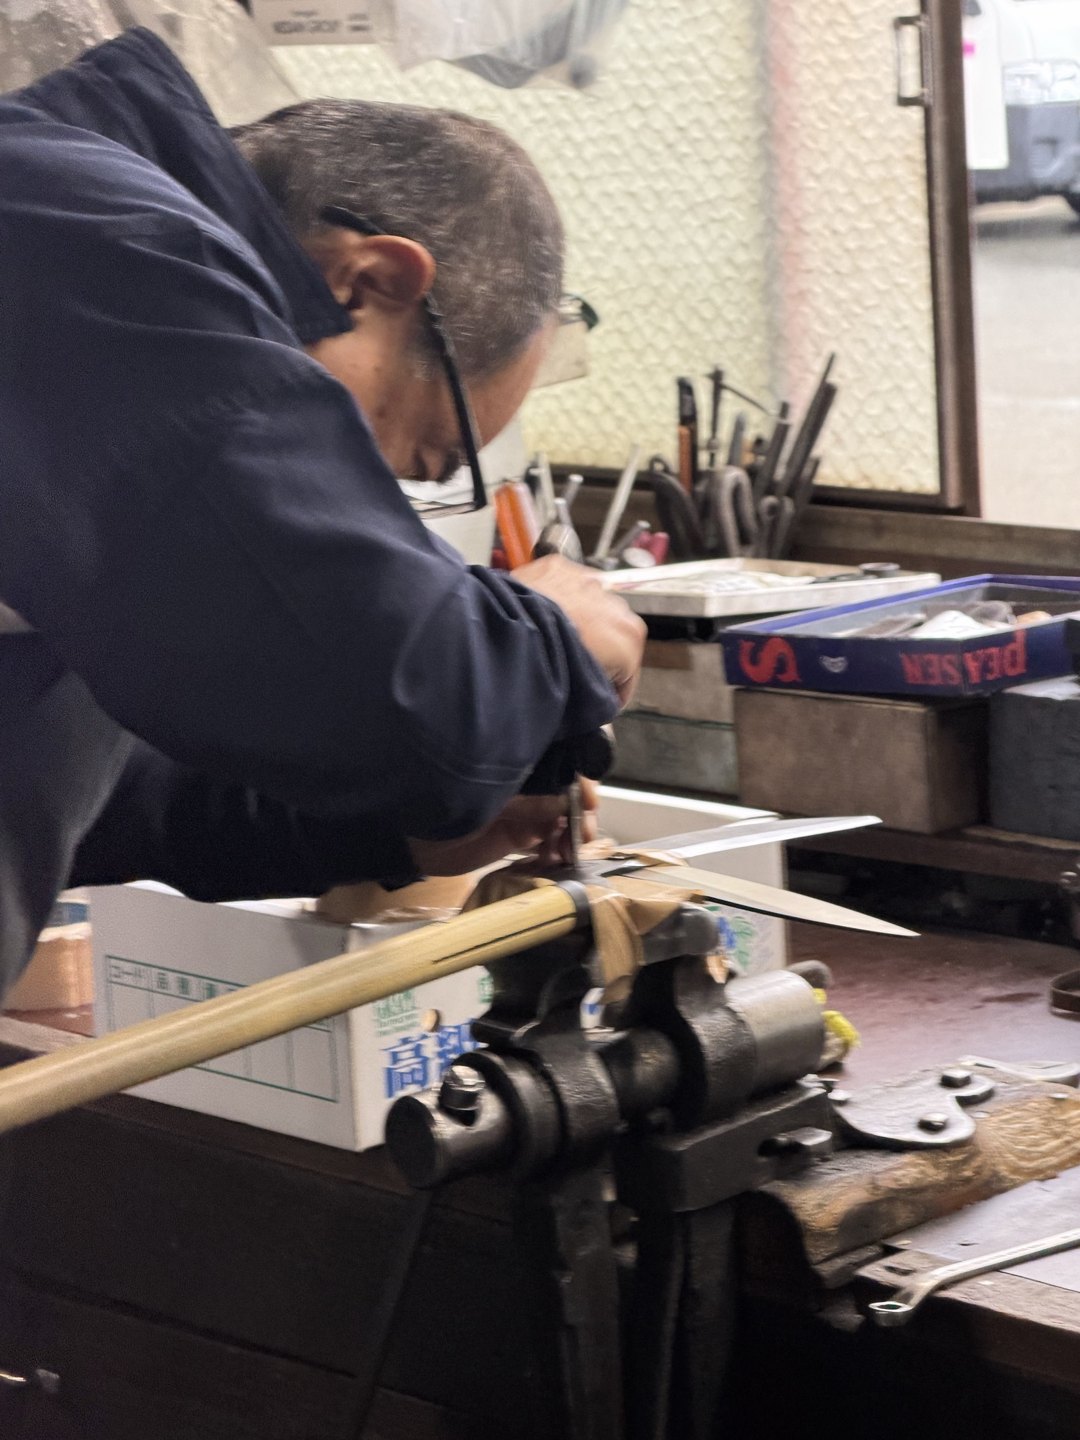
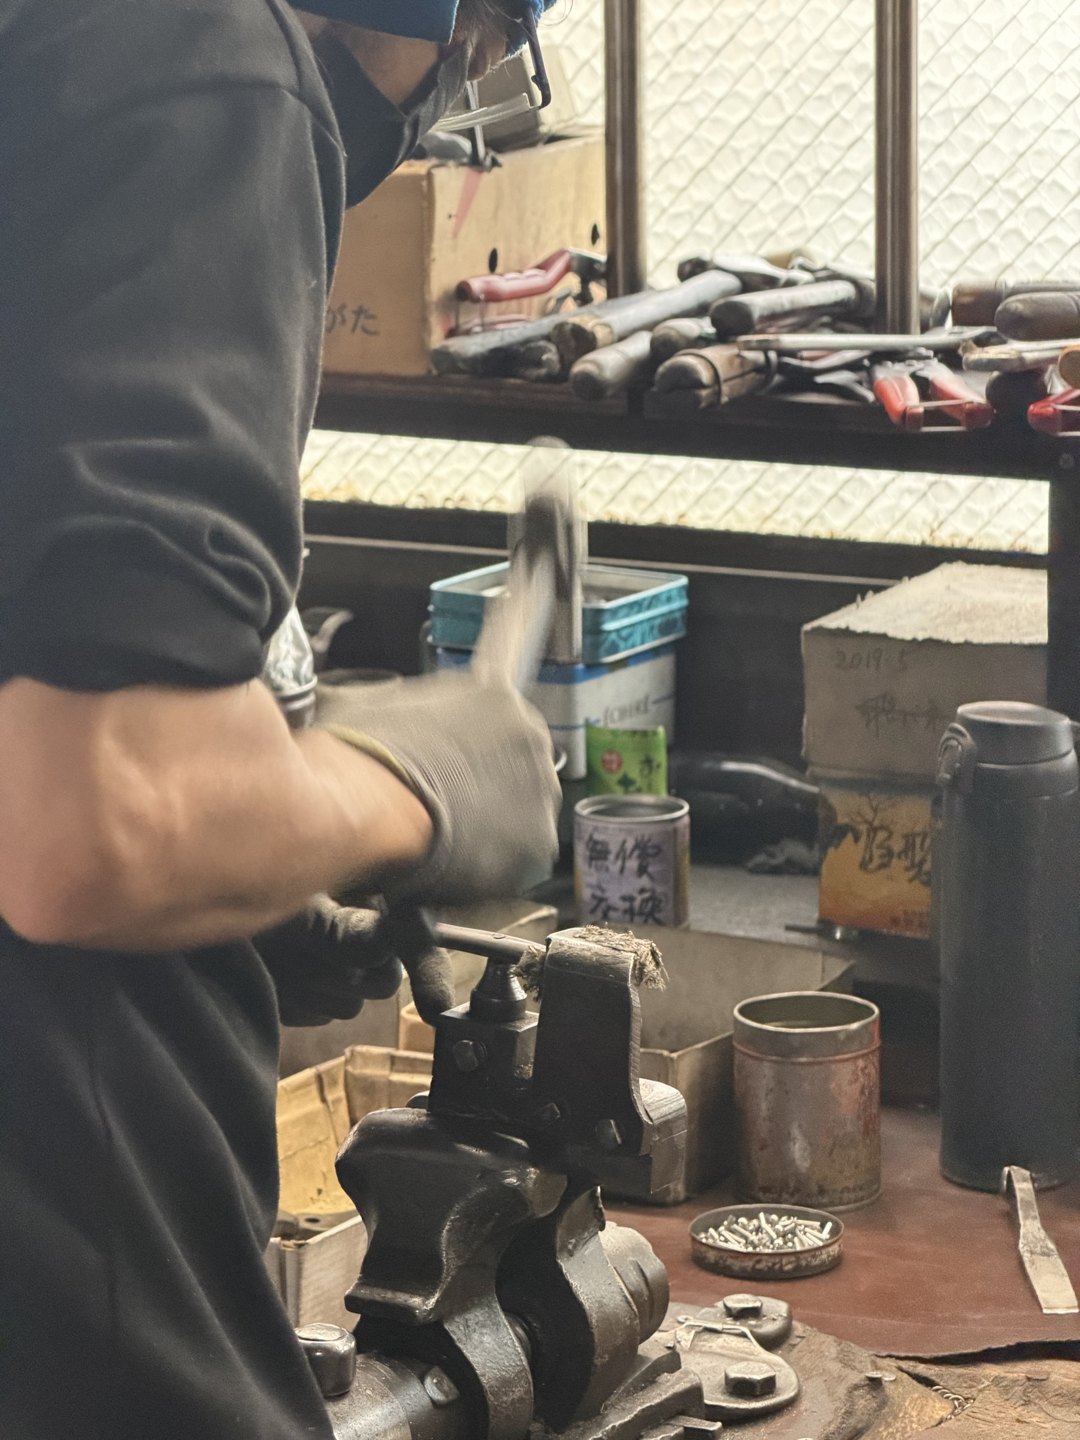
In the end, the final judgement is made by hand. The company brochure says of the screw fitting: “Skilled craftspeople adjust each shear one at a time, checking by feel, so that it opens and closes smoothly.” The company profile also uses the phrase “scientific testing method (in cooperation with the Yamagata Research Institute of Technology)”, which shows that both the craftsperson’s feel and testing are used. However, the website does not explain what the testing involves, so I only give its name here.
What the blade shape changes — ura-suki and the hamaguri edge
Tobisho’s brochure lists five features: forging, traditional heat treatment, the secret ura-suki technique, the hamaguri (clam) edge that is characteristic of Yamagata pruning shears, and the screw fitting with its delicate adjustment. Of these, the ones that bear directly on the user’s hand and the cut face of the branch are ura-suki and the hamaguri edge.
Ura-suki hollows the back of the cutting blade into a three-dimensional curve, and twists the receiving blade so that it slopes lower from the tip. In the company’s explanation, the blades then overlap and travel at a “point” from the base of the blade to the tip, so no bark is left uncut and damage to the cut surface is kept down. The reasoning is that the blades meet at a point, not on a surface, so resistance is small. The Niwa article on the Hiryu also explains that the angle between the advancing blade and the receiving blade was designed by calculating right up to the point where they just touch at the end, which shows that Tobisho puts the way the blades “touch” at the centre of its design.
The hamaguri edge is the finishing of the cutting blade in the shape of a clam. The company says that friction is low when the blade bites into a branch, and that the cut-through and the lasting quality are outstanding. It also writes that the sharpness of the edge angle changes little as the blade is sharpened away (worn down through use), and counts that as one of the features. The claim that the character of the cut does not change each time you sharpen means a great deal on a job where tools are chosen on the premise that they will be resharpened.
Everything up to here is Tobisho’s own explanation of its own products. They are not figures measured by a third party. Still, as a matter of working feel, differences in cutting show up as crushing of the cut face and dragging of the bark. When you cut the same branch with the same force, does the face come away pale and smooth, or is the bark dragged out into a fuzz? When you compare tools, look at these two points.
This shape may also be easy to lose if you sharpen it yourself. The company’s care guide warns against sharpening on a whetstone when removing hardened resin, because the blade is worn away. Ura-suki and the hamaguri edge are shapes that are lost bit by bit if a flat whetstone is run over the whole surface. The reason to send shears to the maker for resharpening is not sentiment or deference, but keeping the shape. This is my own inference from the company’s wording, but I connect it to practice in the later section on resharpening and repair.
The brazed Type A — why keep a method that takes so much work
The Type A differs in construction from the Type B and other fully forged shears, which are made from a single round bar of steel for both blade and handle. The 2022 winter issue of Niwa explains the difference like this. With the Type A, the handle and blade can be made separately, so the blade alone can be made of Aogami (blue-paper) steel. Blue-paper steel cuts superbly because it is hard, but for that reason it takes more work to process and is expensive. Forging the handle too from blue-paper steel would be wasteful and impractical. Because the handle and blade are separate, blue-paper steel can be chosen for the blade alone.
Tobisho’s Type A has a blade of Yasugi blue-paper steel (安来青紙鋼), brazed to the handle. The Type A models in the company’s product brochure (revised June 2025) are the following three.
| Name | Length | Blade material | Description in the company brochure |
|---|---|---|---|
| Brazed Type A | 225 mm (8.9 in) / 200 mm (7.9 in) | Yasugi blue-paper steel | A Yasugi steel version also exists |
| Brazed Type A (Damascus version) | 225 mm / 200 mm | Yasugi blue-paper steel, 16 layers | Stated for the blade steel |
| Forged Type A | 200 mm / 185 mm (7.3 in) | Fully forged | The Type A shape made by full forging |
On the market there are quite a few makers of Type A pruning shears. But the article points out that almost all of them are made by full forging. The makers that keep the original brazed construction are very few, and Tobisho’s own website says that, as far as it knows, only one or two workshops in the whole country keep this method.
Asked why he continues, the fourth-generation head answered DEKIRU! that, in a word, it is “stubbornness” (iji). He also told the magazine that the method needs technical skill, so before anyone noticed, only a handful of makers could still make brazed shears, and he does not want the original method to fail to reach the next generation. Tobisho chooses this labour-intensive construction for the sake of passing the skill on. That reason is not a direct standard for a buyer choosing a tool, but it helps to understand “why is it priced like this?”
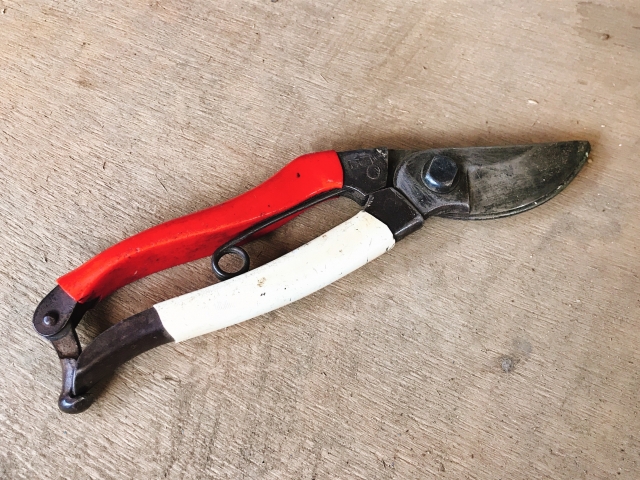
The shape of the Type A has reasons too. The handle bulges out more than on other makers’ Type A, and this is something the previous generation reworked substantially by gathering requests from customers. It was made so that the hand slips less in use, given an ergonomic form, and hollowed out to save weight. Only the 225 mm Type A has no hollowing on the back of the handle, because mulberry wood is hard.
On care and repair, there is a point to watch with the Type A. The same article says that fitting a new blade now costs a price that is not realistic, and that although some people used to keep using a shear by exchanging the blade, a repair is done as with a fully forged shear, by grinding the blade and reshaping it. In other words, even a Type A is a tool to be chosen on the premise of sharpening and continuing to use it, not of replacing the blade. Keeping a blue-paper steel blade on a brazed joint serves the cut, not ease of replacement.
The Hiryu — how a shear whose blades never cross came about
The Hiryu is the most unusual pruning shear in Tobisho’s range. A shear normally cuts with two blades crossing, but on the Hiryu the cutting blade and the receiving blade do not cross. The 2020 spring issue of Niwa tells how it came about.
It began with the news that a blacksmith in Aomori was closing his forge. A customer who used that smith’s shears came to Tobisho and asked whether the same thing could be made. When the third-generation head looked at the shear that had been brought in, he noticed that there was a gap between the cutting blade and the receiving blade, and that the blades never crossed, however far it was closed. Was it that the smith, working by hand, had not managed to fit the blades together? Or was it deliberate? The reason was not clear, but the third-generation head took from it the idea of “a shear whose blades do not cross”. The article also reports that the Hiryu was not made as an extension of the traditional Asuka, the apple-grower’s shear.
The core of the idea is explained as follows. If the blades do not cross, there is no friction between them. Perhaps the load of cutting through can be reduced. Farmers and gardeners prune all day on some days, and even if the load of one squeeze is slight, it builds up over the day. That is why Tobisho took on shear making with a concept opposite to the common sense that a shear cuts “with two crossing blades”.
In an ordinary shear that crosses, the crossing point of the two blades is the cutting point. The Hiryu has no crossing point, so the cutting is done by the cutting blade alone. The cutting blade advances through the branch on its own, at an angle, and at the very end touches the receiving blade lightly so that nothing is left uncut. That is how the article’s diagram explains it. Because the blade advances alone, it is very sharp and finished thin, with mirror-polished faces on both sides. The article also says sap sticks to it less. It explained that the receiving blade supports the branch, and that the gap between the blades and their angles were designed with this whole movement taken into account.
The ingenuity does not stop at the blade. According to the company’s website, the Hiryu has four grease reservoirs inside and uses a left-hand screw of the firm-jaw type, which does away with the nut. A cushion spring is fitted, and it is said to be well received as a measure against tendon strain. The magazine article presents the absence of a nut to hold the rivet on the back as a way of reducing thickness as far as possible. With a left-hand screw, the direction for tightening and for loosening are both the reverse of the usual. Keep this in mind when you take one apart yourself.
On the other hand, because the blade is finished thin, the website states plainly that care is needed when cutting dead wood or thick branches. It is also a design that does not cut string, paper or vinyl easily. It suits people who cut green wood all day, and does not suit jobs where hard branches and dead wood are cut together. The fourth-generation head told the magazine: “As far as the Hiryu goes, it is finished for now.” You can choose this model as one whose design has already settled.
When I picked up a Tobisho shear, the first surprise was the lightness, and the smoothness of the action as I worked it. And the quality of the cut was in a different category.
Trimming shears and bud snips — Tobisho beyond pruning shears
Tobisho is not a maker of pruning shears alone. The company’s product brochure divides its range into three genres: bud snips, pruning shears and trimming shears. Bud snips are described as shears suited to the care of pines and bonsai, to harvesting fruit and vegetables, and to gardening. Trimming shears are introduced as shears suited to pruning that evens up soft branches and foliage and shapes the tree.
Here is a table of the construction and models, based on the pages of the company’s website.
| Genre | Name | Key points of the company’s description |
|---|---|---|
| Bud snips | Pruning bud snips | Suited to pines, bonsai, and harvesting fruit and vegetables |
| Bud snips | Single-edge bud snips | A bud snip with a single-edge blade |
| Bud snips | Double-edge bud snips | Because of the sharp form peculiar to double-edge blades, not suited to pruning branches (including twigs) |
| Trimming shears | One-hand trimming shears (double-edge) | For cutting foliage only |
| Trimming shears | One-hand trimming shears (single-edge) | Using the base of the blade, they can cut somewhat thick branches |
| Trimming shears | One-hand trimming shears (curved-edge) | For pruning such as Chamaecyparis (hinoki cypress dwarf cultivars) |
| Trimming shears | Pine-needle shears | Used mainly for cutting pine needles |
| Trimming shears | Professional trimming shears | Thin blades, lightened. Each pair is marked by hand with “made by Shōjirō, resident of Yamagata” |
What catches the eye on the trimming-shears page is the statement: “Designed for long hours of use, lightened despite the long cutting blade.” A tool with a long blade has been redesigned around weight and grip width. The red-and-yellow grips are explained as easy to see when working outdoors, in daylight and at dusk. It is a practical device that cuts down the effort of dropping a tool and searching for it on site. The professional trimming shears are described this way: “The curve of the blade, the ura-suki and an outstanding fit of the paired blades give them superb cutting performance.” I take up how trimming shears relate to the craft of clipping in Karikomi — The Japanese Art of Cloud Pruning.
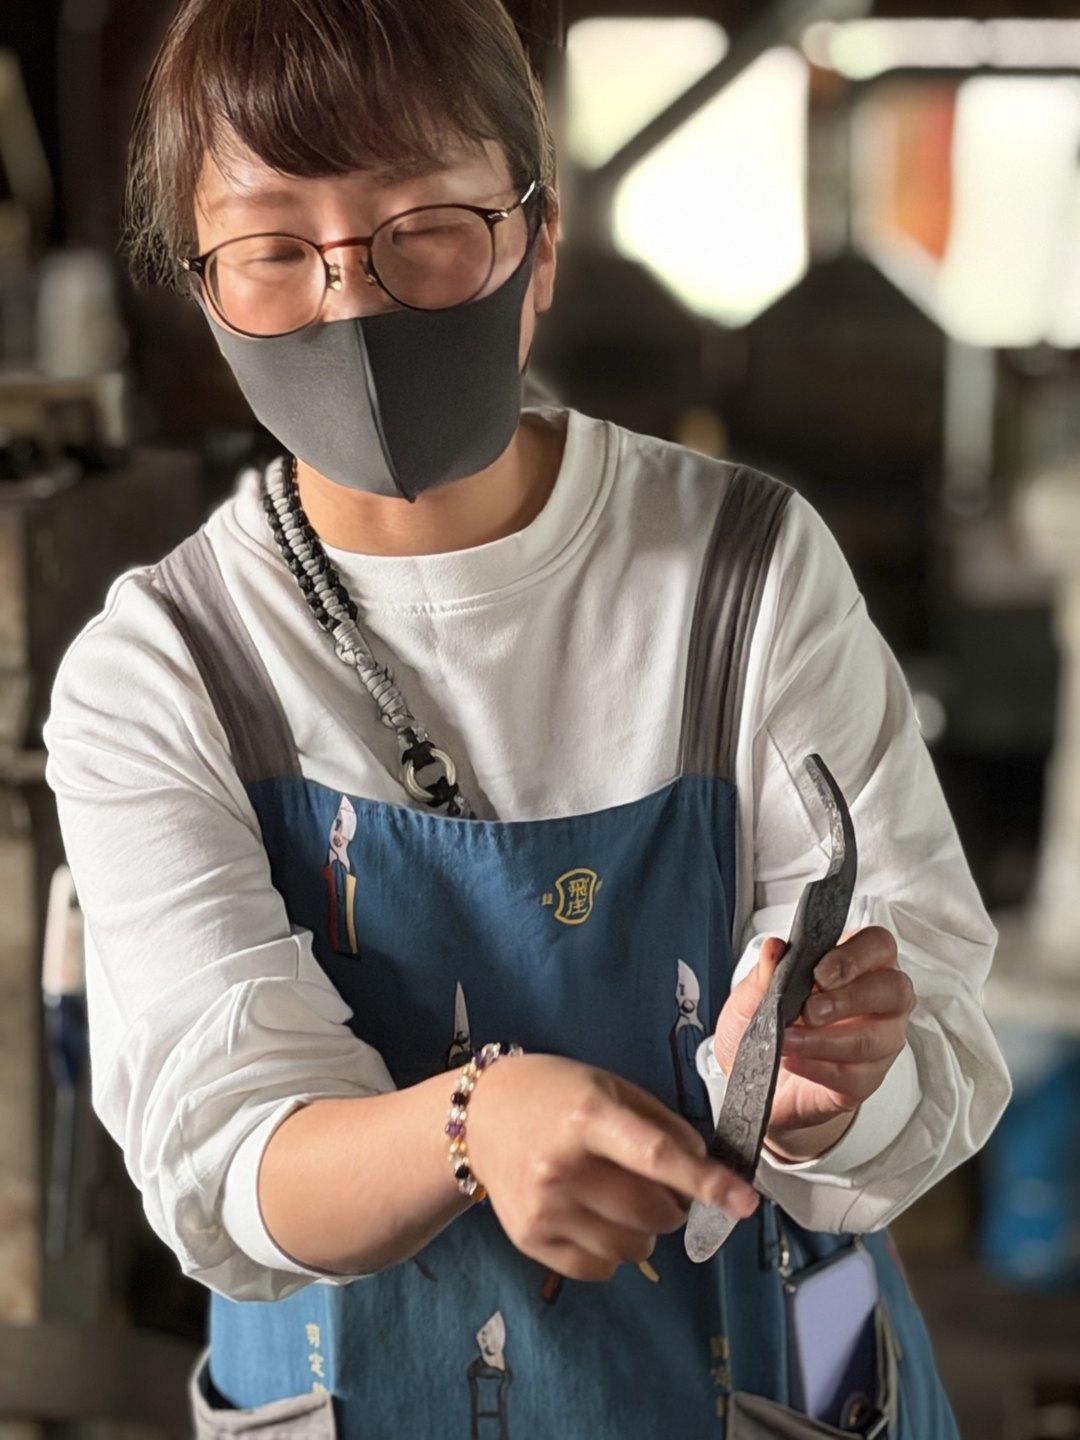
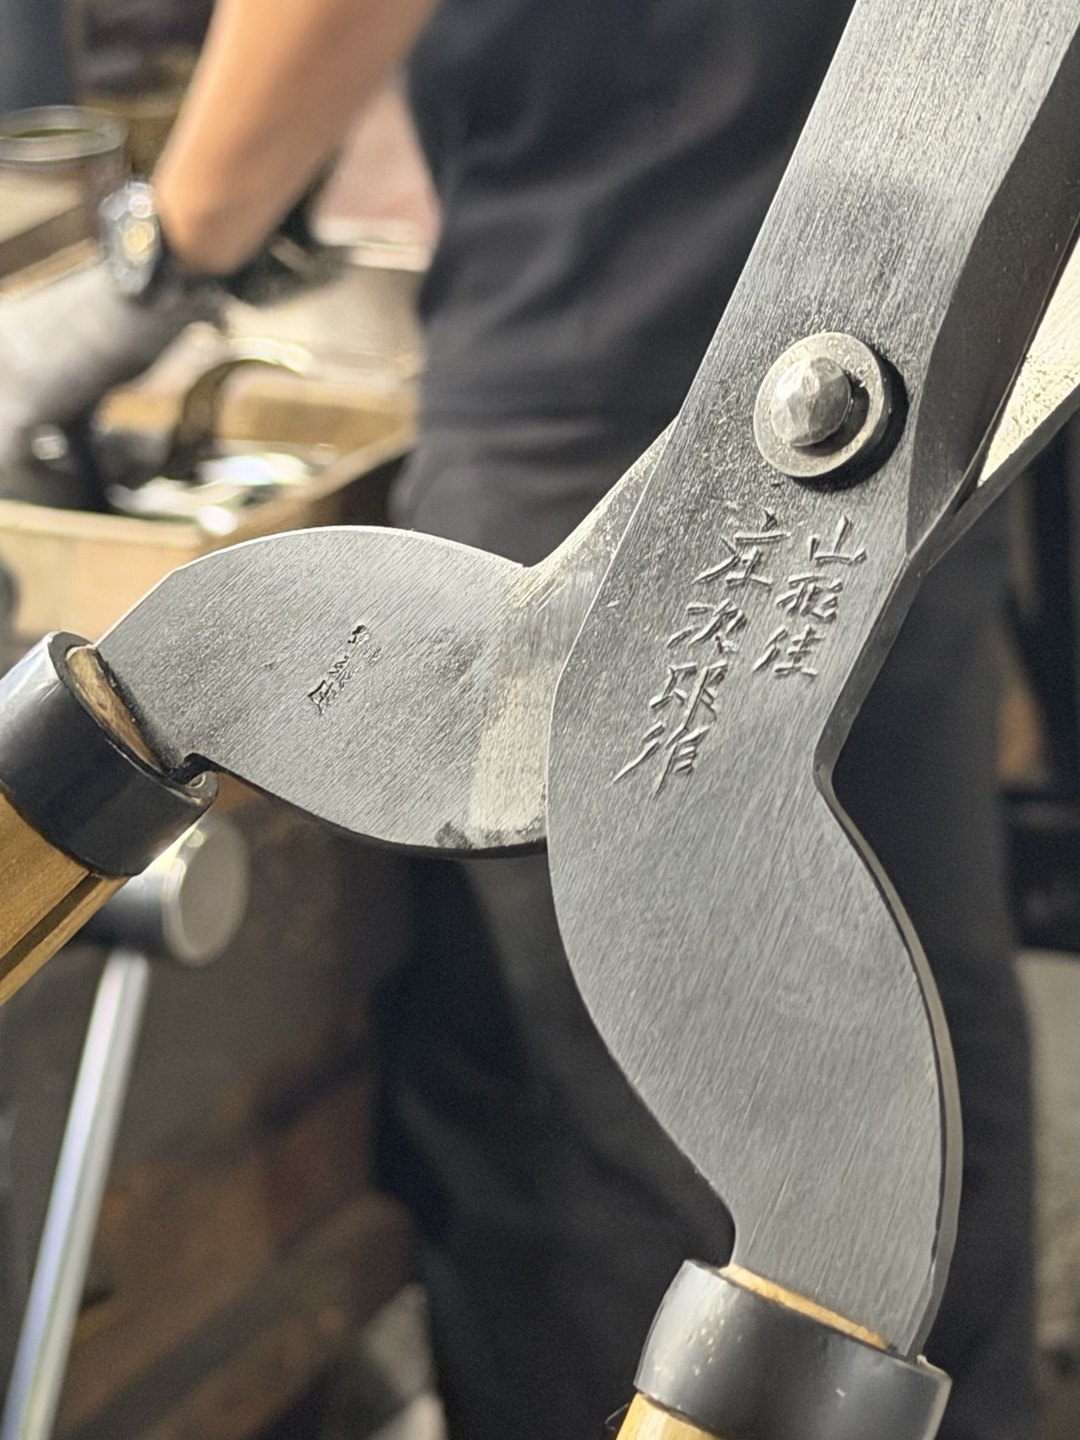
On the visit I was able to see the base of a trimming shear blade up close. A mark is cut into the base of the blade. Cutting a mark by hand is a labour that you rarely see on tools made in bulk in a factory. The company’s website describes the mark on its professional trimming shears as “made by Shōjirō, resident of Yamagata”. I think the mark in the photograph is the same one, but the model name should be checked with Tobisho. If the founder’s name does remain on the mark today, then, like the trade name, the custom of leaving the maker’s name on the tool has continued.
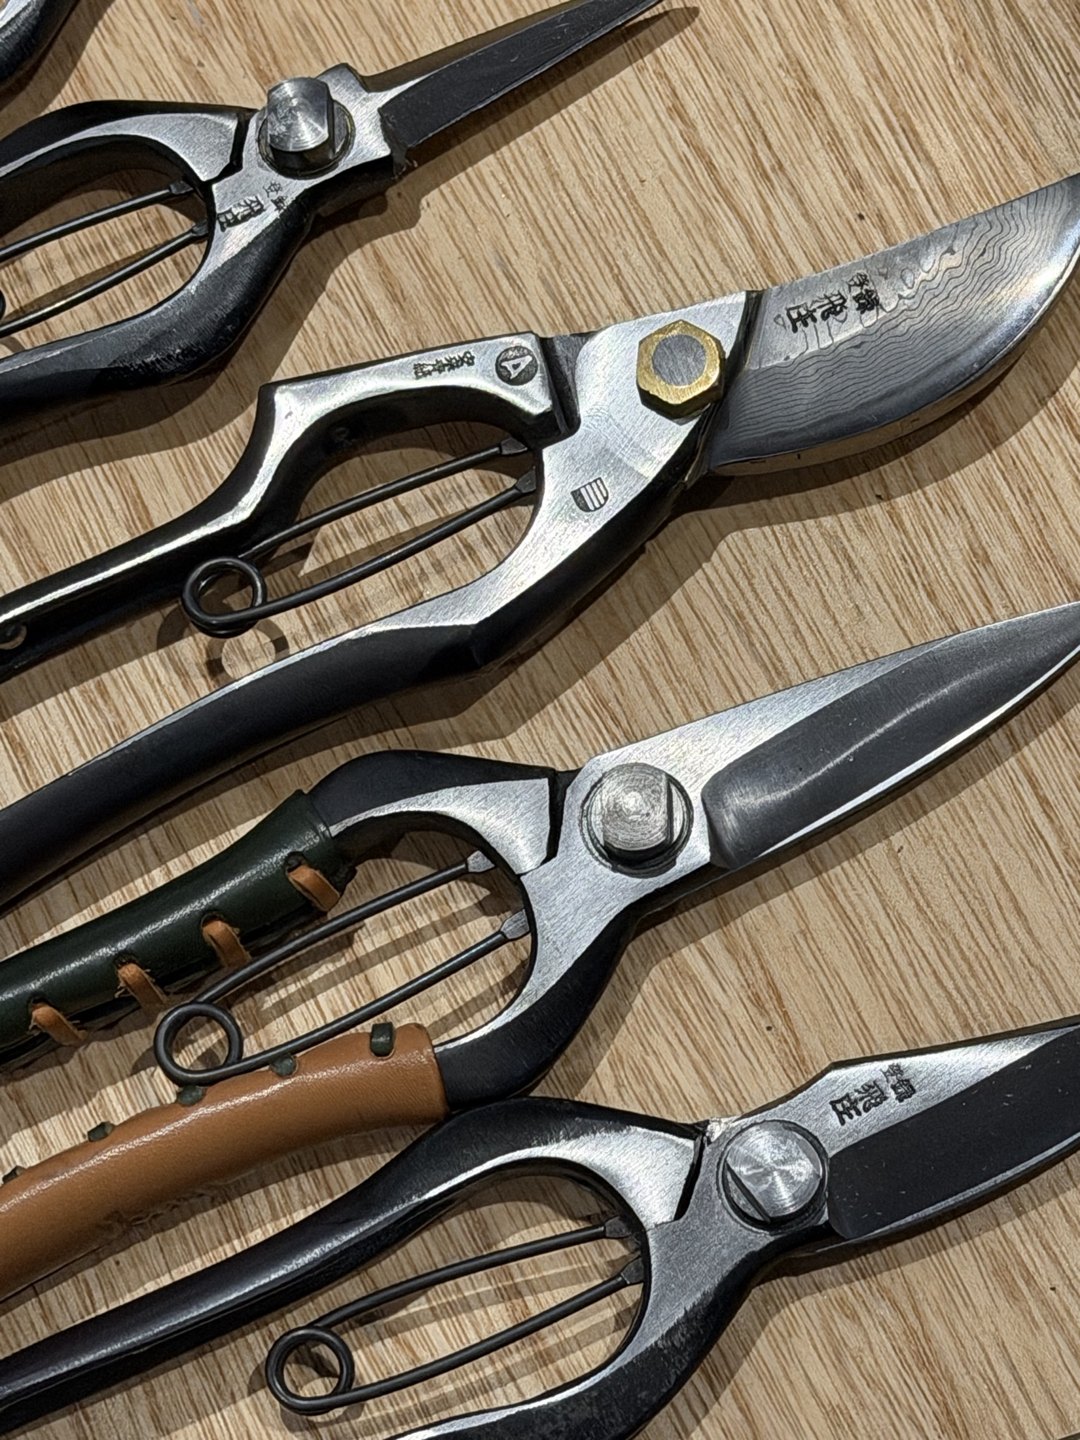
For bud snips, the company’s website gives a warning. Double-edge bud snips, because of the sharp form peculiar to double-edge blades, are not suited to pruning branches (including twigs). Separating the tool for pinching buds from the tool for cutting branches is the first step in avoiding a beginner’s wrong purchase. Bud snips are for pinching pine candles, as in Midori-tsumi — Reading a Pine Tree’s Future in Its Spring Candles, and for bonsai work; pruning shears are for taking off branches. You choose between them by use. For the wider idea of shaping trees with such tools, see Niwaki vs Topiary — What Western Gardens Get Wrong.
The red-and-yellow grips, set beside the black-handled shears in the showroom, can be told apart at a glance. In managing tools on the job, being able to tell the models apart by colour makes a routine that takes little effort.
Choosing a model — by the branch you cut and the hours you hold it
Tobisho’s pruning shears come in seven main models. Based on the brochure (revised June 2025) and the company’s website, I have arranged them in a form in which you can choose “if X, then this model”. The premises are only the features the company states. How a shear feels depends on the size of your hand and on the work, so in the end choose by holding it.
| Model | Build and material | Key points of the company’s description | A candidate if… |
|---|---|---|---|
| SR-1 (200 mm, 7.9 in) / SR-2 (185 mm, 7.3 in) | Fully forged from high-carbon steel | Balances cutting, durability, price and ease of use. Red-and-yellow grips | You are equipping a crew with many pairs and want both price and cutting performance |
| Brazed Type A (225 mm, 8.9 in / 200 mm, 7.9 in) | Yasugi blue-paper steel blade brazed to the handle | A hybrid shear made with hand brazing | You put cutting performance first and want to resharpen it and use it for a long time |
| Forged Type A (200 mm / 185 mm) | Fully forged | The Type A shape made by full forging | You like the Type A shape and are not attached to brazing |
| Type B (200 mm / 180 mm, 7.1 in) | Fully forged | A rounded blade. The basic model used for many years | You are used to the grip of the traditional Type B |
| Hiryu (190 mm, 7.5 in) | Blades that do not cross, thin blade | Low resistance; well received against tendon strain; care needed on dead or thick branches | You cut green wood all day and want to reduce the load on your hand |
| Asuka (195 mm, 7.7 in) | Ura-suki, with a spring to soften shock at the hand | The cut of the ura-suki, plus a spring that eases shock | You want to emphasise the cut face and also soften shock to the hand |
| Tobisho model (195 mm, 7.7 in) | Asymmetric handle, “tilt” in the blade | A model that carries the trade name | You want to choose by the shape of the grip |
There are two things to decide before you choose. One is the thickness and hardness of the branches you mainly cut. On jobs with many hard branches or much dead wood, the thin-bladed Hiryu is unsuited. The other is the number of hours a day you hold the shear. For short work the difference between models is small; for long work the differences in grip and shock add up.
The column “A candidate if…” in this table is my own judgement, assembled from the company’s descriptions. Tobisho is not recommending these. Written out as concrete steps, the way to choose looks like this.
| Step | What to do | Rule of thumb |
|---|---|---|
| 1 | Recall the branches you mainly cut (green or dead, and how thick) | If dead or thick branches predominate, drop the thin-bladed models from the list and plan to use a saw |
| 2 | Estimate the hours of use in a day | For long hours, a model with a feature that lightens the load on the hand (Hiryu, Asuka) is worth trying |
| 3 | Decide how you will handle resharpening | If you will send them to the maker, work out the number of pairs allowing for the days until they come back |
| 4 | Hold it in your hand | Check the hand size and ease of holding for the person who will actually use it |
When you equip an organisation with shears, the key to running them is to narrow the range to one model. Tobisho’s user guide states that, because they are hand-made, dimensions differ slightly even within a model. When people change over, the previous person’s shear tends not to suit the next hand and is left unused. If you standardise the model and the length, you can also send resharpening in a single batch.
Resharpening and repair — the option of sending them to the maker
Tobisho officially accepts resharpening and repair. It accepts shears bought from the company, of course, and shears bought elsewhere too, according to the company’s guide. The fourth-generation head told DEKIRU! that because the shears are made sturdy, repairs are not very frequent, and what is most often asked for is resharpening.
The charges apply to items postmarked on or after 1 September 2026, as in the table below (excluding tax, base price). For other makers’ pruning shears, ¥500 is added to Tobisho’s price. Trimming shears must be discussed beforehand, and the price varies with whether they need to be taken apart. Parts do not always need replacing, and the craftsperson decides after looking at the actual shear.
| Item | Tobisho-made | Added charge and notes |
|---|---|---|
| Pruning shears (SR, A, B, double-edge pruning, Asuka) | ¥1,700 | Other makers’ +¥500, left-handed +¥300, curved-blade +¥200 |
| Bud snips (pruning bud snips, double-edge bud snips, single-edge bud snips) | ¥1,700 | No added charge for other makers’ bud snips is stated in the table |
| Hiryu | ¥2,300 | No added charge for other makers’ shears is stated in the table |
| One-hand trimming shears, pine-needle shears | ¥2,000 | — |
| Trimming shears | From ¥3,500 | Discuss beforehand. Other makers’ +¥1,000 |
| Parts (wire spring, coil spring, screw, leather, coloured grip) | ¥150–400 | The craftsperson decides after looking at the shear |
The steps for making a request follow the company’s guide, as in the table below.
| Step | What to do | Key points of the company’s guide |
|---|---|---|
| 1 | Pack the shear | It is very dangerous if the blades open in transit. Put it in an outer box or cover the blade tips with card. The leather case is not returned with the shear, so keep it by you |
| 2 | Send it | Address it to Tobisho on Hinoki-chō, Yamagata. Direct purchasers attach the resharpening voucher and send it by Letter Pack |
| 3 | Settle the charge | For other makers’ shears or without a voucher, enclose a postal transfer form for the repair charge and the return postage. Cash on delivery is also possible (tell the company beforehand) |
| 4 | Wait | Normally about two weeks of business days from arrival. In autumn and winter (about November to March) it is busy, so about two to three weeks. Trimming shears take longer |
As a rule of thumb, send them in before November. The company says that it normally takes about two weeks of business days from arrival, and about two to three weeks in autumn and winter (about November to March), when requests are very busy. If you send them off before the busy season on your job begins, you avoid running short of shears. If you have several, sending them off one at a time at staggered dates keeps your hand stocked.
You can also care for them yourself. The company’s guide says to break in new shears by cutting from the thinnest branches upward, and to cut thick branches by setting the shear at a 45-degree angle to the branch and turning it slowly through. Day to day, apply machine oil or rust inhibitor in a thin film, and put one drop of oil at the screw. It warns that using a whetstone to remove hardened resin wears the blade away, so avoid it, and that cooking oil promotes oxidation, so do not use it.
Running the tools on the job — how many pairs, and how to rotate them
From here, drawing on the visit and the company’s guide, I think about how to run your tools. This is not Tobisho’s explanation but my own judgement. A shear begins its working life on the day you buy it. If you will use shears on the premise of asking the maker to resharpen them, you need to decide first how many pairs must be at hand at one time for the job not to stop.
The basic idea is the number of users, plus a stand-in while shears are out for repair. The company’s guideline is about two weeks of business days from arrival, and two to three weeks in autumn and winter. If the number of pairs simply equals the number of people on site, you will have no tool to lend the moment you send one off for resharpening. If you always keep one or two pairs as spares beyond the headcount, you can send them off in turn and keep going.
| Item to manage | What to record | Reason |
|---|---|---|
| Model and length | Model name (example: brazed Type A 200 mm), where bought, date bought | Resharpening charges and parts differ by model (resharpening the Hiryu is priced higher) |
| User | The regular user and the stand-in | If hand sizes differ, a model may suit one person and not another |
| Resharpening history | Date sent, date returned, whether parts were replaced | The days until return are a guide for when to send them next |
| Care | The day oil was applied, the day resin was removed | To remember the oil at the screw that the company recommends |
| Branches cut | Whether hard branches or dead wood were cut | Because thin-bladed models restrict the branches you should cut |
“Resharpening the Hiryu is priced higher” in the table can be read from the figures in the repair price list (¥2,300 against ¥1,700). The company does not give a reason, but with blades that do not cross, the same adjustment as for other models may not be enough.
There is also an idea for when people change over. Write the model and the standard way of using it into your handover documents. Turn the company’s warnings into the language of your site and pass them on: this model is not for dead wood, this model is broken in from thin branches. Making sure that handling of the tool does not change drastically when the people change is the key to using an expensive tool for a long time.
On cut quality, and on care and disinfection of shears, I wrote about them in a 2019 visit report on Tobisho on my company’s Japanese blog. I do not repeat that here; this article is limited to how the shears are made, how to choose them, and how to run them.
What to check before you buy or order
Tobisho’s shears are made on the premise that each one is hand made. The company’s top page also says, “each piece is hand finished as a basic rule”. There are four things to check before buying.
| What to check | Whom to ask, and the wording of the question |
|---|---|
| Model and length | Ask the shop or the company’s inquiry desk: “The branches I mainly cut are about this thick, and I use the shear about this many hours a day. Which model suits?” |
| Stock and individual differences | Stock is shared with the shop, and hand-made products vary slightly, so if you want to equip a crew with matching pairs, ask beforehand |
| Return terms | In the user guide, returns and exchanges for the customer’s convenience are not accepted. Defects must be reported within 7 days of arrival |
| Range of shipping | In the user guide, shipping is within Japan only |
What I have taken up here is “asking before you buy”. If you choose the wrong product, the fact that you cannot return it weighs heavily. For a tool you cannot return, it is the quality of your questions before you buy that decides the outcome, and it is reassuring to think of it that way.
One more thing is easy to overlook: after you buy, confirm what to send where, and how much it costs. The resharpening charges and times are on the company’s website, but the wording is sometimes updated. The charges in this article were confirmed on 24 October 2026, so check the official page again before you make a request. If you are outside Japan, ask Tobisho directly how it handles overseas orders and repairs.
Also, when you change the tightness of the screw yourself, do so within a range you can put back. The screw fitting is the heart of the cut; too tight makes the shear heavy to move, and too loose lets the blades fail to bite. If in doubt, it is safer to have the maker adjust it.
Yamagata shears are not only Tobisho — a shop we dropped into the same day
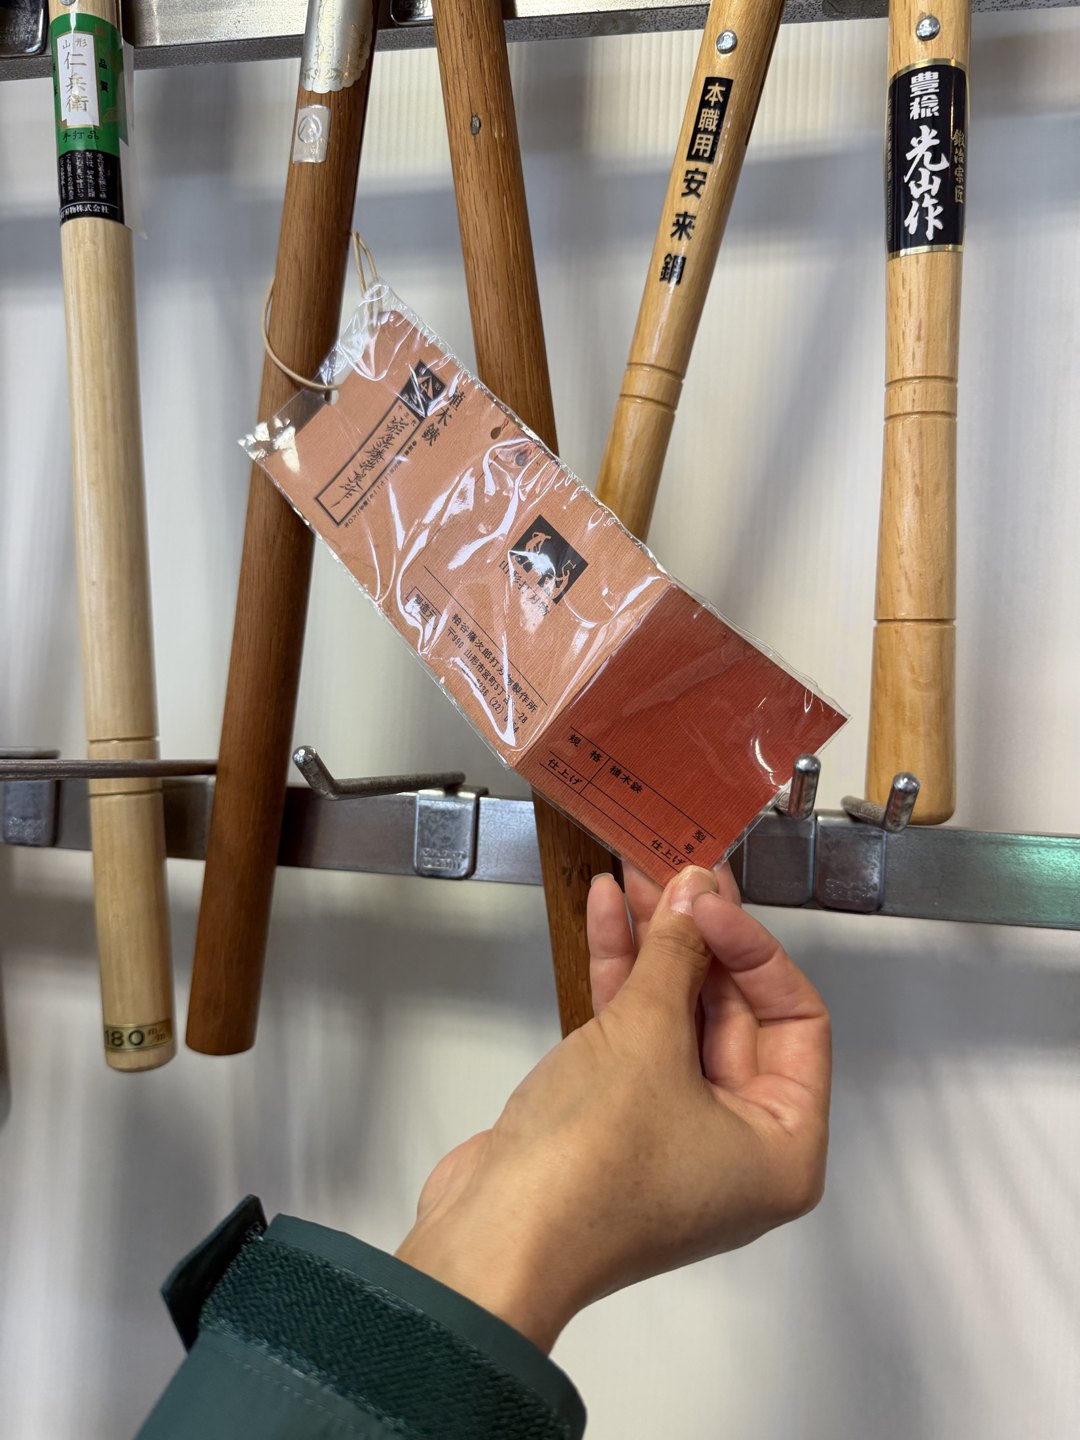
After Tobisho, we dropped into an edge-tool shop in Yamagata City to look at the products on sale. On the front of the building, in gold letters, is the name “Tohoku Uchihamono Co., Ltd.” On the walls inside, trimming shears and pruning shears with wooden handles hung handle-up, and packaged pruning shears were lined up on the lower shelves.

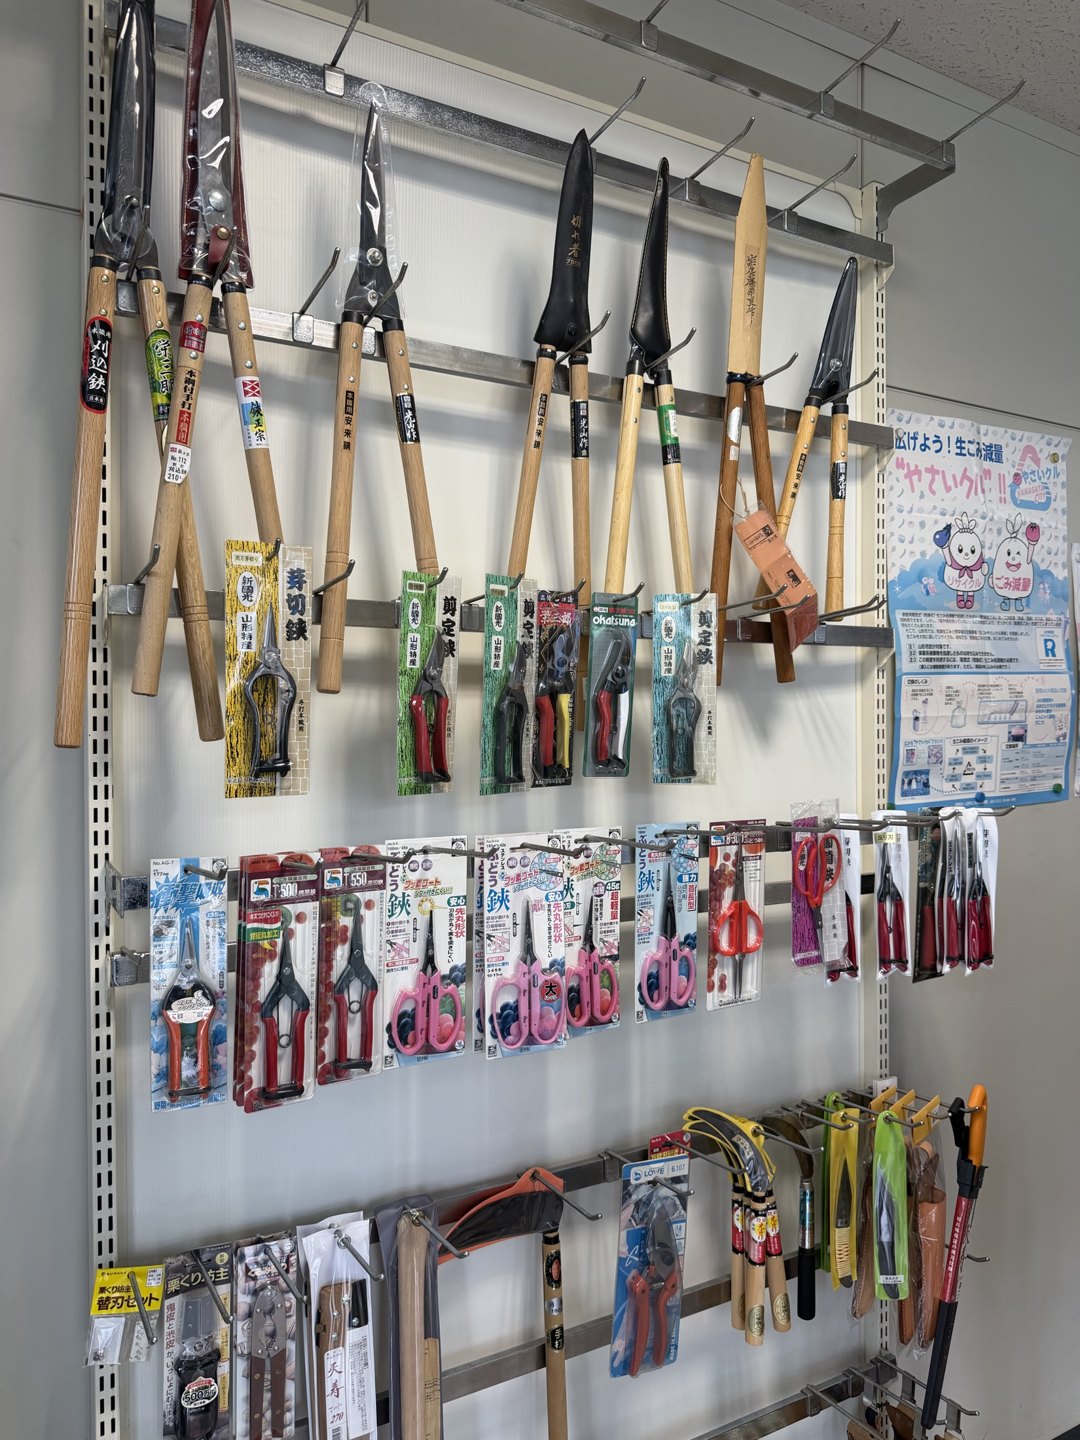
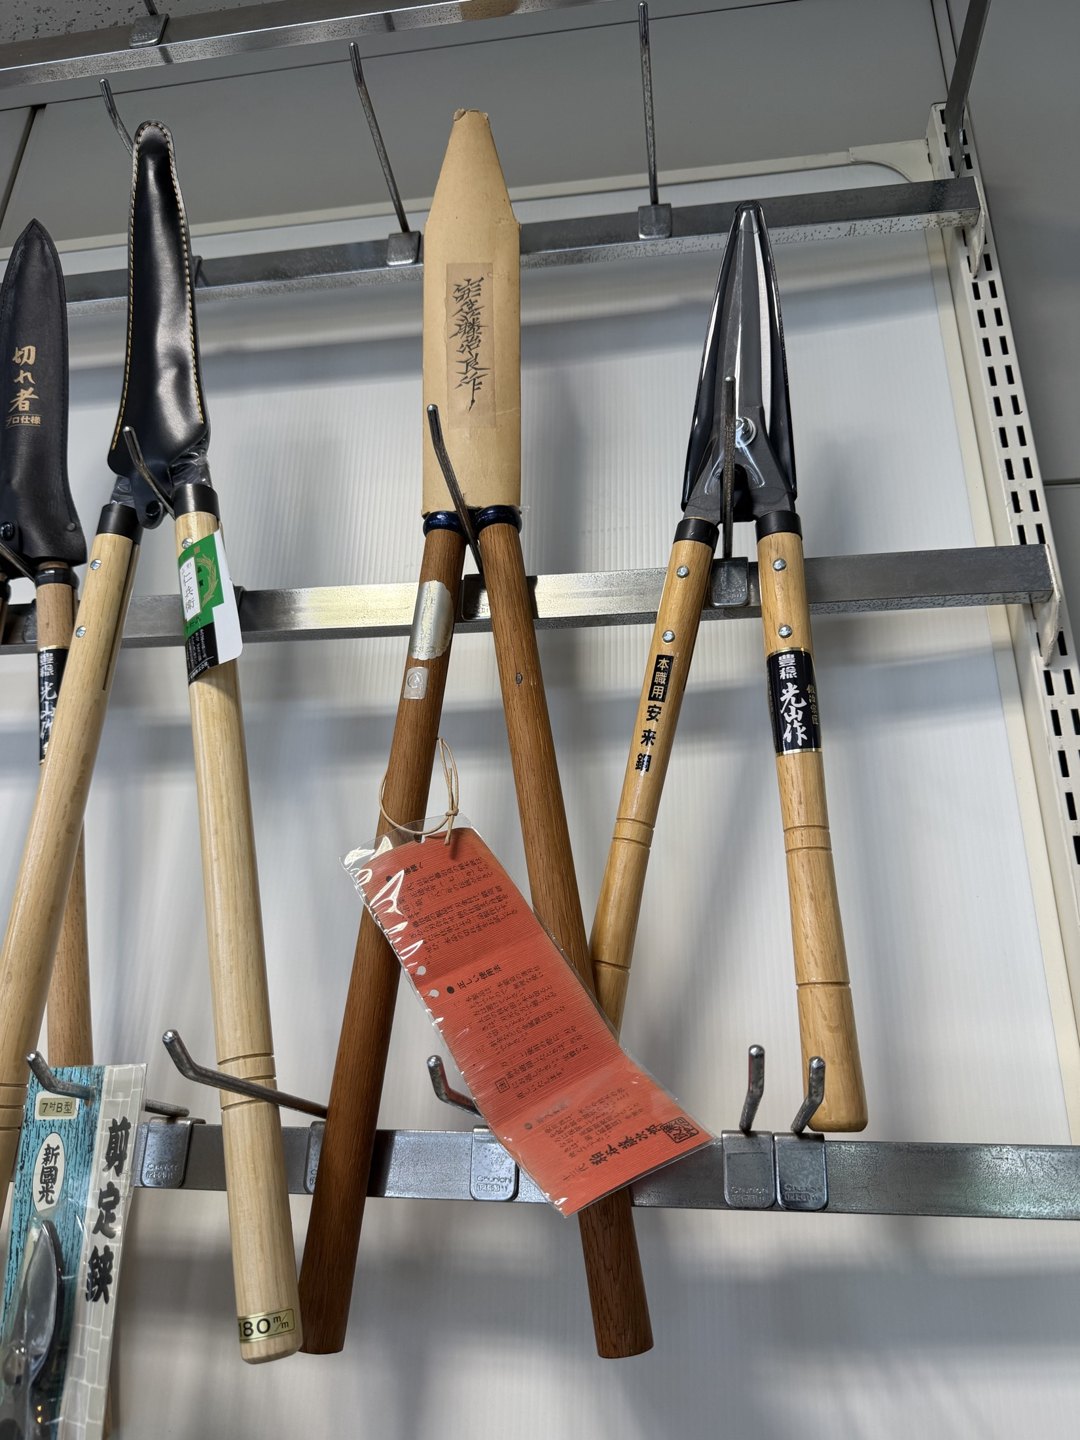
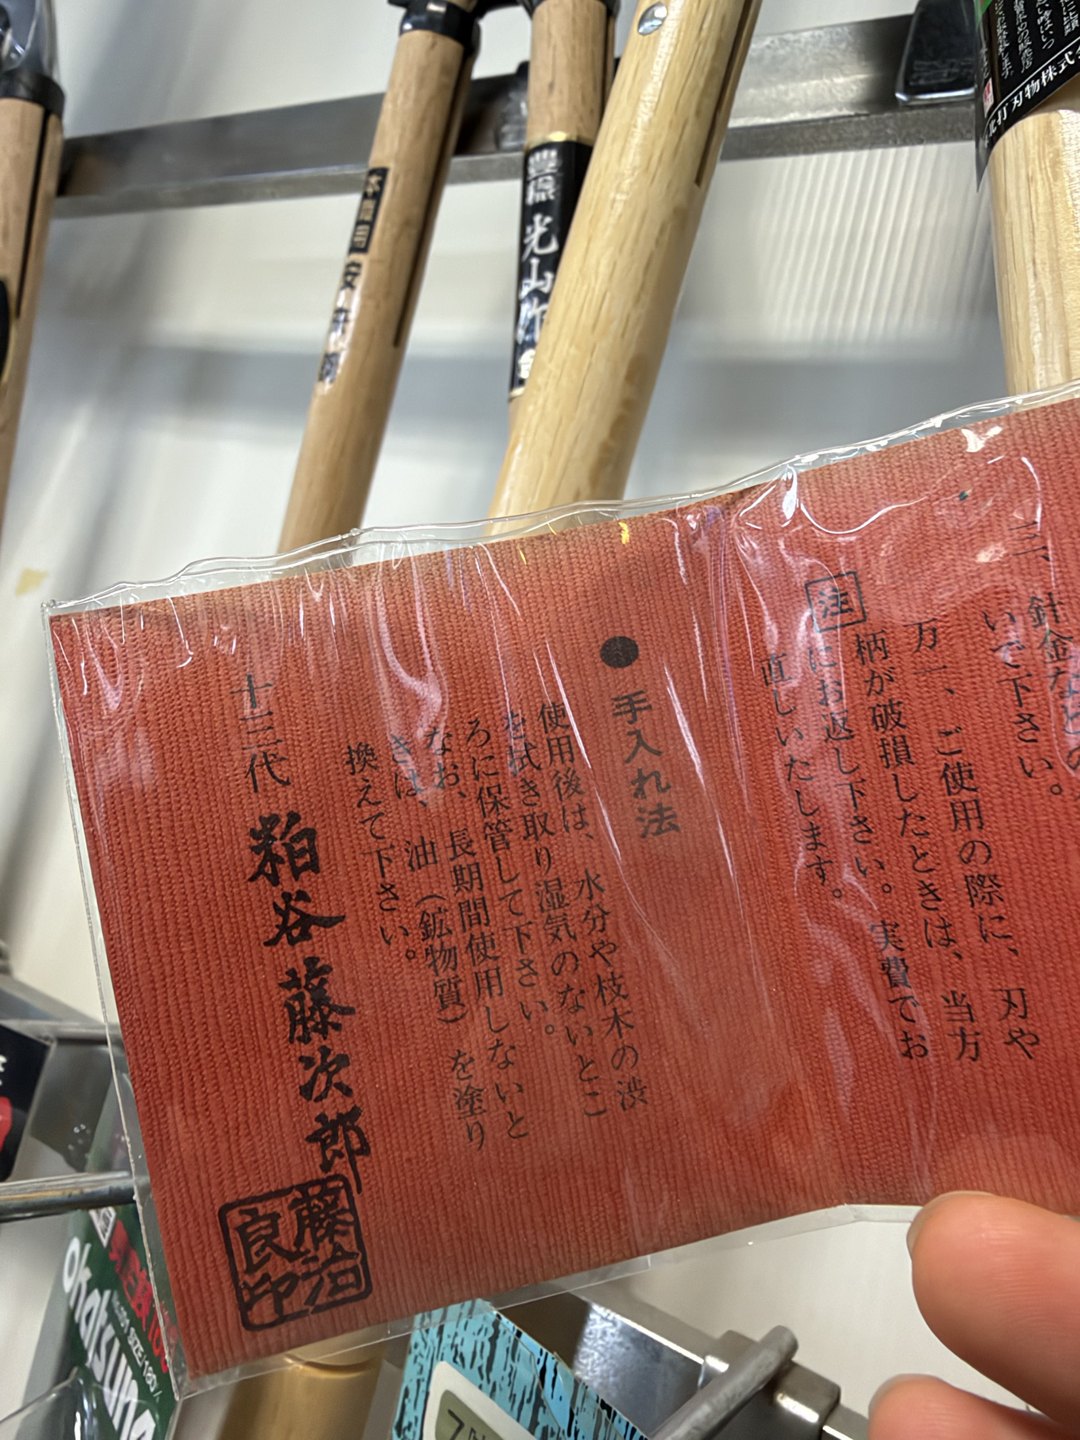
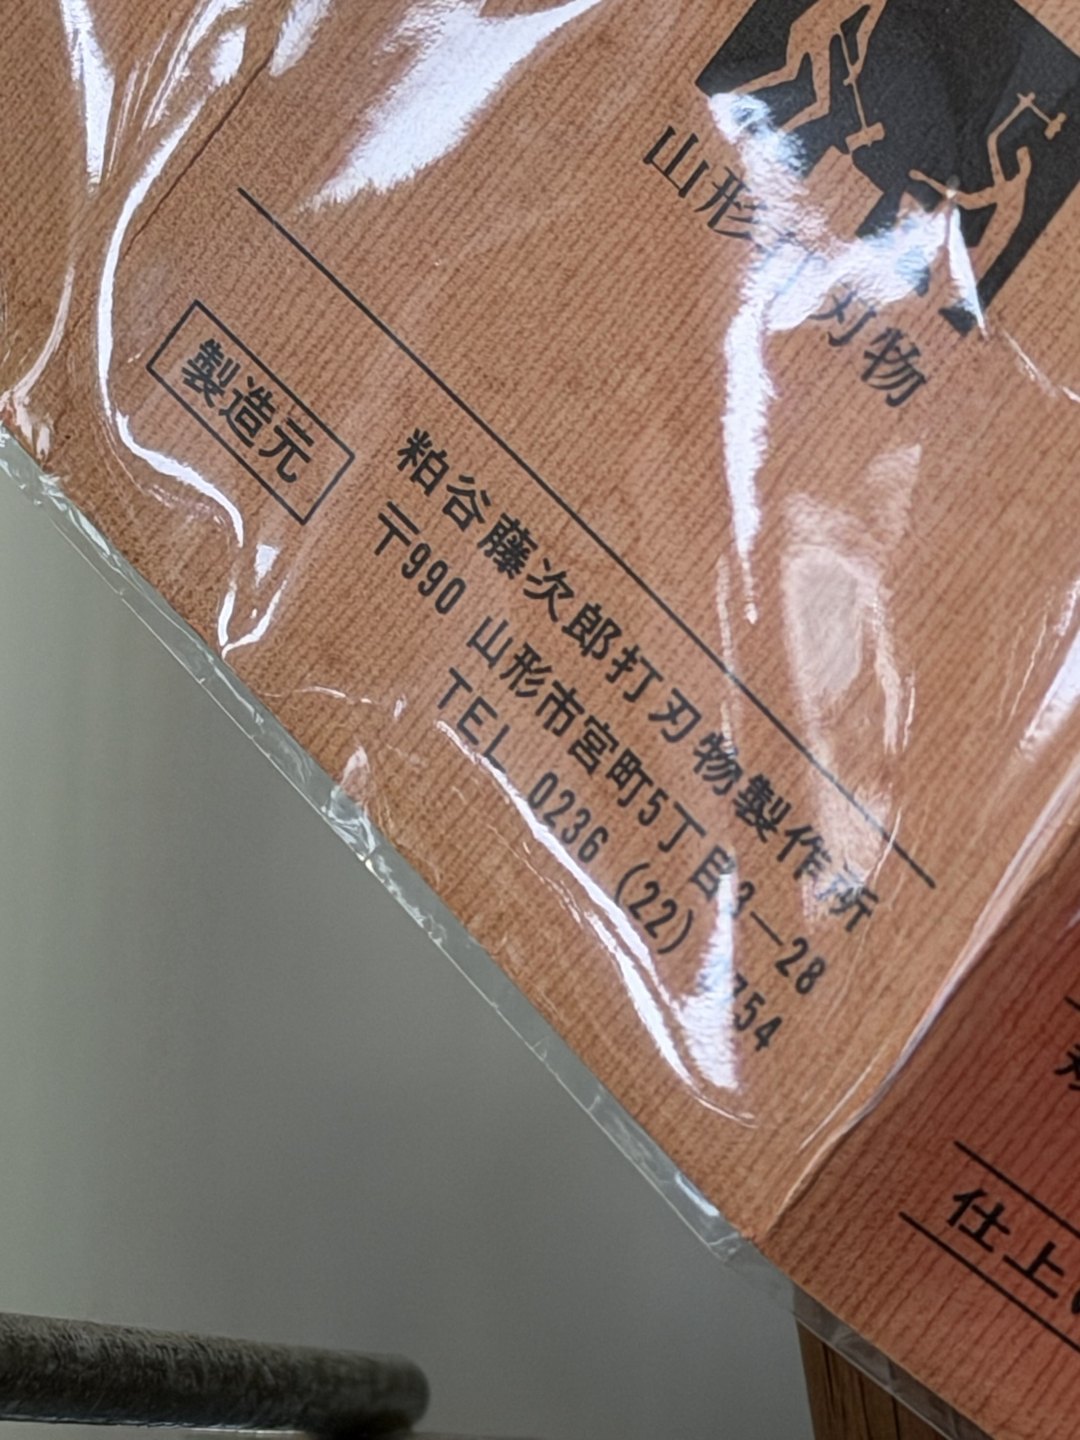
What interested me were the marks and labels on the metal shears hanging on the wall. The handle of one pair of trimming shears was wrapped in a label written in brush, and on a red tag giving care instructions were the name “Kasuya Tōjirō” and the words “thirteenth generation”. On the back of one package, the manufacturer was given as “Kasuya Tōjirō Edge-Tool Works”, with an address in Miyamachi, Yamagata City.
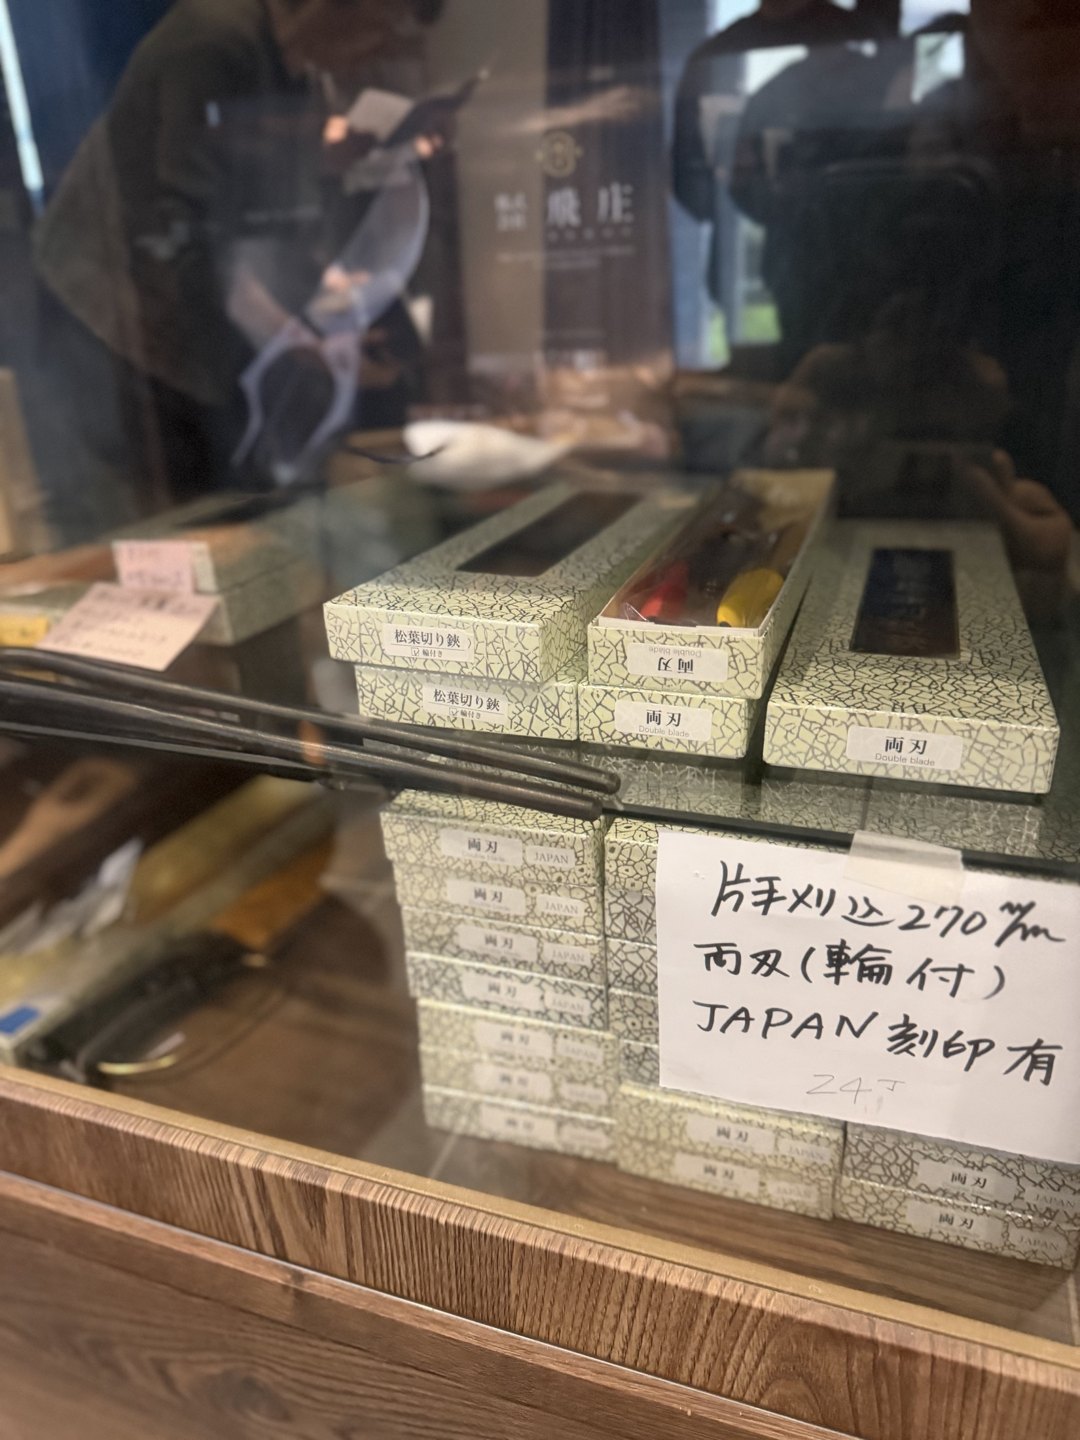
On a table in the shop, boxed shears had been laid out for customers to look over.
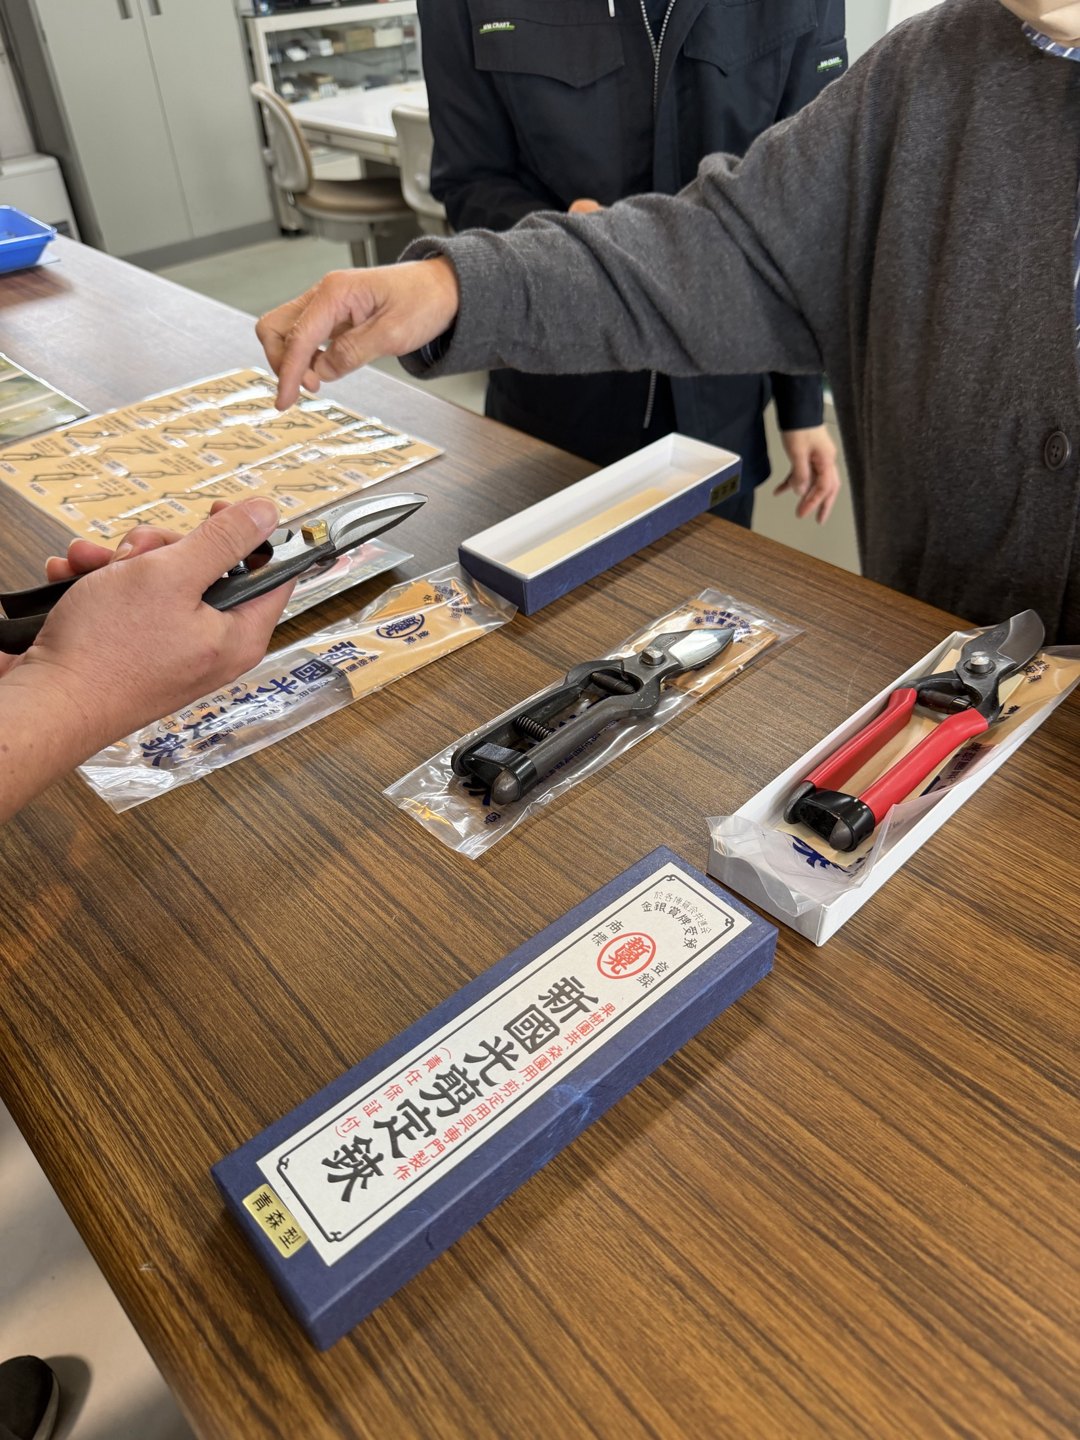
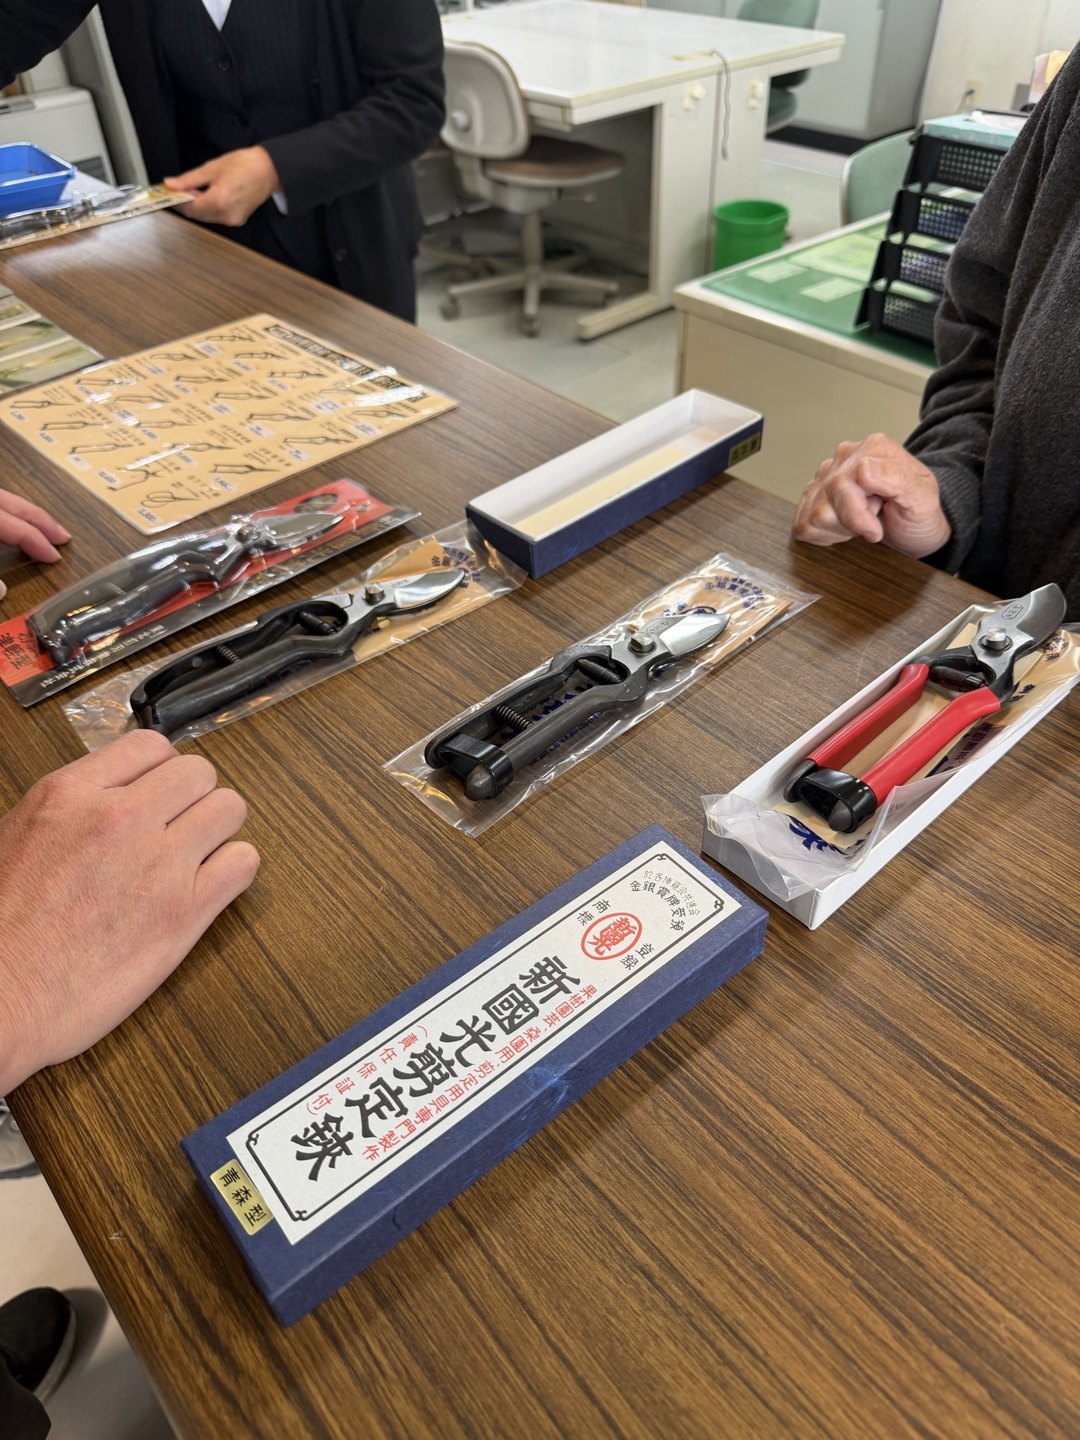
Yamagata edge-tool making is not the story of one company. I think anyone choosing on the job does well to know that shears differing in construction and in marks sit side by side in the same production area. This article is limited to Tobisho, but I will write about other makers’ shears separately when I have the chance. The photographs and wording in this section record only the goods on sale that I saw in the shop. It was not an interview; I only went to look at the products.
Frequently asked questions
Q1. Where can I buy Tobisho pruning shears? A. They are sold through the company’s online shop (shop.tobisho.jp) and in the shop on Hinoki-chō, Yamagata. Stock is shared with the shop, and shipping is within Japan only. The fourth-generation head says the main sales channel is manufacturing and wholesale.
Q2. What is the difference between the brazed Type A and the fully forged Type B? A. The Type A is made with handle and blade as separate parts, brazed with brass. Its advantage is that the hard blue-paper steel can be used for the blade alone. The Type B is forged from a single round bar for both blade and handle.
Q3. Does Tobisho resharpen shears made by other companies? A. According to the company’s guide, shears bought elsewhere are accepted. ¥500 is added to Tobisho’s price for pruning shears and ¥1,000 for trimming shears (items postmarked on or after 1 September 2026, excluding tax). Check the official page for the latest charges before you send them.
Q4. Can the Hiryu cut thick branches or dead wood? A. The company writes that, because the blade is finished thin, care is needed when cutting dead wood or thick branches. It is also a design that does not cut string, paper or vinyl easily. On jobs with many hard branches, use another model or a saw.
Q5. Can I cut thick branches with new shears right away? A. The company’s guide advises breaking in new shears by cutting from the thinnest branches upward. For thick branches, set the shear at a 45-degree angle to the branch and turn it slowly through.
Q6. How long does resharpening take? A. The company says it normally takes about two weeks of business days from arrival, and about two to three weeks in autumn and winter (about November to March) because requests are busy. Trimming shears take longer. It is safest to send them before the busy season.
Q7. May I use a whetstone to resharpen them myself? A. The company’s guide advises against sharpening on a whetstone when removing hardened resin, because the blade is worn away. To keep the shapes of the ura-suki and the hamaguri edge, sending them to the maker is the sure way. For your own care, limit yourself to a thin film of machine oil or rust inhibitor, and one drop of oil at the screw.
Sources
– Tobisho (Tobizuka Scissors Works) official site: About the Tobizuka Scissors Works / Company profile / Manufacturing process / Product features / Pruning shears / Bud snips / Trimming shears / Characteristics of the pruning-shear types / Care and repair guide / User guide – Yamagata Prefecture product portal “Iimono Yamagata”: Tobisho Co., Ltd. (formerly Tobizuka Scissors Works) – DEKIRU!, “A sturdy pruning shear: Tobizuka Daiki of Tobisho” (8 October 2025): media.wakasa.jp – Niwa magazine no. 238 (spring 2020), “A pruning shear that overturned convention: the Hiryu pruning shear”, and no. 249 (winter 2022), “Pursuing ease of use while handing down the spirit” (copies of the articles handed out during the visit) – Tobisho company brochure, “The history of Tobisho / Product features / Product list” (revised June 2025)
All accessed on 24 October 2026.
Related reading
– Karikomi — The Japanese Art of Cloud Pruning – Midori-tsumi — Reading a Pine Tree’s Future in Its Spring Candles – Niwaki vs Topiary — What Western Gardens Get Wrong
Field notes from Japan’s trees arrive a few times each month — subscribe via the form in the footer, or follow the work on LinkedIn.